Understanding Sonar Frequency
* This page contains affiliate links. The Great Lakes Fisherman may earn a commission on items purchased through these links. For more on this, please click here.
So, you’ve purchased that nice, new, and very expensive sonar unit that will solve all of your fishing problems right? Now, if only you knew how to use it. Never fear, The Great Lakes Fisherman is here to help take away the mystery of the modern sonar unit. Understanding the basic principles behind sonar technology will make you more adept at taking advantage of the full capability of the unit. In this article, we will focus on better understanding sonar frequency based on what I have learned about the process.
What is Sonar Frequency?
Frequency is the measure of how often something happens. In the case of sonar, we are measuring the number of sound waves that travel past a given point per second. Sound frequency is measured in hertz and 1 hertz is 1 sound wave per second. The human ear is capable of hearing sounds in the 20 hertz – 20 kilo-hertz range. Today’s fish finders use frequencies in the kilo-hertz range (thousands of hertz) to higher frequencies in the mega-hertz range (millions of hertz). Many of these units use a range of frequencies which make them more versatile. But in order to take advantage of that versatility, it helps to understand how these different sound frequencies affect different objects (targets) under the water.
How The Waves Are Generated and Received
Sound waves from your sonar are generated in your transducer. The word transducer is defined as something that changes electrical energy into physical (mechanical) energy or vice versa. In the case of your boat’s transducer, it does both by using an electrical switch that either connects the transducer to the transmitting portion of the circuit (electrical to mechanical) or the receiving portion (mechanical to electrical). Let’s discuss these 2 phases in detail.
Transmitting Phase
The process starts by your head unit taking its 12 volts of DC power from your battery and converting it to an AC voltage signal. This AC signal is what is then applied to the transducer via the transducer cable. The AC voltage creates an alternating electrical force on crystals that are located inside of your transducer. This pulse causes the crystals to physically vibrate and the frequency of the AC wave determines the frequency of the vibration. This is literally the conversion of electrical energy to mechanical vibrations (sound waves) and is very similar to what happens inside of an audio speaker.
Like all sound waves, the waves radiate from the crystal in all directions. So in order to focus them in one direction, the transducer is designed to absorb these waves in directions that are useless (ie, upwards) and keep the useful waves focused in the directions that are useful (downwards).
So now we have pulses (or pings) of sound waves radiating downward from the transducer and penetrating the water column. Like any sound wave, once these pulses interact with a material that has a different density than that of the water, some of the wave energy will be reflected back. This is known as an echo. This is what your transducer turns back into electrical energy in the receiving phase.
Receiving Phase
During the receiving phase of the process, the energy conversion is reversed. So when the echo wave reaches your transducer, it imparts a vibration on the crystals in the transducer, which in turn creates an electrical pulse in the circuit. This is detected by the main unit and through some fancy signal processing, the unit interprets these pulses and displays them as an object on your screen. It uses the delayed timing of the wave to determine the depth of the target and analyzes the wave forms to determine other features of the object (density and shape, for instance).

Low vs. High Frequency Waves
So now that we understand how the unit is interacting with material in the water, how can we use this to our advantage?
Low frequency waves are able to travel farther than high frequency waves. This is because low frequency waves are less likely to interact with material objects and thus keep more of their energy than do high frequency waves. In fact, whales use these low frequency signals to communicate across thousands of miles in the ocean. This makes lower frequency waves on your sonar better suited for detecting deep water targets. Low frequency waves also produce a larger scan cone. So not only can you detect better in deeper water, but you can also scan over a larger area.

So what is the advantage of high-frequency waves then? With high frequency, you are trading off volume of the water column for detail. The higher the frequency, the more interaction you’ll get with targets in the water which can be used to produce a more refined image on your unit’s display. You may have noticed that the newer live-imaging units utilize very high frequencies in the mega-hertz range. This is because live imaging needs to continuously obtain minute details of a target in order to project its continuous movement on your screen. But in order to produce these high frequency pulses, these units require a lot more energy. This is one of the main reasons that these units will drain your battery so fast.
CHIRP Technology
Which frequencies are better to use then? As with most things in life, the answer is not that simple. And this is precisely why most units today have multiple frequency options. When choosing between options, we must decide what we are willing to trade off in order to get what we are looking for. Lucky for us, CHIRP technology helps us with having to choose by giving us a bit of the best of both worlds in a single view. So, what is CHIRP?
CHIRP, or Compressed High Intensity Radar Pulse, is a feature designed into many modern units that uses a range of frequencies over a longer pulse to give us a more clear visualization on the screen of what is happening. High CHIRP covers frequencies in the ~150–240 kHz range, while medium CHIRP covers the 80–160kHz range. Because the pulse includes a range of frequencies, it reduces some of the trade-offs by allowing us to see the results of relative high and low frequency interactions at the same time. Low CHIRP typically covers frequencies that are less than 80 kHz . This is useful in the deep oceans, but is not much use for inland fishing. For more on how CHIRP works, check out this article by West Marine.
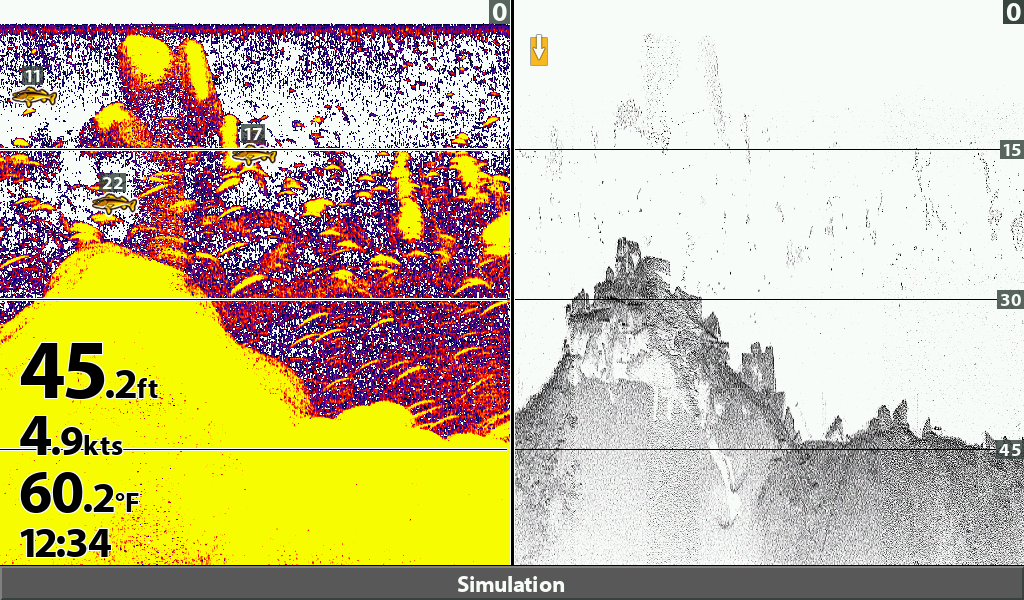
Down-Imaging and Side-Imaging
Down imaging and side imaging have become very popular in the last 10 years. So how are they different that standard 2d imaging? Down imaging is quite simply the utilization of high frequency pulses, taken over a very thin cone. In this way, the unit can put information together in a way that produces a clearer image. Think of it like this, instead of a single large cone of information with less detail, the unit will get the information by focusing on a smaller chunk of the cone with more energy and then sort of lace them together to form a more detailed image. Essentially, more of the energy is being focused on a smaller portion of the water column for greater detail. Side imaging works in the same way, but it directs the sonar pulses out the side of the transducer to produce images to the left and right of the boat.
Sensitivity Setting
The sensitivity setting on your unit has to do with how much of the signal coming from the transducer is displayed on your screen. The transducer is sending the signals, but the main unit is where the processing occurs. There is a processing circuit where that translates these signals to an image that makes sense to us humans. The sensitivity setting allows you, the user, to weed out or include weaker echoes should that you may not care about. This allows you to be able to better focus on the echoes you do care about. This is something that will likely need to be adjusted for each body of water, because each body of water has different amounts of suspended solids that can cloud your screen, making it difficult to see the targets that you are really interested in. There are many other settings (surface clutter, TVG, etc.) on your sonar that allow you to manipulate the transducer signal processing, but we will discuss those features in future articles.
Strategies on the Water
So with all of this information on frequency characteristics, how can we apply this to a day of fishing? Let’s break this down to some things that are very useful for us fishermen.
Locating Targets in Deep Water
While running on plane and looking for fish or structure, it is useful to utilize a lower frequency pulse or medium CHIRP. This is because we want to search the largest volume of water. Remember that low frequency produces the largest cone in the water and therefore “sees” a bigger volume of water than do higher frequency signals. Once we have found some targets, we can slow down, and as we zero in on them, switch to a higher frequency or high CHIRP setting to get more detail on what we are seeing under the water.
Zeroing In
Once you slow down your boat and start to focus on a smaller area, it may be helpful to switch to a higher frequency or high CHIRP. This will give you more detail. If you are seeing fish near the bottom, there may be more detail there than what your screen can show. This is when you’ll want to use your sonar’s zoom function to blow up that portion of the water column to better visualize what you are seeing.
Now let’s suppose that you have found some structure and you want to see more refined detail around that structure. If your unit has down-imaging capability, this is the time to use it. The down-imaging is for ultra-focus and although the beam is very thin, it will produce incredible detail. You may even see individual fish sitting within a brush-pile, or holding very tight to rocks, for instance. This feature is very important for fishing structure, the bottom in order to best distinguish a structural target from fish.
Finding the Thermocline
A thermocline is a region in the water column where the water temperature changes drastically with depth. This can often be picked up by your sonar, because a change in water temperature means there is a corresponding change in water density. You may need to play around with your sonar’s sensitivity, but the thermocline typically shows up better with your higher frequencies. The thermocline is usually present on deeper lakes with little to no current during the mid-summer months when the air temps and thus water surface temps are the warmest. A thermocline is present on most Great Lakes in the summertime. The thermocline is important because, below it, there is typically not much oxygen and thus not many fish. However, when the water gets warm in the mid-summer, a lot of fish will concentrate near the thermocline to find the comfortable temperatures while still having oxygen to breathe.
Locating Targets in Shallow Water
But what if you are fishing shallow water and are trying to locate fish & structure? This is where side imaging is the tool to use. With side imaging, you will be able to “see” fish and structure well off to the side of your boat, allowing you to find what you are looking for without scaring the fish. You can then approach your targets as discretely as possible. Side imaging can locate fish that are stacked up under docks and downed shoreline tree tops. If tuned in correctly it can also be used to locate spawning grounds for various species.
If you find this article helpful in your on-going quest to become a better fisherman, consider subscribing to our newsletter below. Also, please don’t hesitate to drop a comment regarding this article or any other feedback you may have for this site. Thanks for reading!