How to Tie a Stinger Hook

* This page contains affiliate links. The Great Lakes Fisherman may earn a commission on items purchased through these links. For more on this, please click here.
There are many different ways of attaching a stinger hook to your line. Some contain a single hook, others use a treble hook. Some use crimps, others use knots. But I have found a way to make a stinger hook that works very well and it has an advantage that many do not. And the best part is that they are super cheap to make at home. (Note that the stingers in this post are sized specifically for walleye jigs, but they can be adjusted to fit just about any fishing application that requires a stinger hook!)
The Materials
In order to make these stinger hooks, you need a few cheap supplies. The good news is that they supplies will produce the stinger hooks for less than $0.60 each!
First you will need some hooks. I prefer treble hooks and you can purchese these for about $0.5 each. Next you will need some line. I prefer Berkeley big game in 20 lb. test for walleye, you can adjust as necessary to fit your application. Line can be purchased in large quantities and if you use a foot (including waste), the line cost will be less than a penny per rig. The last thing you will need is some craft beads in whatever color you’d like. I like metallic colors like copper and silver but you can also choose colors that blend with your bait colors. The hole in these beads needs to be just big enough to allow the line to pass through it twice. These can be purchased at any craft store and will cost just a few cents each.
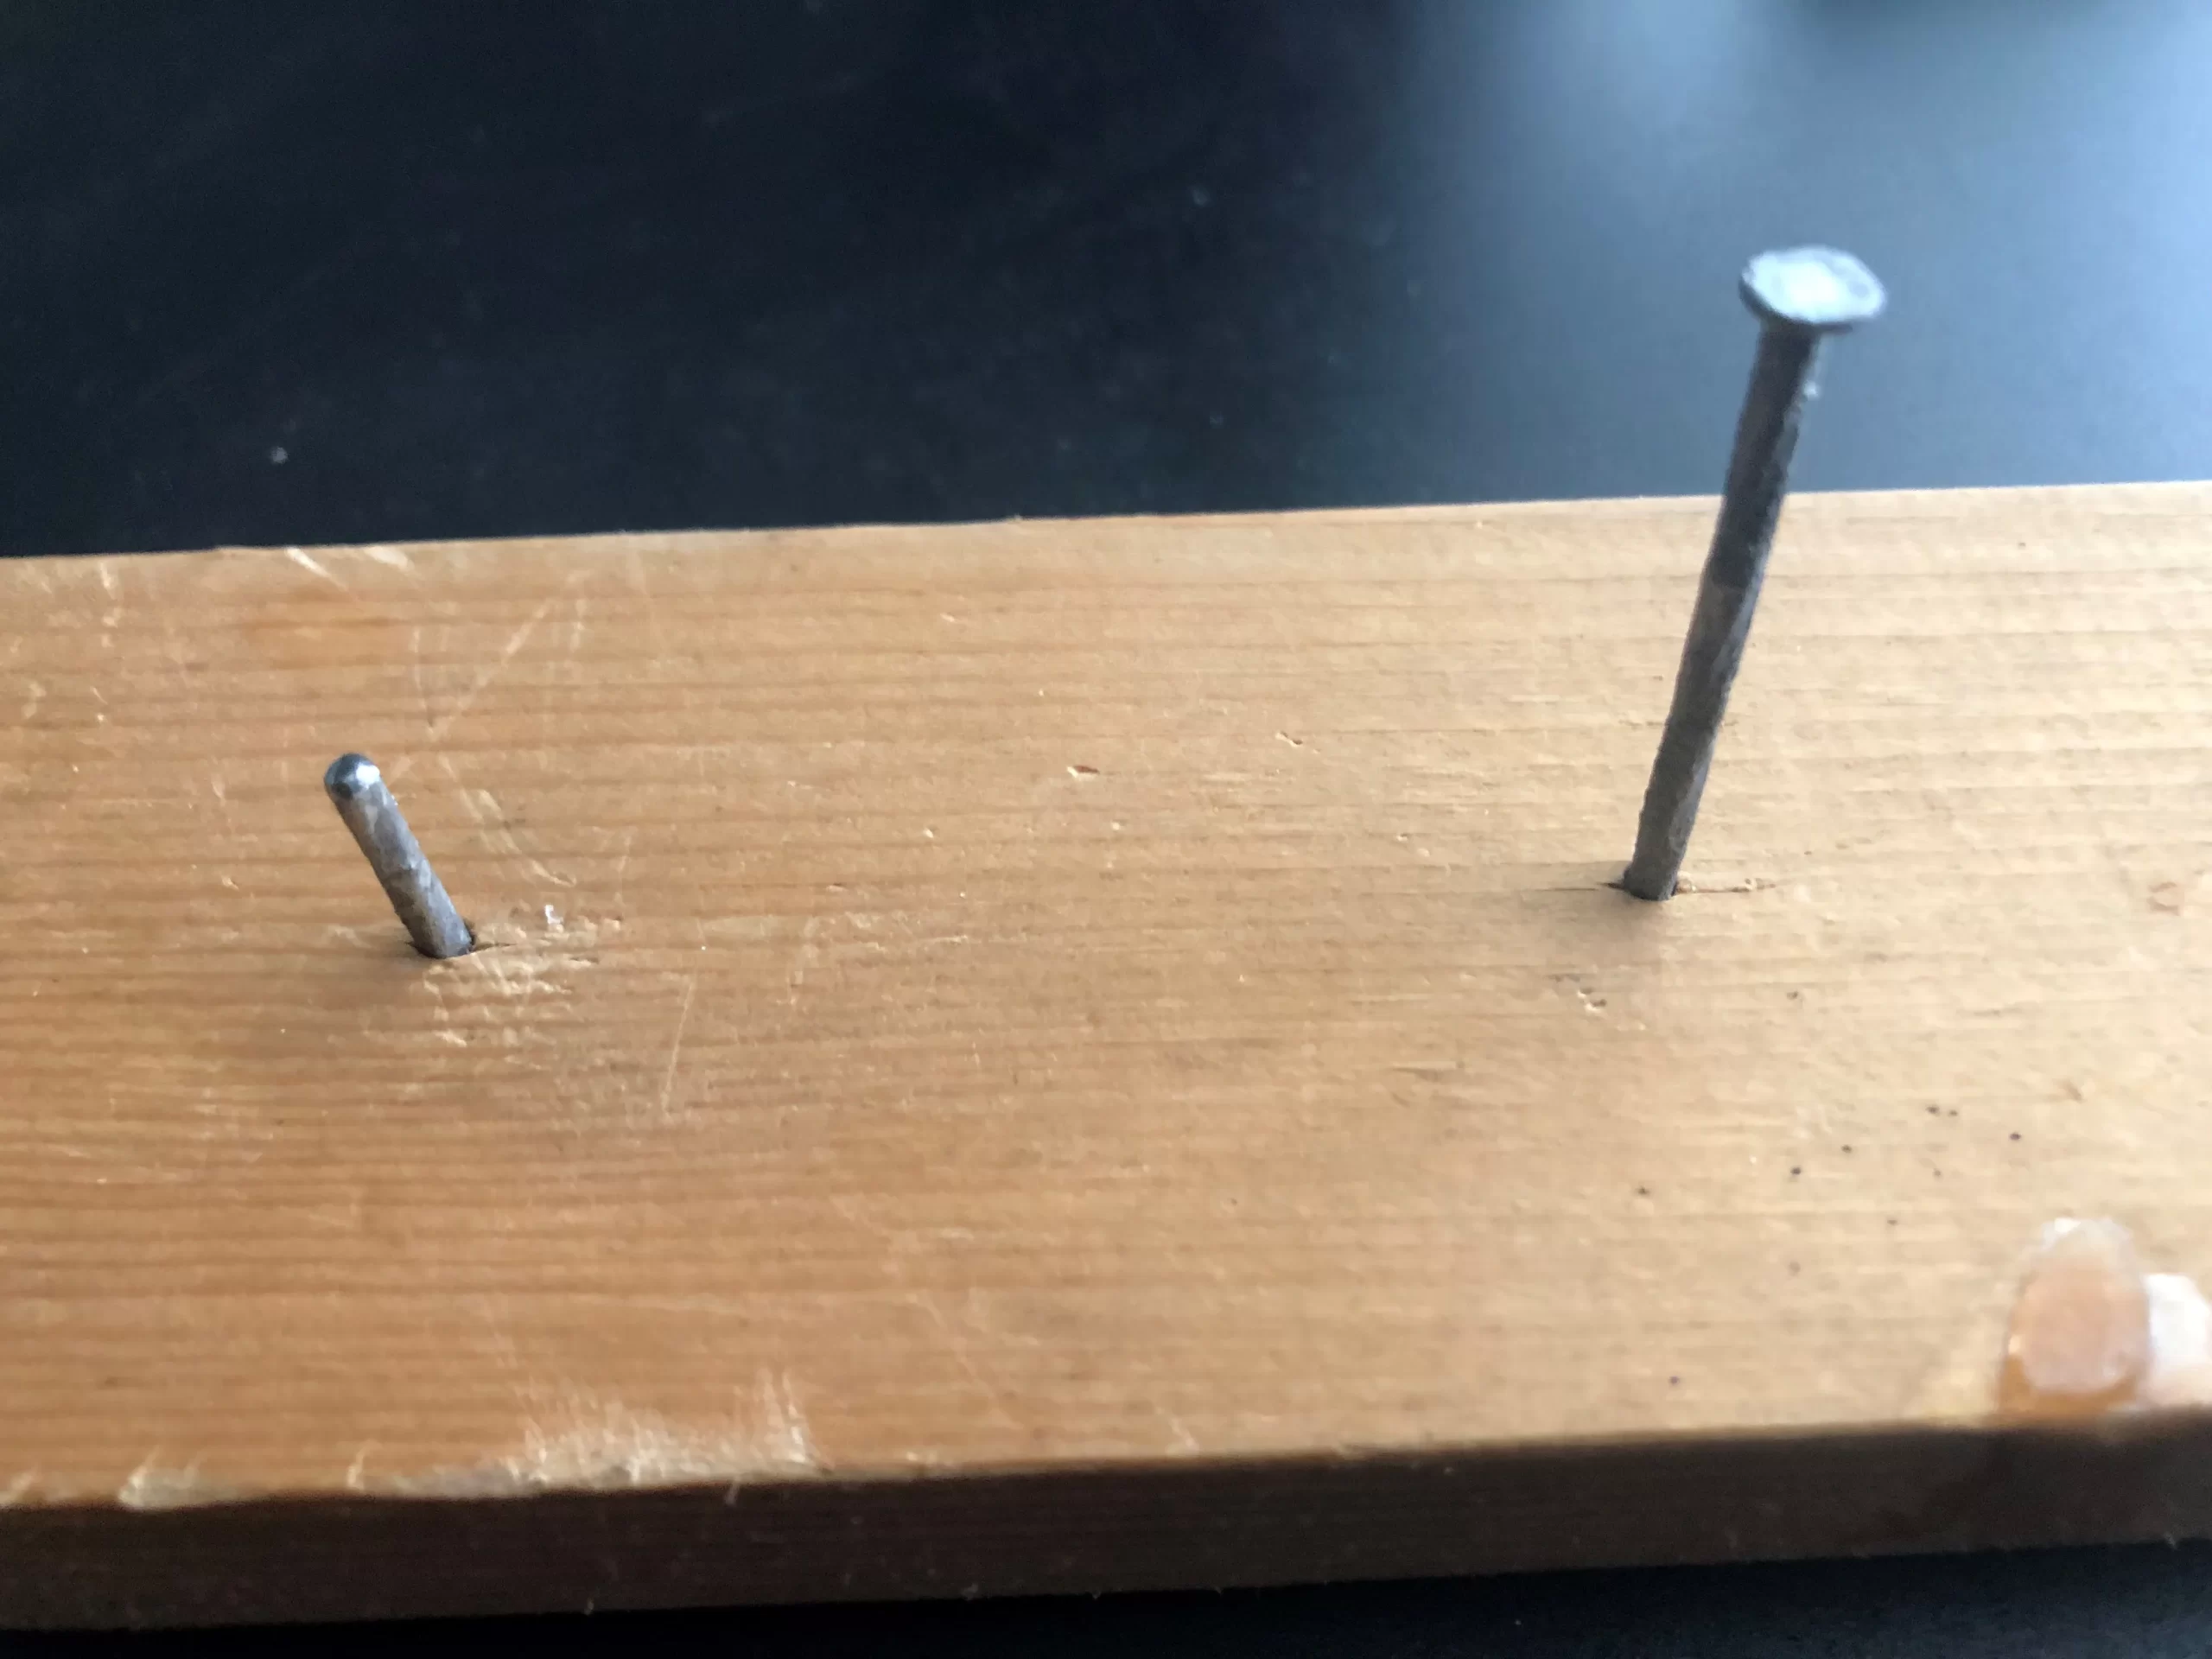
A Tying Jig
The next thing you will need is a jig to tie up your stinger hooks. The commonly used jig for this is simply a scrap piece of wood with two nails driven through it about 2 1/2 inches apart (or whatever distance is required for your bait to put the stinger near the tail of your presentation). This ensures a consistent length for all of your hooks.
Making the Stinger Hook
Here is the process for making the stinger.
Step 1: Cut a 1′ length of line.
You can reduce this once you get used to tying the leader, but I would start with 1 foot to give yourself plenty of extra line to handle it easier.
Step 2: Tie the line to a treble hook.
I prefer to use a palomar knot, but feel free to use the knot of you feel is the strongest.
Step 3: Slip a bead on the line and then back through.
Slip the bead onto the end of the line and then back through the same end it came out of. This will result in a loop in the line on one side of the bead and the hook and tag end on the other side of the bead.
Step 4: Place the loop on one nail and the hook on the other nail.
Now place the loop of line on one of the nails and the hook on the other. Being right-handed, I prefer the hook on the right nail and the loop on the left nail, but whatever works best for you is what you should do.
Step 5: Pull the tag end of the line tight.
Now pull the tag end of the line tight so that the bead is cinched down to the nail.
Step 6: Start an overhand knot in the tag end of the line.
Now start an overhand knot in the tag end of the line but don’t tighten it (leave an open loop).
Step 7: Cinch the line tight to the bead, while keeping the entire rig taught.
Insert a pin, nail or some other smooth, thin object into the loop and then cinch the knot down towards the bead, keeping the entire rig tight while you do so.
Step 8: Clip the tag end of the line and remove the completed stinger hook from the jig tool.
You are done. It’s that easy! If that was hard to follow, here is a video on how to do it.
Advantages of this Stinger Hook
The biggest advantage of tying this stinger hook is the ability to easily add it to you line or remove it. To add it to your jig hook, simply slip the loop over the ond of the jig hook and then pull on the treble hook to cinch it down. To remove the stinger hook from the jig, grab the bead and gently pull back toward the treble hook to open the stinger loop and remove it from your jig hook.
One of the biggest advantages of this is to be able to quickly remove the stinger when tipping your jig with a minnow. By putting the minnow on the jig first and then adding the stinger afterwards, the stinger acts as a sort of retainer, keeping the minnow on the jig and not allowing it to slip off. Not only does this ensure that the minnow stays in the strike zone longer, but it also saves money on minnows!