Spring Crappie
* This page contains affiliate links. The Great Lakes Fisherman may earn a commission on items purchased through these links. For more on this, please click here.
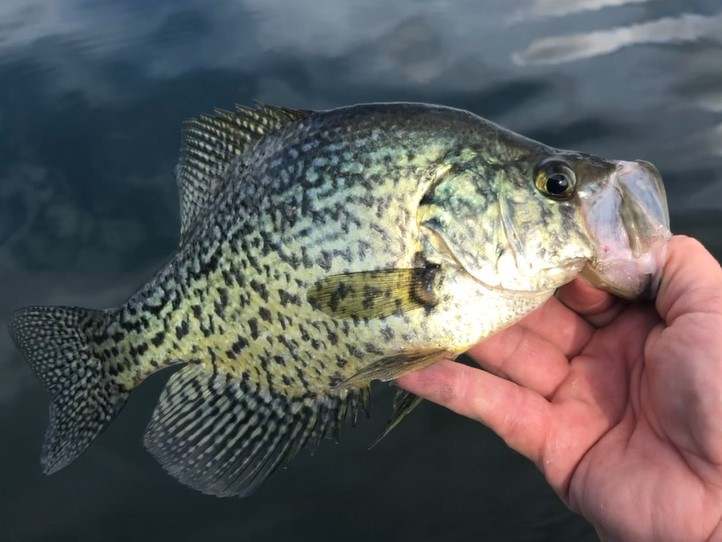
Crappie are a mysterious fish to many. In fact, I know some avid fishermen who have fished their whole lives but have rarely caught crappie. It may seem strange, but crappie are something you really need to target in order to catch many of them. For most of the year, anglers focus on other species and crappie are generally left alone. But spring crappie are relatively easy to catch as they hang out close to shore and become very aggressive.
Fishing for springtime crappies is a great way to introduce young anglers to the sport of fishing. The action can be fast. And the fish are big enough to be exciting, but not overwhelming for a 4 or 5 year old to handle.
When Do Crappie Spawn?
Crappie tend to begin staging off of their spawning grounds when water temps get into the low 50’s. Spawning usually begins when the temps reach the upper 50’s. Keep in mind that this is not a hard and fast rule. In a year with a fast warmup, the temperature gradient from from the top to bottom of the water column will be larger at first as it takes time for the water further below the surface to warm. This means that while the very surface may be warm, the water underneath where the fish spawn may not be. Therefore, once the surface water temp reaches the mid-50’s it’s tie to start fishing.
Start in deeper water (6-10′) that is adjacent to the spawning habitat and work your way to shallower water until you find fish. Remember that while a sonar unit helps to locate fish in deeper water, fish in shallower water tend to be spooked by the boat before they are even marked by traditional or down-scan sonar. A forward or side-scanning sonar helps tremendously when looking for fish in these shallow areas.
Locating Spawning Crappie
Crappie like to spawn in areas where the wind and waves aren’t able to disturb the water surface. For lakes that are fed by incoming streams and creeks, such as an impoundment, this will often mean that the crappie are spawning in water near or even up in those creek channels. For lakes that don’t have these feeder streams, try to locate secluded back bays or manmade canals that connect to the lake.
The other important factor in finding spawning crappie is structure. Crappie are a structure-loving fish, and the spawning period is no exception to this rule. Look for areas that have substantial vertical structure in waters 6′ deep or less. This might be a stand of cattails, some overhanging limbs that dip into the water, a shallow stump-field, or even a boat dock with underwater framework.
What to Use
Many think that a live minnow is the key to catching crappie. And while this is true, particularly in clear water, don’t overlook a simple plastic or hair jig with the right color. I fish crappie year round and it is rare that I use minnows. A slap-tail style plastic provides the perfect movement when the jig is periodcially “twitched” under a bobber. Go with brighter colors (chartruese, pink, etc.) when fishing stained water. Try natural colors when fishing clear waters.
When selecting a bobber, try to go with the smallest bobber that you can get away with. Crappie are very sensitive and will spit the hook the instant they detect resistance. Russ Bailey of Brushpile Fishing fame, recommends a teardrop float (like these E-Z Tout Floats) for these finicky fish and I will say that for me, they have worked great!
If you are fishing very clear water, you should also consider using flourocarbon line. Some say that crappie are not line sensitive, but when fishing in clear water, flourocarbon is always advisable.
Best Crappie Waters in the Great Lakes
Although crappies are not the most popular of game fish in the Great Lakes, this region certainly has its fair share of great crappie waters. While some of these lakes are naturally formed lakes, many of the best crappie waters are impoundments. And the reason is obvious. Crappie love vertical structure and the standing trees and stumps found in man-made lakes provide bountiful amounts of this cover.
But believe it or not, some of the best spring crappie fishing in this part of North America doesn’t occur on inland lakes at all. You may be surprised to learn that some of the best crappie fishing is actually on the Great Lakes. That’s right, the marinas, river mouths and marshes that dot our great lakes shorelines provide some of the best habitat for crappie in the entire region. Not only that, but some of the these fish get very big. Although I have yet to put one in the boat, I have heard stories that 17-18 inch whoppers are known to have been caught in these often overlooked waters.
How to Catch Spawning Crappie
The easiest way to catch crappie that are on their beds is by using a small jig fished under a bobber. While this sounds simple enough, there are some things that you can do to increase your hook-up rate.
First of all, when it comes to crappie bait and equipment, it is best to start small. Light line, smal jigs and small bobbers are the key to putting a lot of fish in the cooler. Start with a 1/32 oz jig to locate the fish. Once you have found them, you can always upsize the offering if the fish you are catching are too small. Oftentimes, a larger bait will help you filter out the dinks and get you bigger fish.
When it comes to jig color, pink, white and chartreuse are typically all I use. This is what catches the crappie’s eye. Something with a high contrast to the environment is what stands out and 1 of these these 3 colors usually does the trick. The bait on the jig and its action will determine whether or not they will bite. So once you know the fish are there, don’t be afraid to change plastic colors and/or live offerings until you find what they want. If the fish are actively guarding beds, they won’t be very picky!
Spring Fishing Opportunities
* This page contains affiliate links. The Great Lakes Fisherman may earn a commission on items purchased through these links. For more on this, please click here.
Spring is on the way and that means gearing up and planning for one of the most productive times of the year to fish the Great Lakes region. Fish of nearly every species become easier to catch this time of year. There are many reasons for this, but a couple of them are major factors.
First, after the cold water environment that they lived in through the winter, the fish’s bodies are depleted of energy and nutrients. As their metabolism ramps up, so does their appetite. Because food is concentrated this time of year, so are the fish and they tend to be more aggressive due to their hunger.
Second, spring is the time when many species of fish spawn. This is true for bass, walleye, steelhead, perch, crappie and bluegill. Spawning means that there are a lot of fish concentrated in relatively small areas which increases success rate dramatically.
That said, here are some of the most popular fish to catch in the region during this time.
Steelhead
Spring fishing often kicks off for many in the region with the pursuit of river steelhead. Some steelhead are present in rivers throughout the winter, but as the water begins to warm in early spring, loads more run upstream to begin spawning. Although the streams can get crowded with anglers in some of the more popular locations, with countless miles of streams in the region, there is room for anyone looking for these “silver bullets” to find a place to fish.
Perch
As the ice comes off of the lakes and the water begins to warm, perch also get more aggressive. March through May can be good times to target them as their metabolism ramps up and they begin to gorge on food. While minnows are always a popular choice for perch, don’t overlook alternatives. Wigglers (mayfly larvae) are prevelant in the water this time of year and are a favorite of perch!
Walleye
Probably the biggest attraction to the Great Lakes fishery, the spring walleye runs here are the things of legend. Walleye begin their spawning rituals when the water temps reach the mid-40’s. Depending on the year, this can happen as early as mid-March, but April-May is typically when the run hits its peak, depending on location and water temp.
During this time, walleye fisherman from all over the country flock to the Great Lake’s major rivers to get a piece of the action. On a Saturday trip last spring on the Detroit River, we waited idling in line for over 2 hours at the boat ramps to get off of the water. There was a line of boats nearly a half-mile long waiting to get trailer their boats after a morning of fishing. Of course, a weekday trip will reduce the liklihood of a long wait.
As always, be sure to check your local regulations while planning your trip as many rivers, especially smaller tributaries, are closed to walleye fishing during the spawning season.
Salmon & Brown Trout
Although salmon and brown trout are not spawning during the spring, many of them do move into shallower water to take advantage of the smorgasboard of baitfish that congregate in the warming, nearshore waters of the Great Lakes. This makes them accessible to both small boat anglers as well as beach and pier fishermen.
Trolling along shallow water beaches is one very productive method, especially when spreading the offerings out with planer boards. One place to concentrate your efforts would be anywhere that warm water is found. This could be the mouth of a tribuary or near a power plant discharge.
For shore fishermen, the pierheads at rivermouths are popular locations. They are often lined with spring anglers casting spoons and/or spawn bags.The beaches around these pierheads are also popular places.
Crappie
In many parts of the country, especially in the south, crappie are the main attraction in the spring. As they move into the shallows to spawn, they become easy targets for shore fisherman and boat fisherman alike. They tend to be concentrated, so once you find them, you can usually catch a bunch from that same location.
Crappie spawn when the water temps rise to the upper 50’s. For the Great Lakes, this usually doesn’t happen until May or even June. That said, some of the region’s inland lakes will warm much faster, so you will need to tune into the conditions on each body of water to get the best prediction on when the spawn starts.
Bluegill
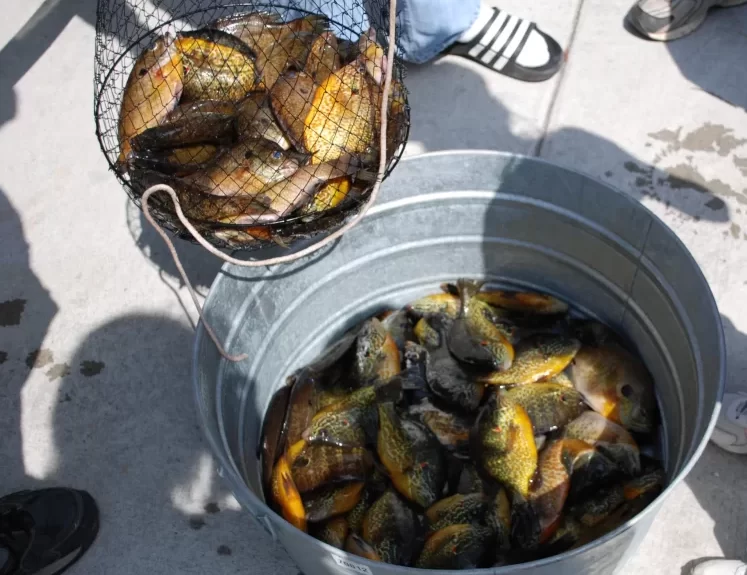
Last, but certainly not least, is spring panfish. As the water warms in shallow weedy areas of the region, bluegill and other panfish will begin to move into the shallows to take advantage of food. As insects become active, bluegill will begin to hit the surface. As the water reaches the 70’s, many will begin making beds for spawning. While a bobber and worm are the most popular way to catch bluegill, these fish can be even more fun to catch on a fly rod or a fly setup made for a spinning reel. Popular flies are poppers or rubber spiders.
Trolling Spoon Storage
* This page contains affiliate links. The Great Lakes Fisherman may earn a commission on items purchased through these links. For more on this, please click here.
There are storage trays of all shapes and sizes to accommodate all styles and sizes of spoon. But these boxes are typically designed to maximize space. This is great for storing a lot of spoons in small places, especially when space on a boat is at a premium. However, there are a couple of disadvantages to this.
First, when the spoons are jammed together in a tackle tray, they tend to get scratched. The sharp hooks will do a number on the paint job of the spoons each and every time you are moving. Think about how much time that tackle is bouncing around both down the road on the trailer as well as the entire time out on the water. This will lead to having to repaint or replace them much sooner than you would need to otherwise.
The second disadvantage to this is that when these spoons are jammed together, it can be difficult to find the color combo you are looking for. We all know how frustrating it can be when our spoons are stuck together in clumps and we’re trying to sort through them to find the right one. There has to be a better way, right?
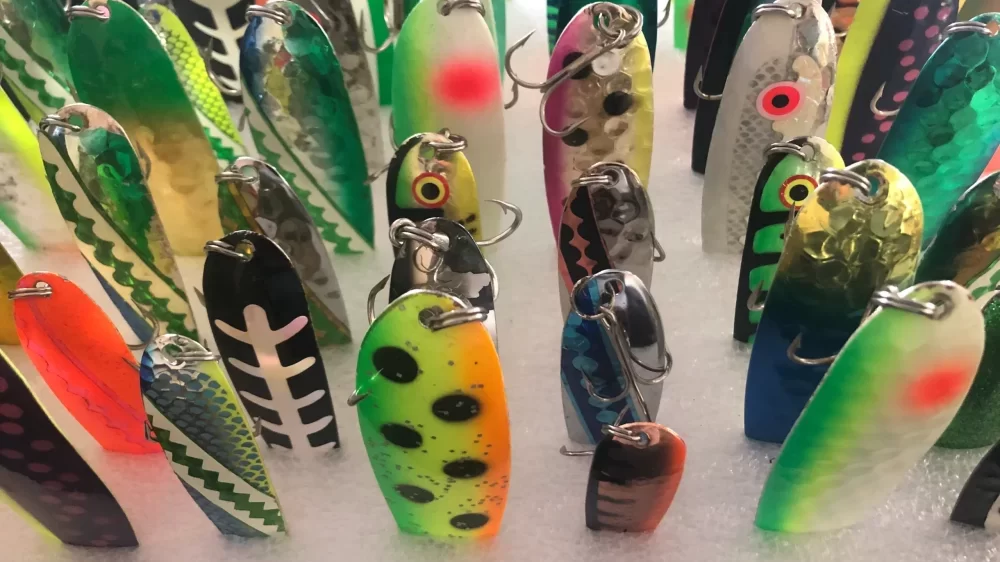
Here, I will go over our favorite way to store our trolling spoons. While it takes up a bit more space, it keeps the spoons from scratching each other as well as making it super easy to find the color combo you’re looking for quickly. All you will need is a storage tray that is deep enough to store the spoons vertically (about 6″ deep) and some polyethylene foam (or some other sort of high density foam material).
Step 1: Get a Sheet of Foam
A sheet of polyethylene foam can often be salvaged from heavy duty packaging. If you don’t have any from a recent delivery, you can purchase a sheet of it online. Polyethylene is what pool noodles are made of and is what we prefer, but any type of tough foam should work. We prefer a sheet that is 2″ thick, but you can probably get away with a little less.
Step 2: Choose a Storage Tray
The storage tray can be sized to fit your needs. The one we use is about 16″ x 23″. This holds our entire collection of spoons. Admittedly, we have a modest collection of spoons (about 100), and the tray size you select should accommodate your space/storage space. For handling, we don’t recommend a tray much larger than this, but you can always get a second or third tray, if necessary.
Step 3: Cut the Foam
First, simply cut the foam to fit the bottom of the tray. Next, cut a gridwork of slits in the foam to accommodate your spoons. The slit should be slight less than the spoon width so that you get a tight fit. Remember, you can always cut more, but you can’t cut less!
You should space them according to the sized spoons you will be storing. For salmon, we mostly troll magnum spoons, so we spaced each slit about 1.5″ apart in both directions. At 1.5″ spacing, we get about 56 magnum spoons per square foot. This equates to over 140 spoons in the 16″ x 23″ tray! Of course, they can be spaced closer together for smaller spoons allowing room for even more spoons. Optionally, you also can secure the foam to the bottom of the tray using a few pieces of double-stick tape, although, we did not find this necessary.
Step 4: Install LED Blacklight Strip Tape
To allow your glow-in-the-dark spoons to be activated and ready to go when you reach the fishing grounds, consider installing some LED blacklight strips in the inside of the lid. The power cord can by run through a hole punched in the lid, or simply run in between the lid and container (just be sure not to pinch it). These can then be rigged to plug into your boats 12 VDC to allow your glow-in-the-dark spoons to activate while you are in transit!
Managing Lake Erie Walleye
* This page contains affiliate links. The Great Lakes Fisherman may earn a commission on items purchased through these links. For more on this, please click here.
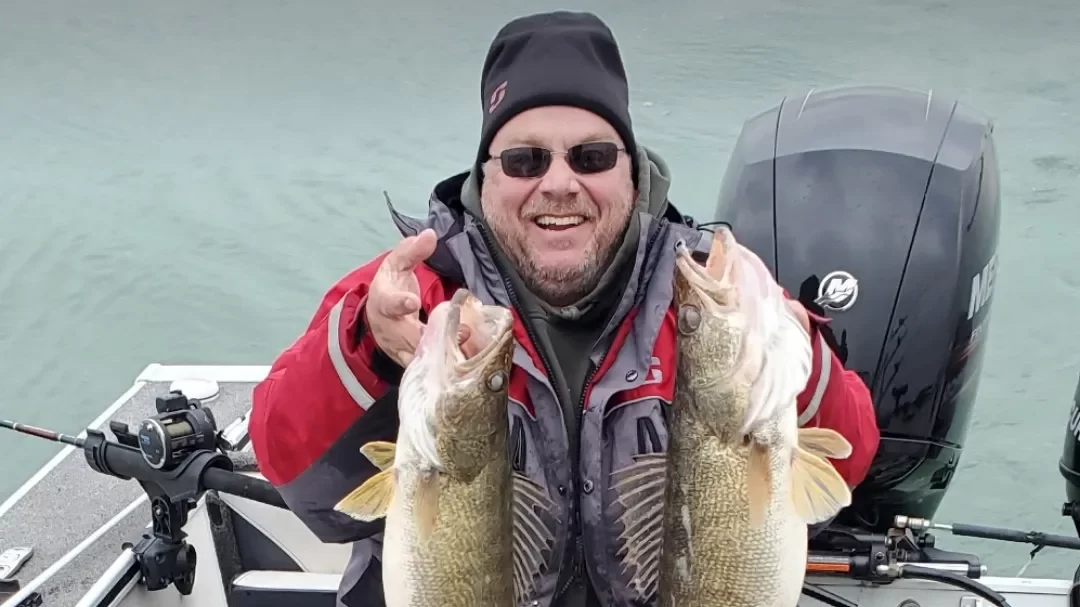
In case you didn’t know, Lake Erie walleye fishing is the best in the world. I may be a bit biased though. Growing up in southeast Michigan, I had the luxury of fishing the lake from the time that I was a young boy. Nonetheless, I have never caught walleye with the size & in the numbers that I have on Lake Erie, anywhere else. It has everything a walleye loves: plenty of forage, dark water, and massive tributaries that provide them with some of the most ideal spawning grounds found anywhere on earth.
Walleye are native to the Great Lakes and are found in fishable numbers in all of them. But a combination of factors has led to immense numbers of them in Lake Erie. Lake Erie receives considerably more fishing pressure than the other Great Lakes and despite this, it continues to produce many more fish per angler-hour. And walleye are the top attraction.
But managing Lake Erie walleye is no easy task. The reputation the lake has developed over the years has resulted in visitors from all over the country flocking to the lake every year to get a piece of this phenomenal fishery. The industry that the lake supports runs in the hundreds of millions of dollars. This has led to immense pressure on state and federal agencies whose task it has become to manage the fish in this lake. And with walleye being the most popular, there is a lot of focus on this key species.
Q & A with Jim Francis of the Michigan DNR

To better understand what goes into the task of managing Lake Erie walleye, The Great Lakes Fisherman caught up with Jim Francis of the Michigan DNR to discuss the coordination with other agencies and some of the factors that they consider and study in the process.
GLF: What is your name, title, and organization?
Jim Francis, Lake Erie Basin Coordinator, Michigan Department of Natural Resources – Fisheries Division
GLF: Which state, provincial and federal agencies are involved of the efforts to manage the Lake Erie walleye population?
The state and provincial agencies have jurisdictional authority over the management of their respective fisheries resources – so for Lake Erie, that includes Michigan, Ohio, Pennsylvania, New York, and Ontario. But because we are managing a shared resource, we coordinate management through the Lake Erie Committee under the Great Lakes Fishery Commission. But management is broader and includes many state environmental agencies, federal agencies like the US Fish and Wildlife Service, US Geological Survey, Environmental Protection Agency, and finally, university, research partners, and conservation organizations.
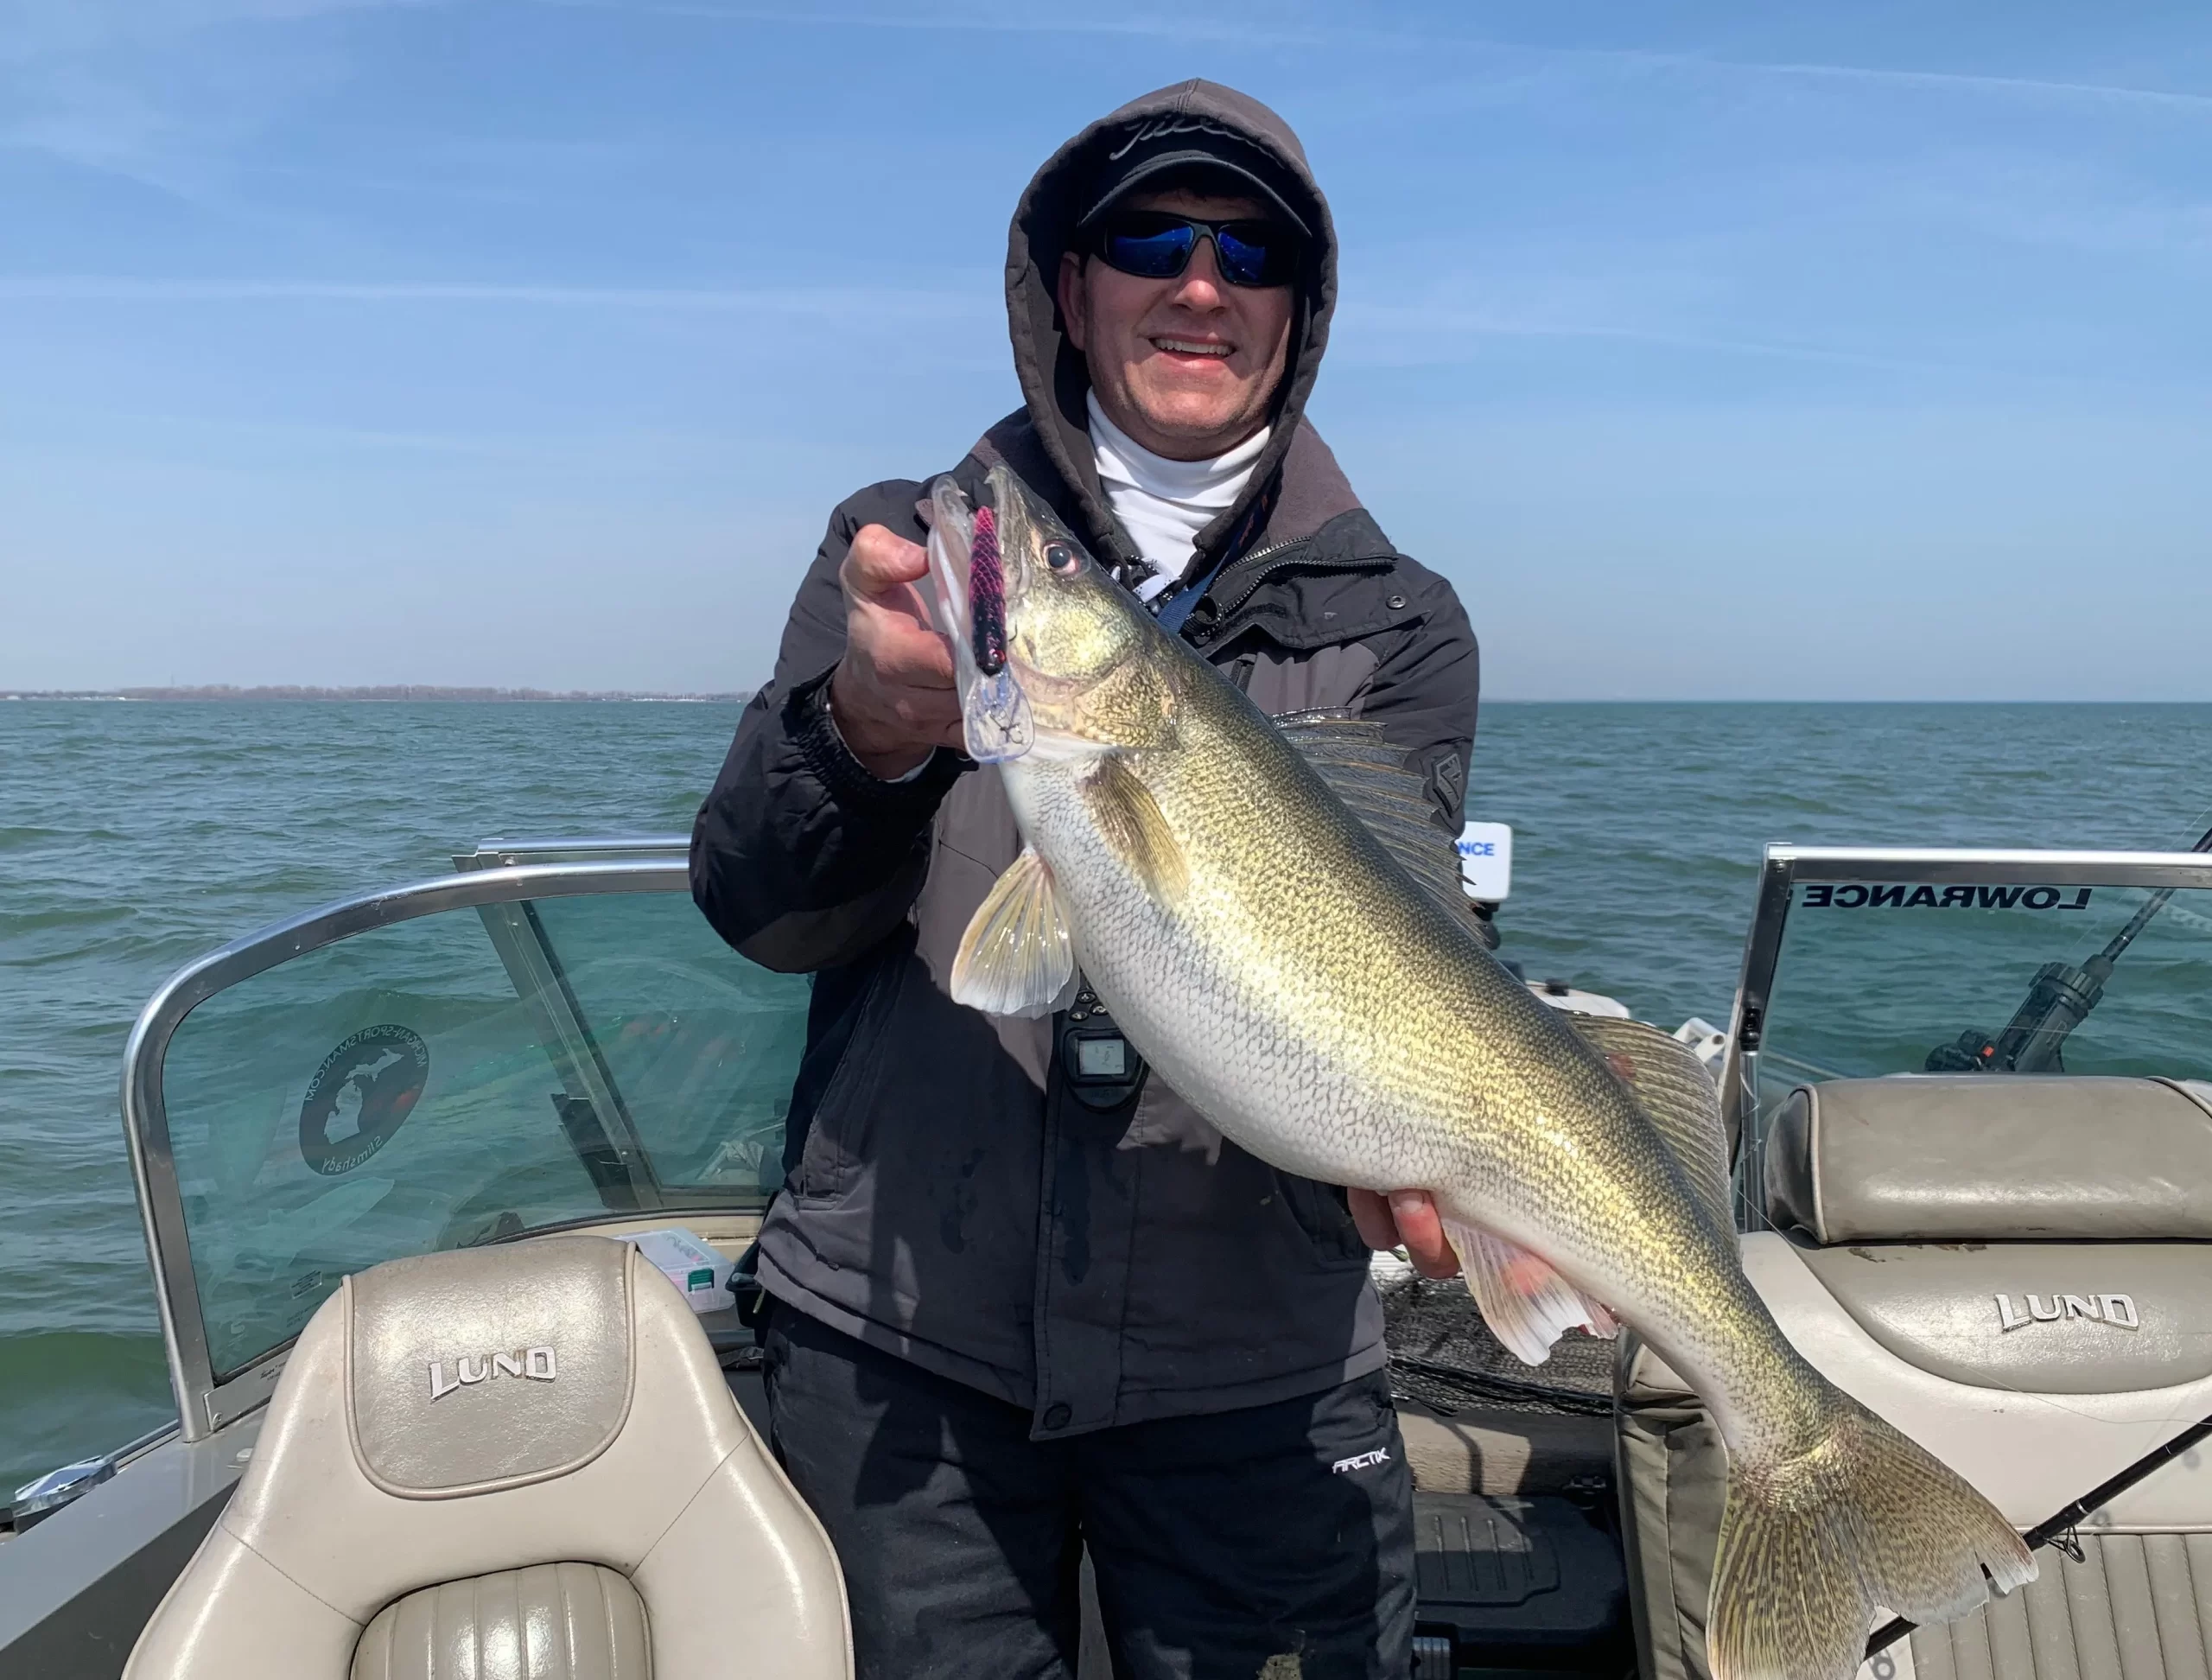
GLF: How long has the Lake Erie walleye population been actively managed?
The first inter-jurisdictional fishery quota management program was implemented in 1976. This established a Total Allowable Catch (TAC) for walleye from commercial and recreational harvesters in Lake Erie. The goal was to maintain a sustainable walleye fishery.
GLF: If possible, please outline the annual calendar for the walleye management plan (or provide links to similar info).
The TAC’s are announced annually at the annual Lake Erie Committee meeting that takes place at the end March. But there is a huge amount of work that goes into establishing the TAC, prior to the annual meeting. A large amount of data is collected across the lake from spring through fall to evaluate the number of walleye present, age structure of the population, growth rates, reproduction rates, and fishery results. During the winter is when the Walleye Task Group (technical staff from the Lake Erie Committee) processes all the survey and assessment data and use a computer model to generate a range of safe harvest levels to maintain a sustainable fishery. While the purpose of the committee is to look at the total body of survey data, each state makes adjustments based on info from the local surveys that are completed in each jurisdiction, when setting their respective creel limits.
GLF: How often are Lake Erie walleye stocking levels evaluated?
Walleye are not stocked in Lake Erie; it is managed as a self-sustaining fishery.
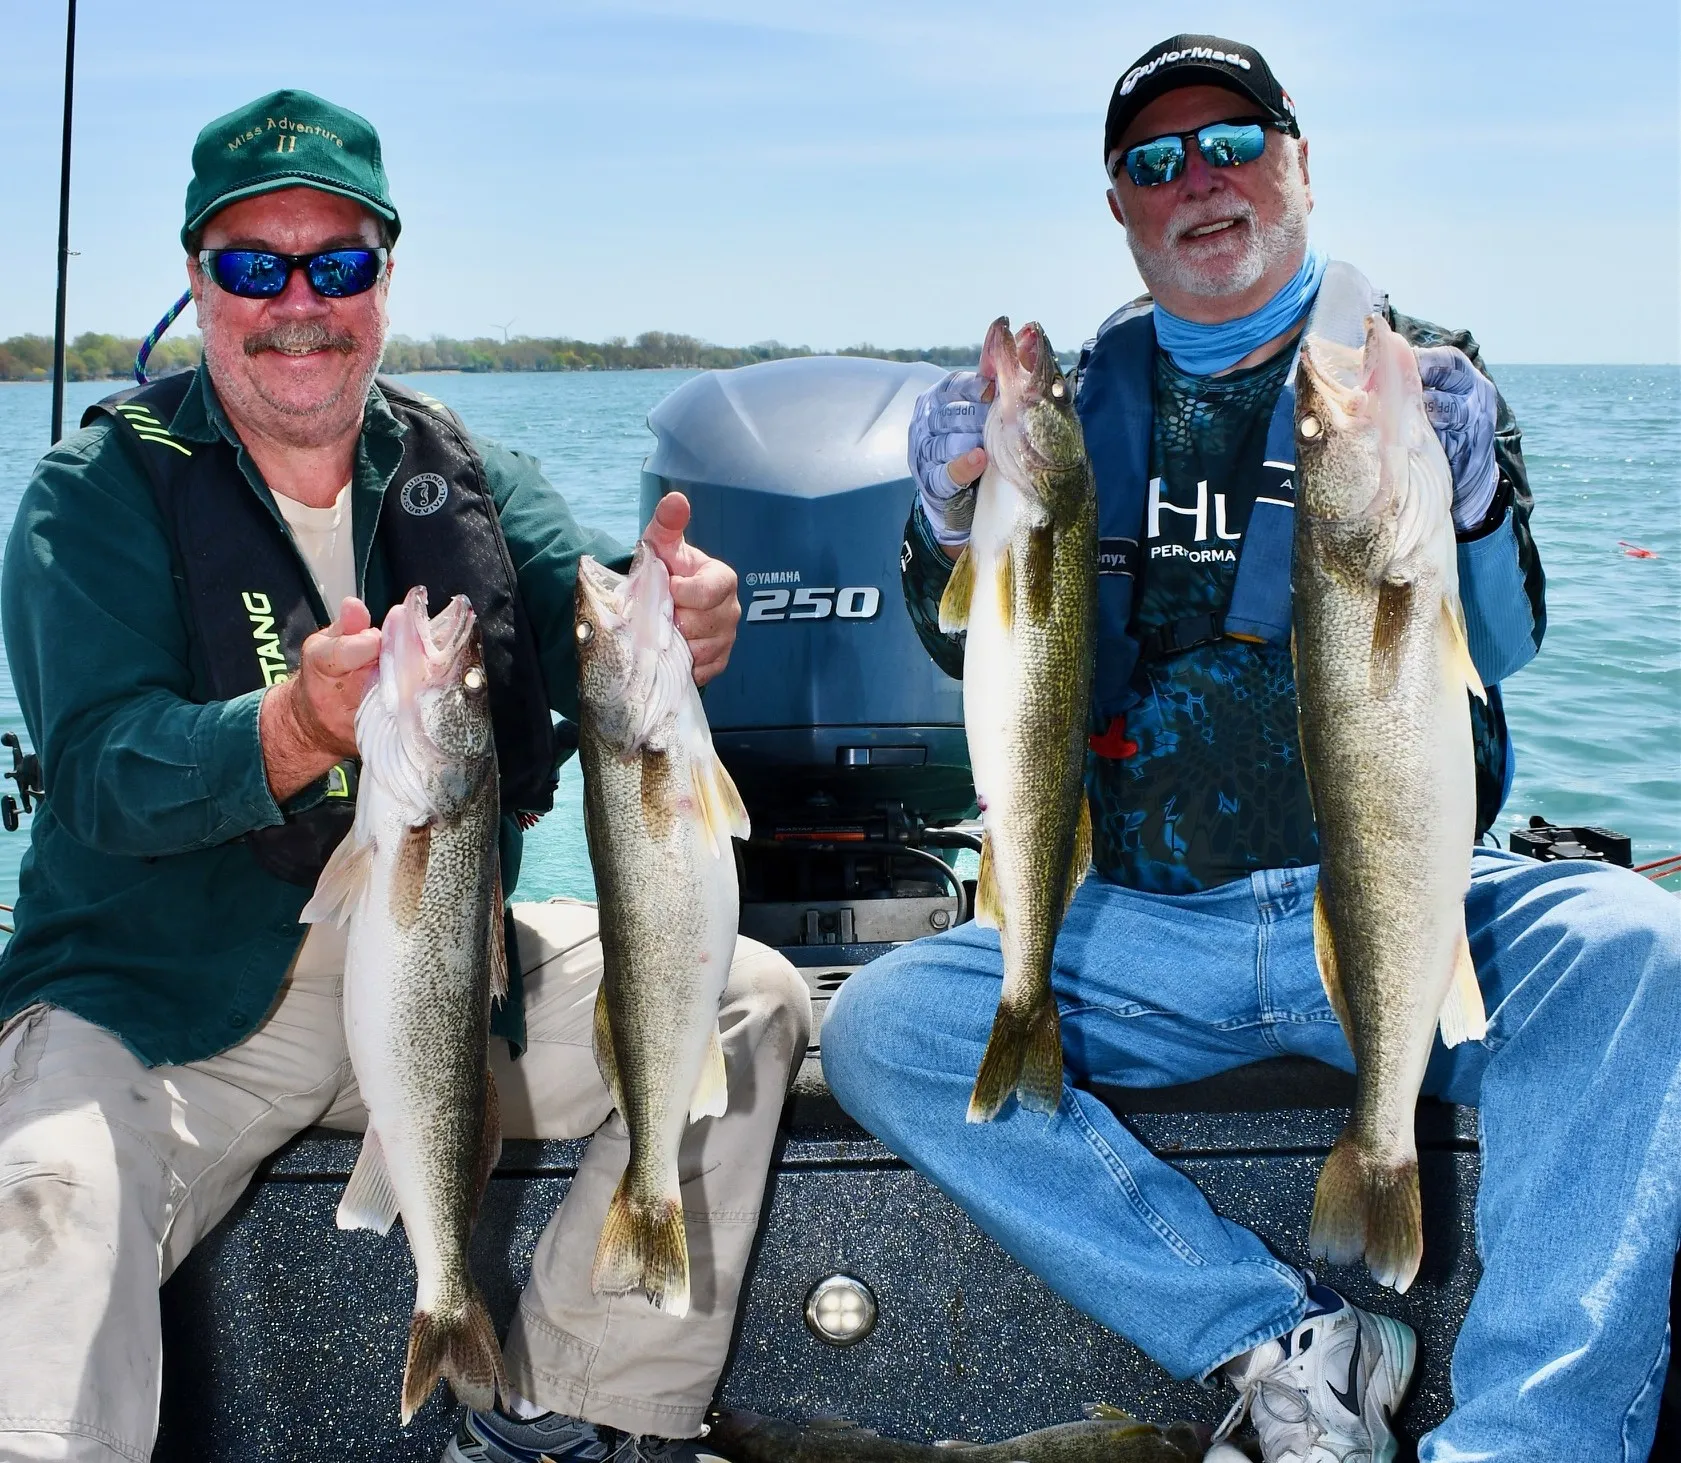
GLF: If the fishery is self-sustaining, what “levers” are used to manage the population?
There are 2 primary areas we can impact to help regulate the population.
The first is that we can regulate harvest. As mentioned above, setting the TAC is one of the main tasks of the Lake Erie Committee and by setting appropriate TACs, we can help control the number of mature walleye that are taken out of the population each year.
The second area that we can impact is habitat quality. Most fish in the Great Lakes utilize marshes at one point or another during their lifecycle. For walleye, the fish rely heavily on marshes during the fry stage of their development. The marshes provide food and shelter from predators until the fish are large enough to survive in the open lake. By maintaining and improving marsh habitat, we can have a direct impact on the survivability of young-of-year (fry that that were born that same year).
GLF: How has the cleanup of lake water pollution over the years impacted the Lake Erie walleye population?
Pollution during the early part of the 1900’s was certainly a contributor to the walleye fishery collapse in the 1960’s. The highly-publicized fire on the Cuyahoga River in 1969 prompted key legislative action in both the US and Canada, including the creation of water quality management agencies, environmental regulations, and the signing of the binational Great Lakes Water Quality Agreement in 1972. These actions reduced pollutants from industrial, municipal, and agricultural point sources through the regulation of discharges. The resulting improvements in water quality contributed to a recovery of the walleye population.
GLF: How has the introduction of zebra and quagga mussels had an impact on the Lake Erie walleye population?
It is difficult to determine cause and effect of zebra and quagga mussels on the walleye population in Lake Erie. Zebra mussels were first found in the Great Lakes in the late 1980s. While mussels have been known to affect water clarity due to their filtering, it does not appear to be having an impact in Lake Erie. Another potential concern was that mussels would strip the water column of plankton that are especially important to young walleye. But again, there does not seem to be a reduction in the number of young walleye being produced in Lake Erie.
GLF: How has the introduction of the Round Goby had an impact on the Lake Erie walleye population?
There does not appear to be a direct connection between round gobies and walleye in Lake Erie. Gobies are an important part of the diet of some fish, for example smallmouth bass. They are eaten extensively by smallmouth bass and have improved growth rates of bass. Whereas gobies will occasionally be found in walleye stomachs, but they are not an important food item.
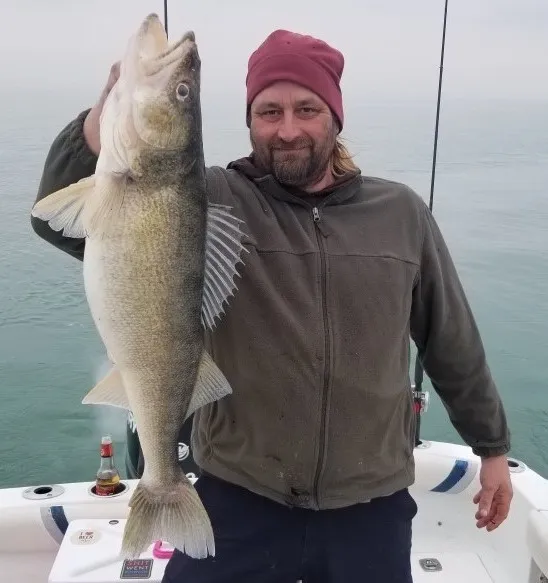
GLF: Are there any impacts (positive or negative) that climate change is having on the Lake Erie walleye population?
The jury is still out. All the data seems to indicate that Lake Erie is warming and there is a pattern of less ice cover in the winter. But it is unclear how these changes will affect walleye numbers.
GLF: What is magnitude of the walleye population gradient from the east end of Lake Erie to the west end?
There are a number of walleye stocks from Saginaw Bay in Lake Huron, all the way to the east end of Lake Erie. But walleye migrate and mix throughout the system. There is no question that the stocks in the western basin are the primary drivers of walleye abundance. But after spawning is completed, these fish distribute north up the Detroit River, as well as to the east end of Lake Erie. One study estimated that 90% of the walleye harvested in the East Basin were seasonal migrants from the western basin.
GLF: What are some of the challenges that the agencies will be facing in managing the Lake Erie walleye population over the next decade?
Invasive species continue to be high on the threat list. Although I mentioned earlier that zebra mussels and round gobies do not appear to have affected walleye – there is always the concern that the next one could be a game-changer. Think of bighead and silver carp. And there are examples of other invasive species, that have impacted walleye – like sea lamprey. Sea lamprey devastated native fish species in the Great Lakes, fortunately a control program was developed – but at a cost. A recent estimate is that $10 million is spent annually to control sea lamprey in the Great Lakes. As with any invasive species – the key is prevention.
GLF: Is there anything else you would want anglers to know about the management of the walleye population in Lake Erie?
I think it is important to highlight that today’s walleye fishery is at historic levels. It is not uncommon to have one strong year class carry a fishery for up to a decade. But we have now had five consecutive years of exceptional production, with the 2021-year class being the highest ever recorded. This is unprecedented to have a string of year classes like we have seen from 2018-2022. Targeted harvest rates for walleye in Michigan waters of Lake Erie have been ranging from 0.5-0.6 walleye per hour. These harvest rates are comparable to the mid-1980s during the peak of the walleye fishery.
A Final Word
The Great Lakes Fisherman would like to thank Jim for taking the time to answer our questions and layout all of the work that goes into managing such a massive fishery.
If you see a natural resources worker at the boat ramp or out on the water, please remember to thank them for the work they do. This work is essential to a quality fishery and is what makes our Great Lakes the best inland fishery in the world.
Finally, if there are other lake management topics that you would like to hear about, please drop us a comment below and let us know about it. We are always looking to provide you with the content your are interested in hearing about!
Top 5 Lures for Fishing Freshwater
* This page contains affiliate links. The Great Lakes Fisherman may earn a commission on items purchased through these links. For more on this, please click here.
Who doesn’t have a favorite fishing lure? We all have that one bait that we make sure we always have in our tackle box on fishing trip. It is the bait that seems to always catch fish when nothing else will. For those veteran fisherman out there, we know that almost every lure has its time and place. Some just have more of them than others. Nonetheless, there are a handful that are standouts and that can produce in a large variety of situations and locations. These are the lures that have stood the test of time and that do the best at attracting a fish’s attention. Here we will take a quick look at our top 5 lures for freshwater fishing.
Before we start, we must clarify that these are artificial lures only. Anything requiring live bait as a integral part of the presentation is not included. For example, a night crawler harness becomes much less effective without a live crawler. As a result, it doesn’t qualify for this list. That said, let’s get into it!
5. Flies
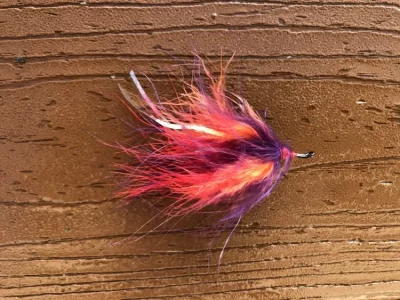
Fly fishing is a popular sport in the Great Lakes region. There are hundreds of tributary streams, creeks and ponds that host a variety of species that rely heavily on inspect species that can be fooled by a well-tied (or in some cases, not so well-tied) flies.
In addition to inspect patterns, well-presented crayfish and wetfly patterns will take species such as smallmouth bass in many of these same lakes and streams.
Trolling flies are a very popular bait when targeting salmon and trout in the open waters of the big lakes. When fished behind a dodger, these can be one of the most productive presentations for salmon at certain times of the year.
4. Trolling Spoons
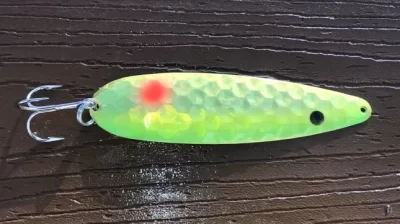
Trolling spoons are probably the most used open water lure in the Great Lakes. They are used for targeting salmon, trout and walleye but catch a whole host of other fish along the way.
The fluttery motion of a reflective spoon in the clear Midwest waters mimic all sorts of forage that the bigger game species can’t resist. That same fluttery motion also makes spoons more visible in deeper water, giving them an advantage over many other lures that simply won’t show up in those dark conditions.
3. Spinners
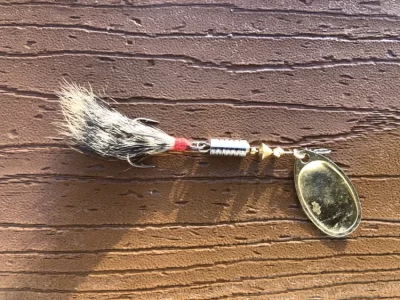
This covers all spinners, including inline spinners such as a Mepp’s for trout or pike, bucktails for muskies or spinner-jig combos like spinner-baits for bass.
Our personal favorite and one of the most versatile lures out there is the Beetle-Spin. These are fantastic baits for locating fish, especially on new bodies of water.
2. Original Floating Rapala
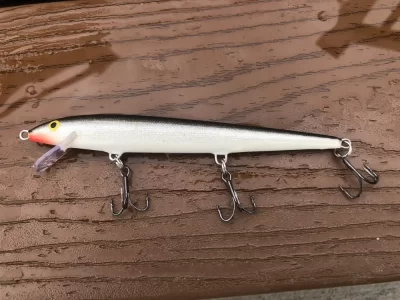
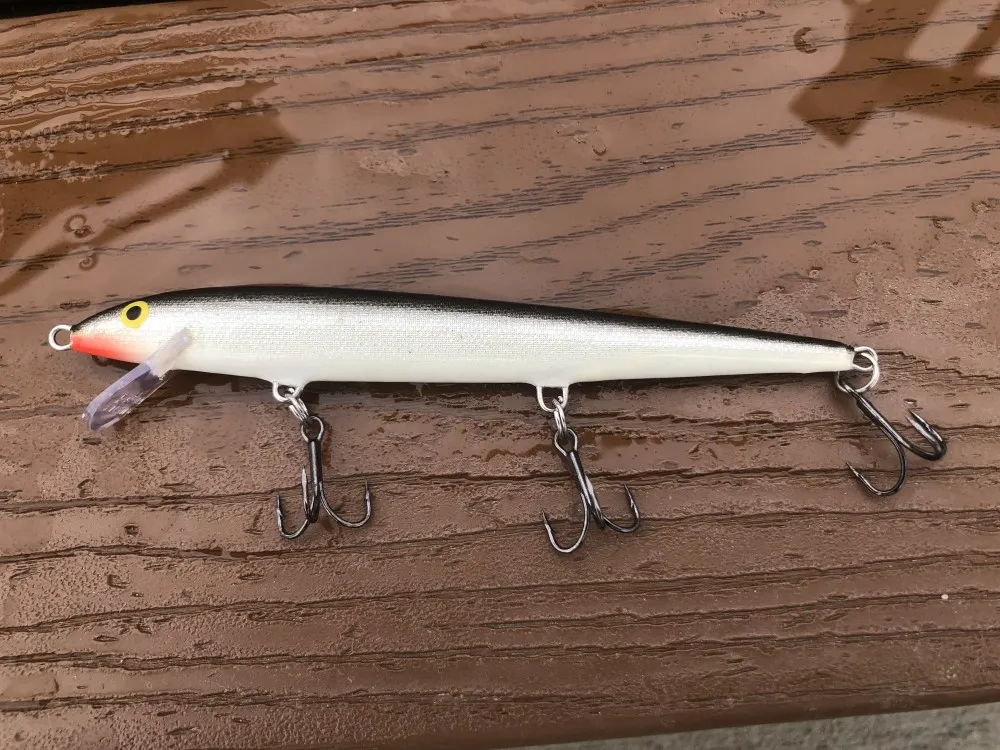
If you know nothing about fishing or are trying a brand new body of water, this is probably your go-to lure. Most people have an original floating Rapala in their tackle box. It is easy to see why. The bait imitates your basic bait fish in a whole host of conditions. The black-white contrast will show up in all but the most turbid of waters and the fluttery action of their movement is enough to drive any fish crazy. This bait appeals so well to a fish’s predatory instincts that is has been known to catch fish half of it’s size and less. It is also a great trolling lure for the region’s most popular gamefish, the walleye. They are particularly productive in low-light conditions when contrast becomes important (for more on this, see our article on Lure Color Selection).
1. Jig
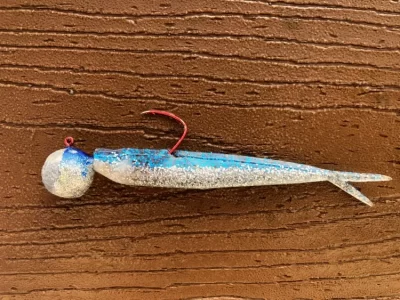
The most versatile and deadly fishing lure to have in the arsenal, in our opinion, is the jig. This bait can be used to fish all levels of the water column. They come in nearly every color combination in the rainbow and they can be paired with plastics and retrieved to mimic nearly any variety of forage. There is almost no fish anywhere that won’t respond to a jig when presented with the right size, color, and retrieval. While a jig may not seem very special to a novice, an experienced fisherman can attest to their productivity when fished properly.
Disagree with our list? Drop a comment below and let us know what your best-producing lure is in freshwater.
Lure Color Selection
* This page contains affiliate links. The Great Lakes Fisherman may earn a commission on items purchased through these links. For more on this, please click here.
Color selection for fishing lures is a controversial topic. Everyone has an opinion on what a fish wants and why. But what does science say about the matter? I think we can all agree that color matters, but how do we know which colors work best in any one scenario? Here we will explore light properties under the water and how that impacts lure color selection.
How Fish See Color
Before we go any further, it is important to note that a fish’s vision is very similar to that of humans. They have cells that process light in very similar ways to us both during the day and at night. This is important because as we understand how colors change in the water, we will understand how a fish sees it. One minor difference is that a fish’s visual range is a bit broader than ours, allowing them to detect some ultraviolet light that we can’t see. But this difference is, for practical purposes, irrelevant. So for our purposes here, we can assume that fish see things generally the same way as we do.
Light and Color
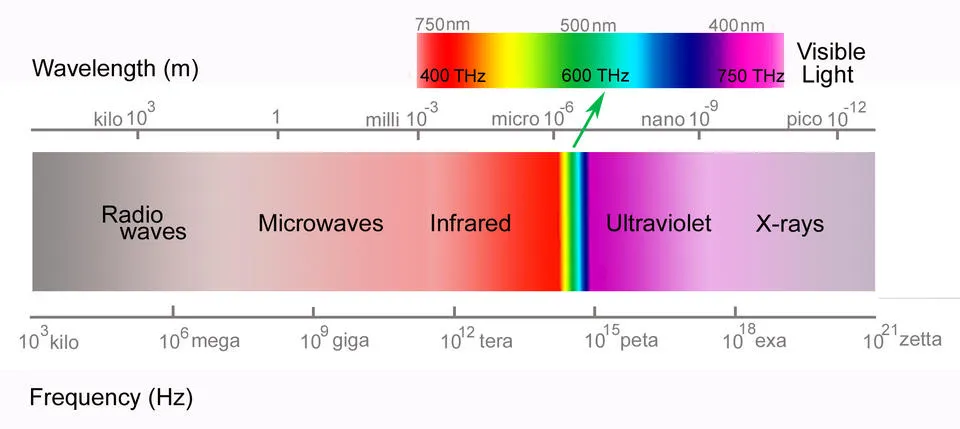
Although light is still not fully understood by science, many of its properties are. Color is one of them. Each light ray has a property known as frequency and wavelength. In a sense, these are one and the same as they are inverses of each other. The higher the wavelength, the lower the frequency and vice versa. Quite simply, each frequency/wavelength of a light ray that hits your eye is correlated to the color that you see.
When these rays hit the retina at the back of your eyeball, they enter a line of cells called cones. These cells come in three varieties to detect just 3 colors: red, green and blue. From there, signals are sent to your brain where your brain process all 3 signals and turns them into the color you “see”.
Light frequencies span a very large range. But there is only a small range of these frequencies that is known as visible light and this is the only light we can “see” with our naked eye. The visible range starts at what we see as red light on the lower frequency end and goes up to violet light at the higher frequency end. Light frequency that is below the red end of our visible range is known as infrared light (meaning “below red”). Frequency above the violet end of our visible range is known as ultraviolet light (meaning “above violet”).
Color Changes with Water Depth
Nearly all light in the water column is coming from the surface. During the day, most of that light is coming from the sun which carries all frequencies of visible light. However, the sun doesn’t deliver these frequencies in equal amounts. The chart below indicates the relative intensity of the various light wavelengths emitted by the sun that are within the visible range.

From the chart, we can see the the green region of the spectrum has the most intensity. Put quite simply, there is more of this green light entering the water column than any other. This is important in understanding how things are seen under the water.
But this doesn’t tell the whole story. The higher the frequency, the more the light will penetrate the water column. This means that lower frequencies will be absorbed by the water more than higher frequencies. As a result, almost all of the red light will be absorbed in the top part of the water column. To the contrary, violet light will penetrate the deepest.
So if we combine the relative intensity of each frequency with the depth at which it can penetrate, we get something that looks like the following diagram.
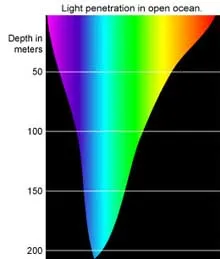
From this diagram we can see that the combination of intensity and penetrability make bluish-green light the most abundant in deep water. So how can we use this information to help understand what a lure looks like under the water?
How Lures Reflect Light
Now that we understand how much light of various frequencies is in the water column, let’s discuss how that light interacts with the lures we put down there. To do this, we need to understand how light is reflected off of objects. This will tell us how light “looks” coming from the lures.
Every material absorbs and reflects light differently. When we perceive an object’s color, it is due to the combination of reflected light frequencies that are hitting our eyes.
For example, when we see the color red, that means that based on the combination of the light frequencies that are reflected off of the object, our brain is interpreting that as red. This might be because the only light frequency hitting our eye is red light. But usually it is because the combination of frequencies hitting our eye results in our brain processing them as red. Either way, we see the object as red.
Impacts on Lure Selection
So now that we understand how light interacts with the water and lures, how can we make use of this information to our advantage?
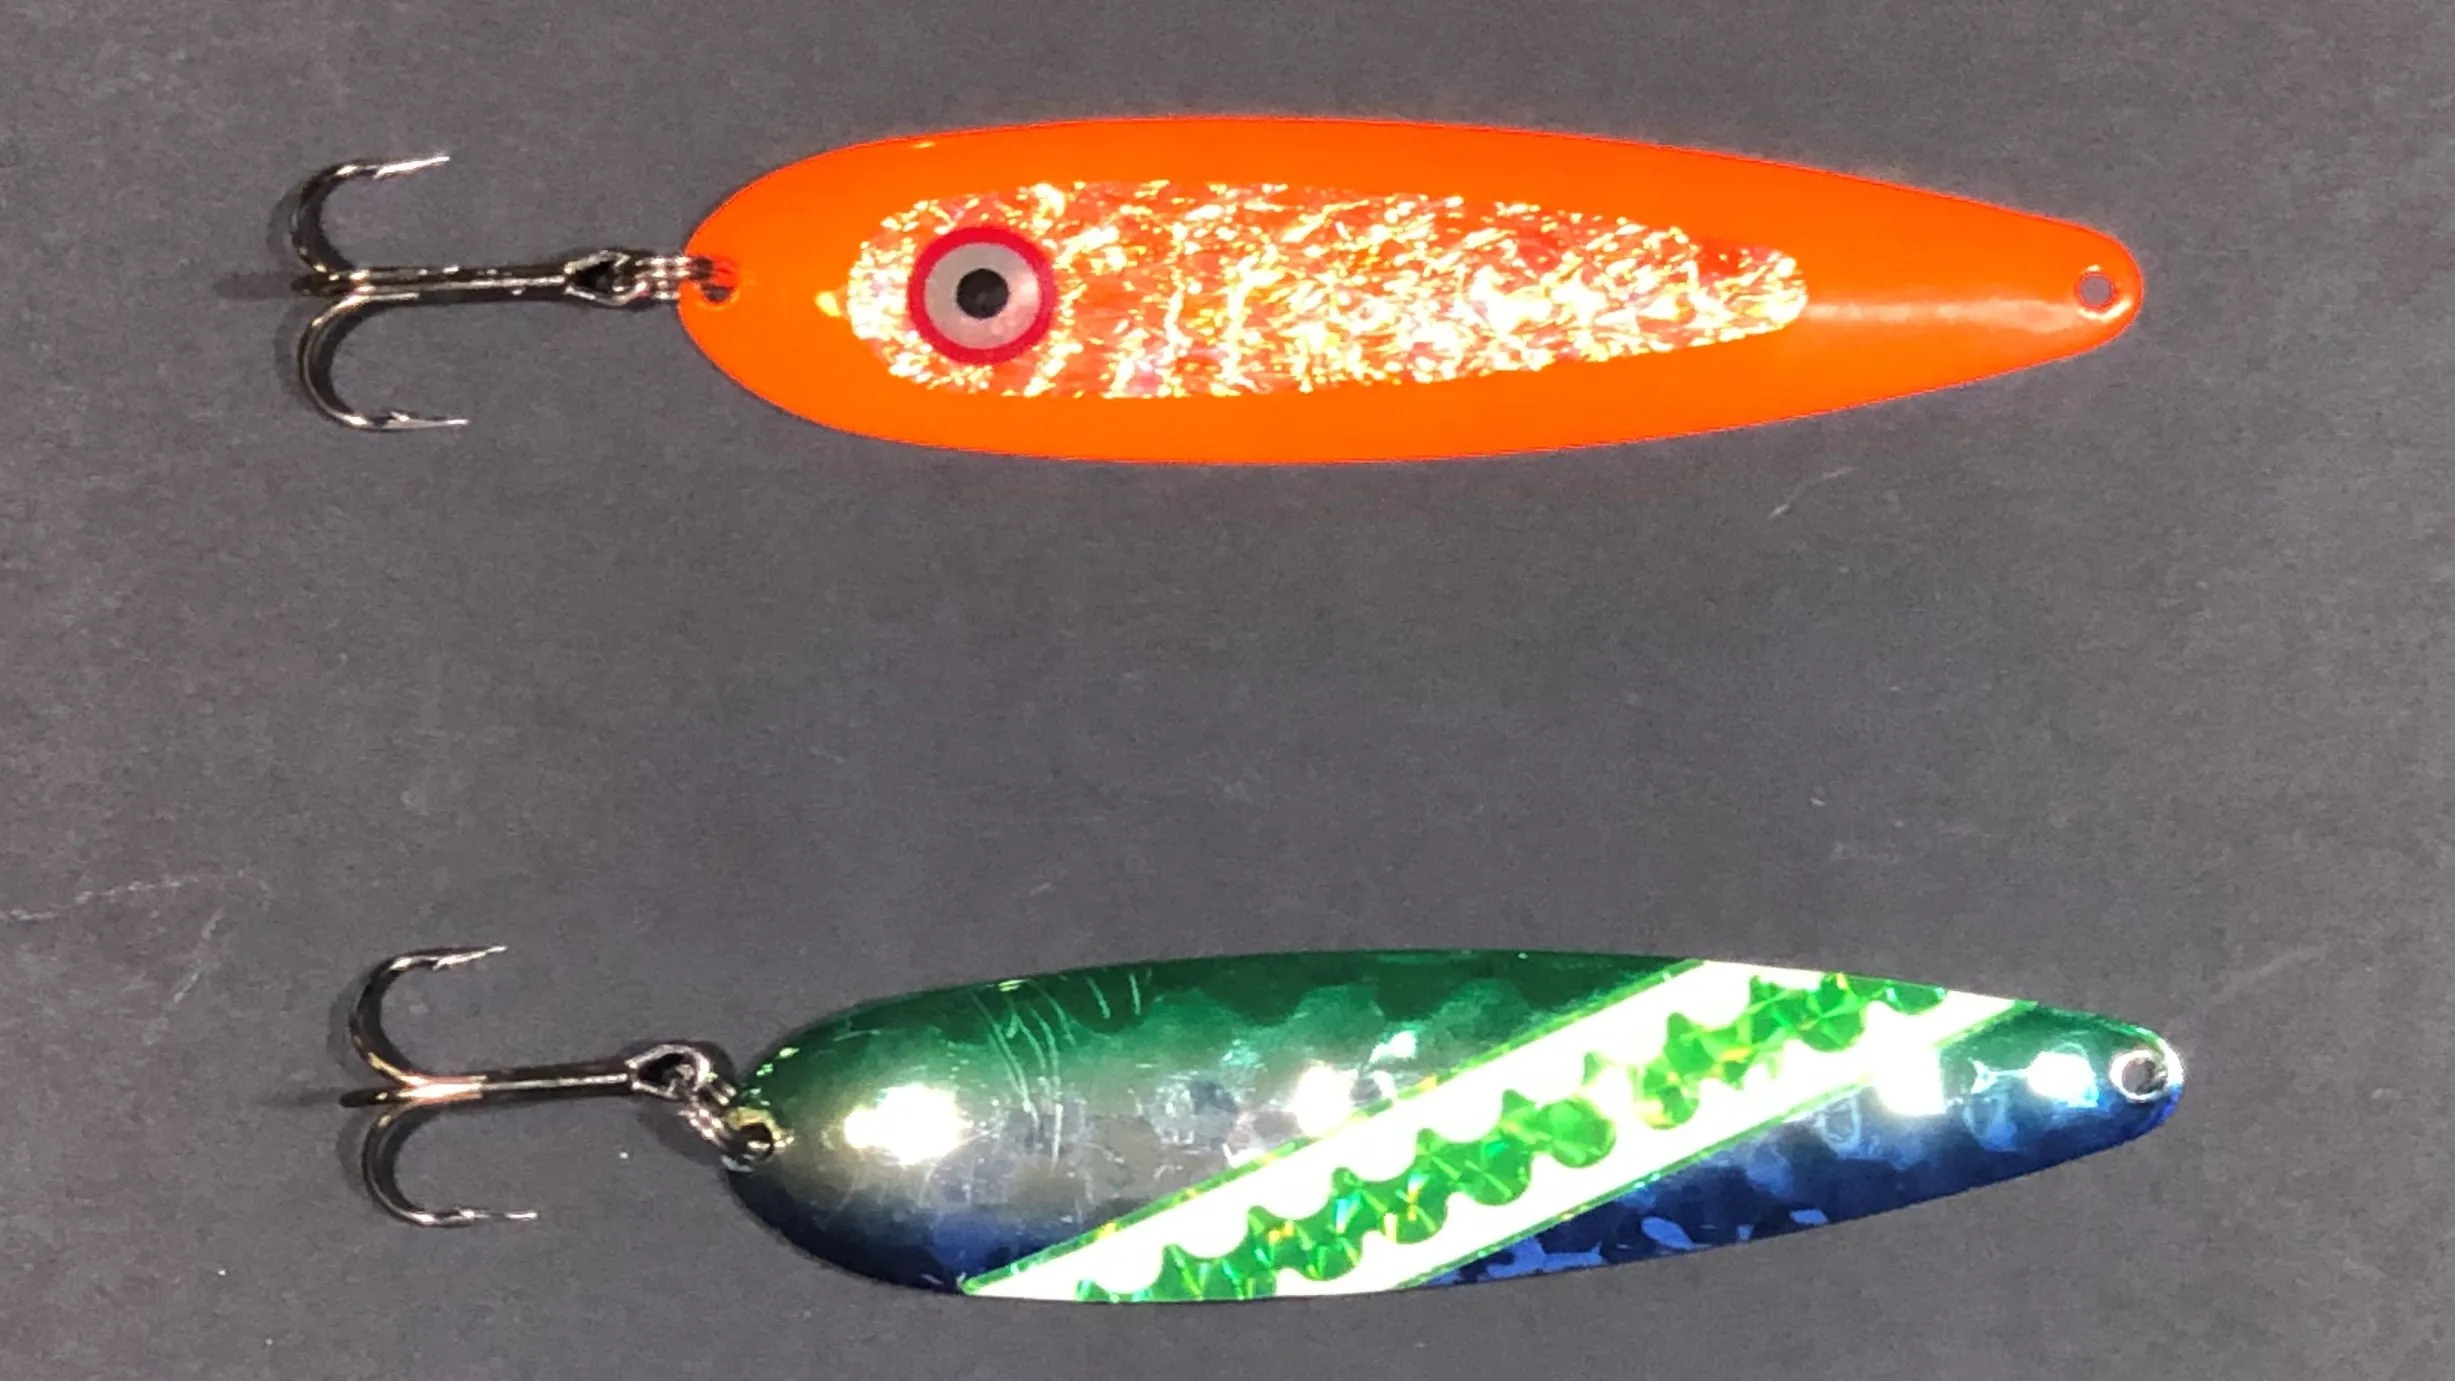
Suppose you are trolling for salmon in 100′ of water and are marking fish. As a result, you have your trolling spoons set 50′ down. Earlier in the spring, you were catching easy limits in shallow water (less than 20′ deep) on orange spoons and you decide to include a healthy number of those colors in your trolling spread. To your surprise, you are not catching anything on those colors. You have, however, been consistently getting bit on two green spoons that you have down there. What is going on? How could a color that was so hot in the spring be so cold now?
Referencing the chart above, we can see that red and orange light doesn’t penetrate very deep into the water column. This means that the orange lures will look significantly different in the deep water than what they looked like in the shallow water back in the spring. To be fair, any color will look different in deeper water, but the closer the lure colors are to the colors that penetrate that depth, the less change there will be in their appearance. This also doesn’t mean that fish won’t hit a red or orange lure in deep water. But it does mean that those lures won’t show up nearly as well as some of the colors in the middle of the spectrum, such as hues of blue and green.
Water Clarity Affect on Color
So now that we have discussed water depth, what about water clarity?
We all know what happens when we put on a pair of those yellow sunglasses. It doesn’t just change the intensity of the light, but it changes the colors we see as well. A similar thing happens in stained or turbid water. The suspended particles in the water absorb and reflect light just like any other material. Based on what is in the water, certain frequencies of light will be absorbed and others will be reflected. This causes a change to the perceived color of a lure in the water. This is why certain colors work better in some stained water than they do in clear water and vice versa.
Really Dark Water
At times we have to fish in water that is extremely dark, where light is almost non-existent. This could be water that is very deep, or it could be water that is so stained that light is just not penetrating very far. You might also be fishing at night. In these cases, the color under the water can be so dim, that the very low signals from the cone cells in the eyeball are being overridden by a different set of cells known as rods.
Unlike cones, rod cells only distinguish between shades of black and white. Effectively, they signal contrast, or differences between shades. Furthermore, light entering from the periphery, your peripheral vision, tends to be seen better by these rod cells than light coming from directly in front of you. If you don’t believe it, just step outside on a dark, starry night. You will notice that there are some stars that are easier to see when you don’t look directly at them. This is precisely due to the fact that more of that light is being “seen” by the rod cells in your eyes vs the cone cells.
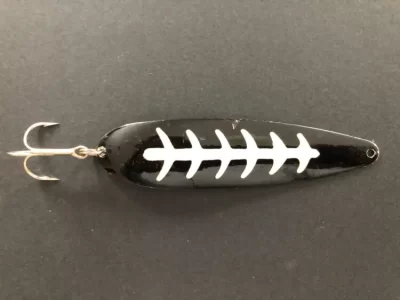
When it comes to lure selection in these cases, think contrast. Black and whites with sharp contrasts are great choices in these conditions as they will stand out to a fish when not much else will. A lure that rotates or vibrates with the right combination of black and white (or glow in the dark) will effectively look like a strobe light under the water to a fish in these dark conditions.
Good luck out there! If you enjoyed this article, please let us know by dropping a comment below and consider subscribing to our blog.
Perfect Fish Tacos

* This page contains affiliate links. The Great Lakes Fisherman may earn a commission on items purchased through these links. For more on this, please click here.
Looking for an alternative to fried, baked or grilled fish? If you are a fan of tex-mex, give this recipe a try. Once you do, these fish tacos will become a permanent part of your fish cooking playbook.
Recipe
Serves: 4 Prep Time: 30 min. Cook Time: 20 min.
Ingredients
The Fish
- 2 lbs. boneless, skinless fish fillets (crappie and walleye are great choices)
- 2 tbsp. olive oil
- 12 – 8″ flour tortillas
The Seasoning
- 2 tbsp chili powder
- 2 tbsp paprika
- 1 tbsp ground coriander
- 1 tbsp garlic powder
- 1 tbsp salt
- 2 tsp cumin
- 1 tsp oregano
- 1 tsp black pepper
- 2 tsp cayenne or red pepper flakes (optional)
The Sauce (Recipe from Natasha’s Kitchen)
- 1/2 cup of sour cream
- 1/3 cup of mayo
- 1 tbsp garlic powder
- 1 tbsp fresh lime juice
- 1 tbsp siracha
The Toppings
- 2 cups of shredded cabbage (white, red or a mixture)
- 2 cup fresh pico de gallo (recipe below)
Pico de Gallo
- 5 Roma tomatoes, diced
- 1/4 cup diced red onion
- 1/4 cup chopped cilantro
- 1/2 large jalapeno pepper, seeds removed
- 1 tbsp fresh lime juice
- salt to taste
Directions
Mix all of the sauce ingredients well. Cover and refrigerate for 1 hour to allow flavors to blend.
Mix all of the pico de gallo ingredients well. Cover and refrigerate for 1 hour to allow flavors to blend.
Mix all of the seasoning ingredients well.
Make sure the fillets have been rinsed and dried thoroughly and that all bones and skin have been removed. Brush the fillets with the olive oil and then coat thoroughly in the seasoning.
Heat a cast iron skillet (preferred) or non-stick pan until it is very hot. Sear seasoned fillets for 2-3 minutes on each side, just until fillets are cooked through and the seasoning is dark (be carfeful not to burn). You may need to cook a little longer with thicker fillets.
Move the fillets to a cutting board to let them rest for 5 minutes. Once they have rested, chop the fillets into desired size for the tacos. The more your chop, the more the seasoning flavors will blend with fish.
Warm the tortillas in the microwave for 20-30 seconds.
Build the tacos in the following order:
1. Warm tortilla
2. Layer of fish
3. Layer of shredded cabbage
4. Drizzle of sauce
5. Layer of pico de gallo
Enjoy!
5 Tips to Help You Become a Better Fisherman
* This page contains affiliate links. The Great Lakes Fisherman may earn a commission on items purchased through these links. For more on this, please click here.
With many of the skills we develop in our lives, the process involves learning the right technique and then practicing it thousands of times. But fishing is a unique activity. It involves countless techniques. Some of them work great some of the time, but poorly at other times. So becoming a better fisherman has as much to do with versatility as being great at any one method. With that in mind, here are 5 tips that will help you become a better fisherman.
5. Watch YouTube Videos
The old ways of learning about fishing techniques usually involved watching the few outdoors shows that were offered by your local tv or cable provider, reading magazine articles and occasionally renting a video. That expertise was limited to a few big pro-fishing names that were fortunate enough to land their own TV show or write features in the few outdoor magazines of the time. But the information was usually pretty high-level and not very specific.
But with YouTube, we can learn from many more people, both amateurs as well as professionals. Many of these folks are better in-tune with the specific bodies of water and the species we are targeting. And there are some amateur fishermen out there that can hang with the very best of professionals when it comes to their fishing skills. YouTube has volumes of great videos ranging in duration from a few minutes each to entire feature length programs. This is an easy and very convenient way to learn.
4. Socialize with Other Fishermen
Fisherman are generally good people. While they are not likely to divulge the location of their honey hole (nor should you expect them to), many of them are more than willing to give you a few pointers on techniques to help you put more fish in the boat.
If you have the time, joining a fishing club can be a great way to meet and socialize with fisherman that are interested in the type of fishing you enjoy. You might also make some new friends along the way.
If fishing clubs aren’t your thing and you’re looking for an easier way to socialize, a fishing forum is a great way to trade information with fellow fishermen. Being in Michigan, I often used the Michigan Sportsman Forum, but there are similar forums in most states. Our Regs & Reports menu includes links to several such forums related to fishing the Great Lakes region.
3. Think Like a Fish
Fish are relatively simple in terms of what drives them. For 80-90% of the year, they are driven by the need for food. The other 10%-20% they are either preoccupied by spawning, prepping to spawn or recovering from spawning. Thinking like a fish means knowing which of these modes the fish are in, and within the body of water you are fishing, which area will provide them with their needs at that time. Each and every time you head out on the water, you should ask yourself, what is driving the fish and where would they likely be to obtain their goal.
2. Experiment
As fishermen, we sometimes get caught in the trap of continuing to try the same method that has worked in the past, regardless of the results we are getting. It is appealing because after all, the method has a proven track record. But over time, a fish’s environment changes and they must adapt accordingly. Sometimes, their behavior can change several times within a day or even a few hours. This means that you must adapt if you expect to catch fish.
Once you have located fish, it shouldn’t take long to catch them if the right presentation is used. If you aren’t achieving results in 10-15 minutes, you need to try something else. Try changing baits, colors and even techniques. By finding what they are concentrating on, your catch rate will increase dramatically.
1. Put in Your Time
When it comes to fishing, there is no “one size fits all”. This is because each lake, river or stream is unique. Where walleye hang out on one lake may not be the same on another. As the old saying goes, “90% of the fish are in 10% of the lake”. But it will take a little time to figure out where that 10% is on each body of water.
So while the tips above will better prepare you for your fishing trip, trial and error will train you the best. There is no substitute for this. Like it or not, following the above tips will not pay off if you don’t spend time on the water. But as you spend the time, and better understand your target, your catch rates will continue to get better and better.
There will still be days, of course, where you find yourself skunked, but they will become very few and far between. But spending time on the water and utilizing the tips above will help you become a better fisherman!
Bobber Fishing for Steelhead
* This page contains affiliate links. The Great Lakes Fisherman may earn a commission on items purchased through these links. For more on this, please click here.
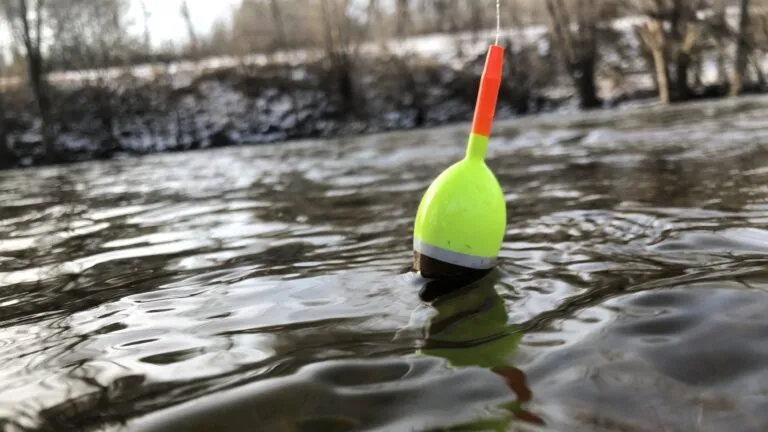
I like to fish without a guide. That’s part of the draw of fishing to me, figuring things out. Nothing teaches you about fish behavior better than good old trial and error. But after years of not being a very good steelhead fisherman, my brother talked me into going on a guided trip on the Muskegon River. Having that experience made me appreciate the value of a guided trip every now and then. Here, I will share a few of the tips I learned while bobber fishing for steelhead.
The Bobber Rig
Before we continue, it is important to remember the goal of the technique. The goal, as with any type of fishing, is to put something that the fish believes is food in a place that the fish can see, smell or feel. The problem with steelhead, is that they are very finnicky. And in clear, shallow streams, it’s very bright under the water and they easily notice the slightest discrepancies between real food and bait on a hook.
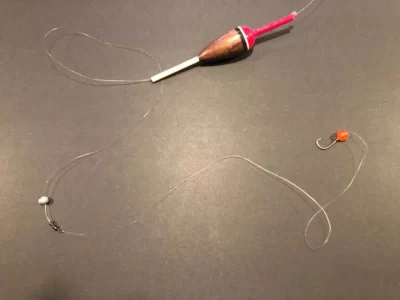
Therefore, in using this technique, we must make sure that our presentation is perfect. This means not only giving the fish something they want to eat, but making sure that the food looks normal in its environment. In moving water, this is not as easy as it might seem. But the tips that we learned ensured that our presentation was as good as it could possibly be.
To be clear, the techniques below won’t work if fish aren’t present. This article will focus on the technique used to catch the fish and not on locating steelhead. For our purposes, we will assume that you are fishing a run of water that holds fish.
1. Use a Flourocarbon Leader
Most rivers that hold steelhead tend to be clear. And because the water is so clear, the fish tend to be extremely line-shy. This makes a flourocarbon leader a must.
Transparent materials bend light to some degree. A measure known as the refraction rate indicates how much the light will bend. Flourocarbon has a refraction rate that is very close to water. This means that it is more difficult to see under the water than any other type of fishing line. In fact, I recommend flourocarbon when fishing any clear body of water, regardless of the target species.
2. Keep the Bait on the Bottom
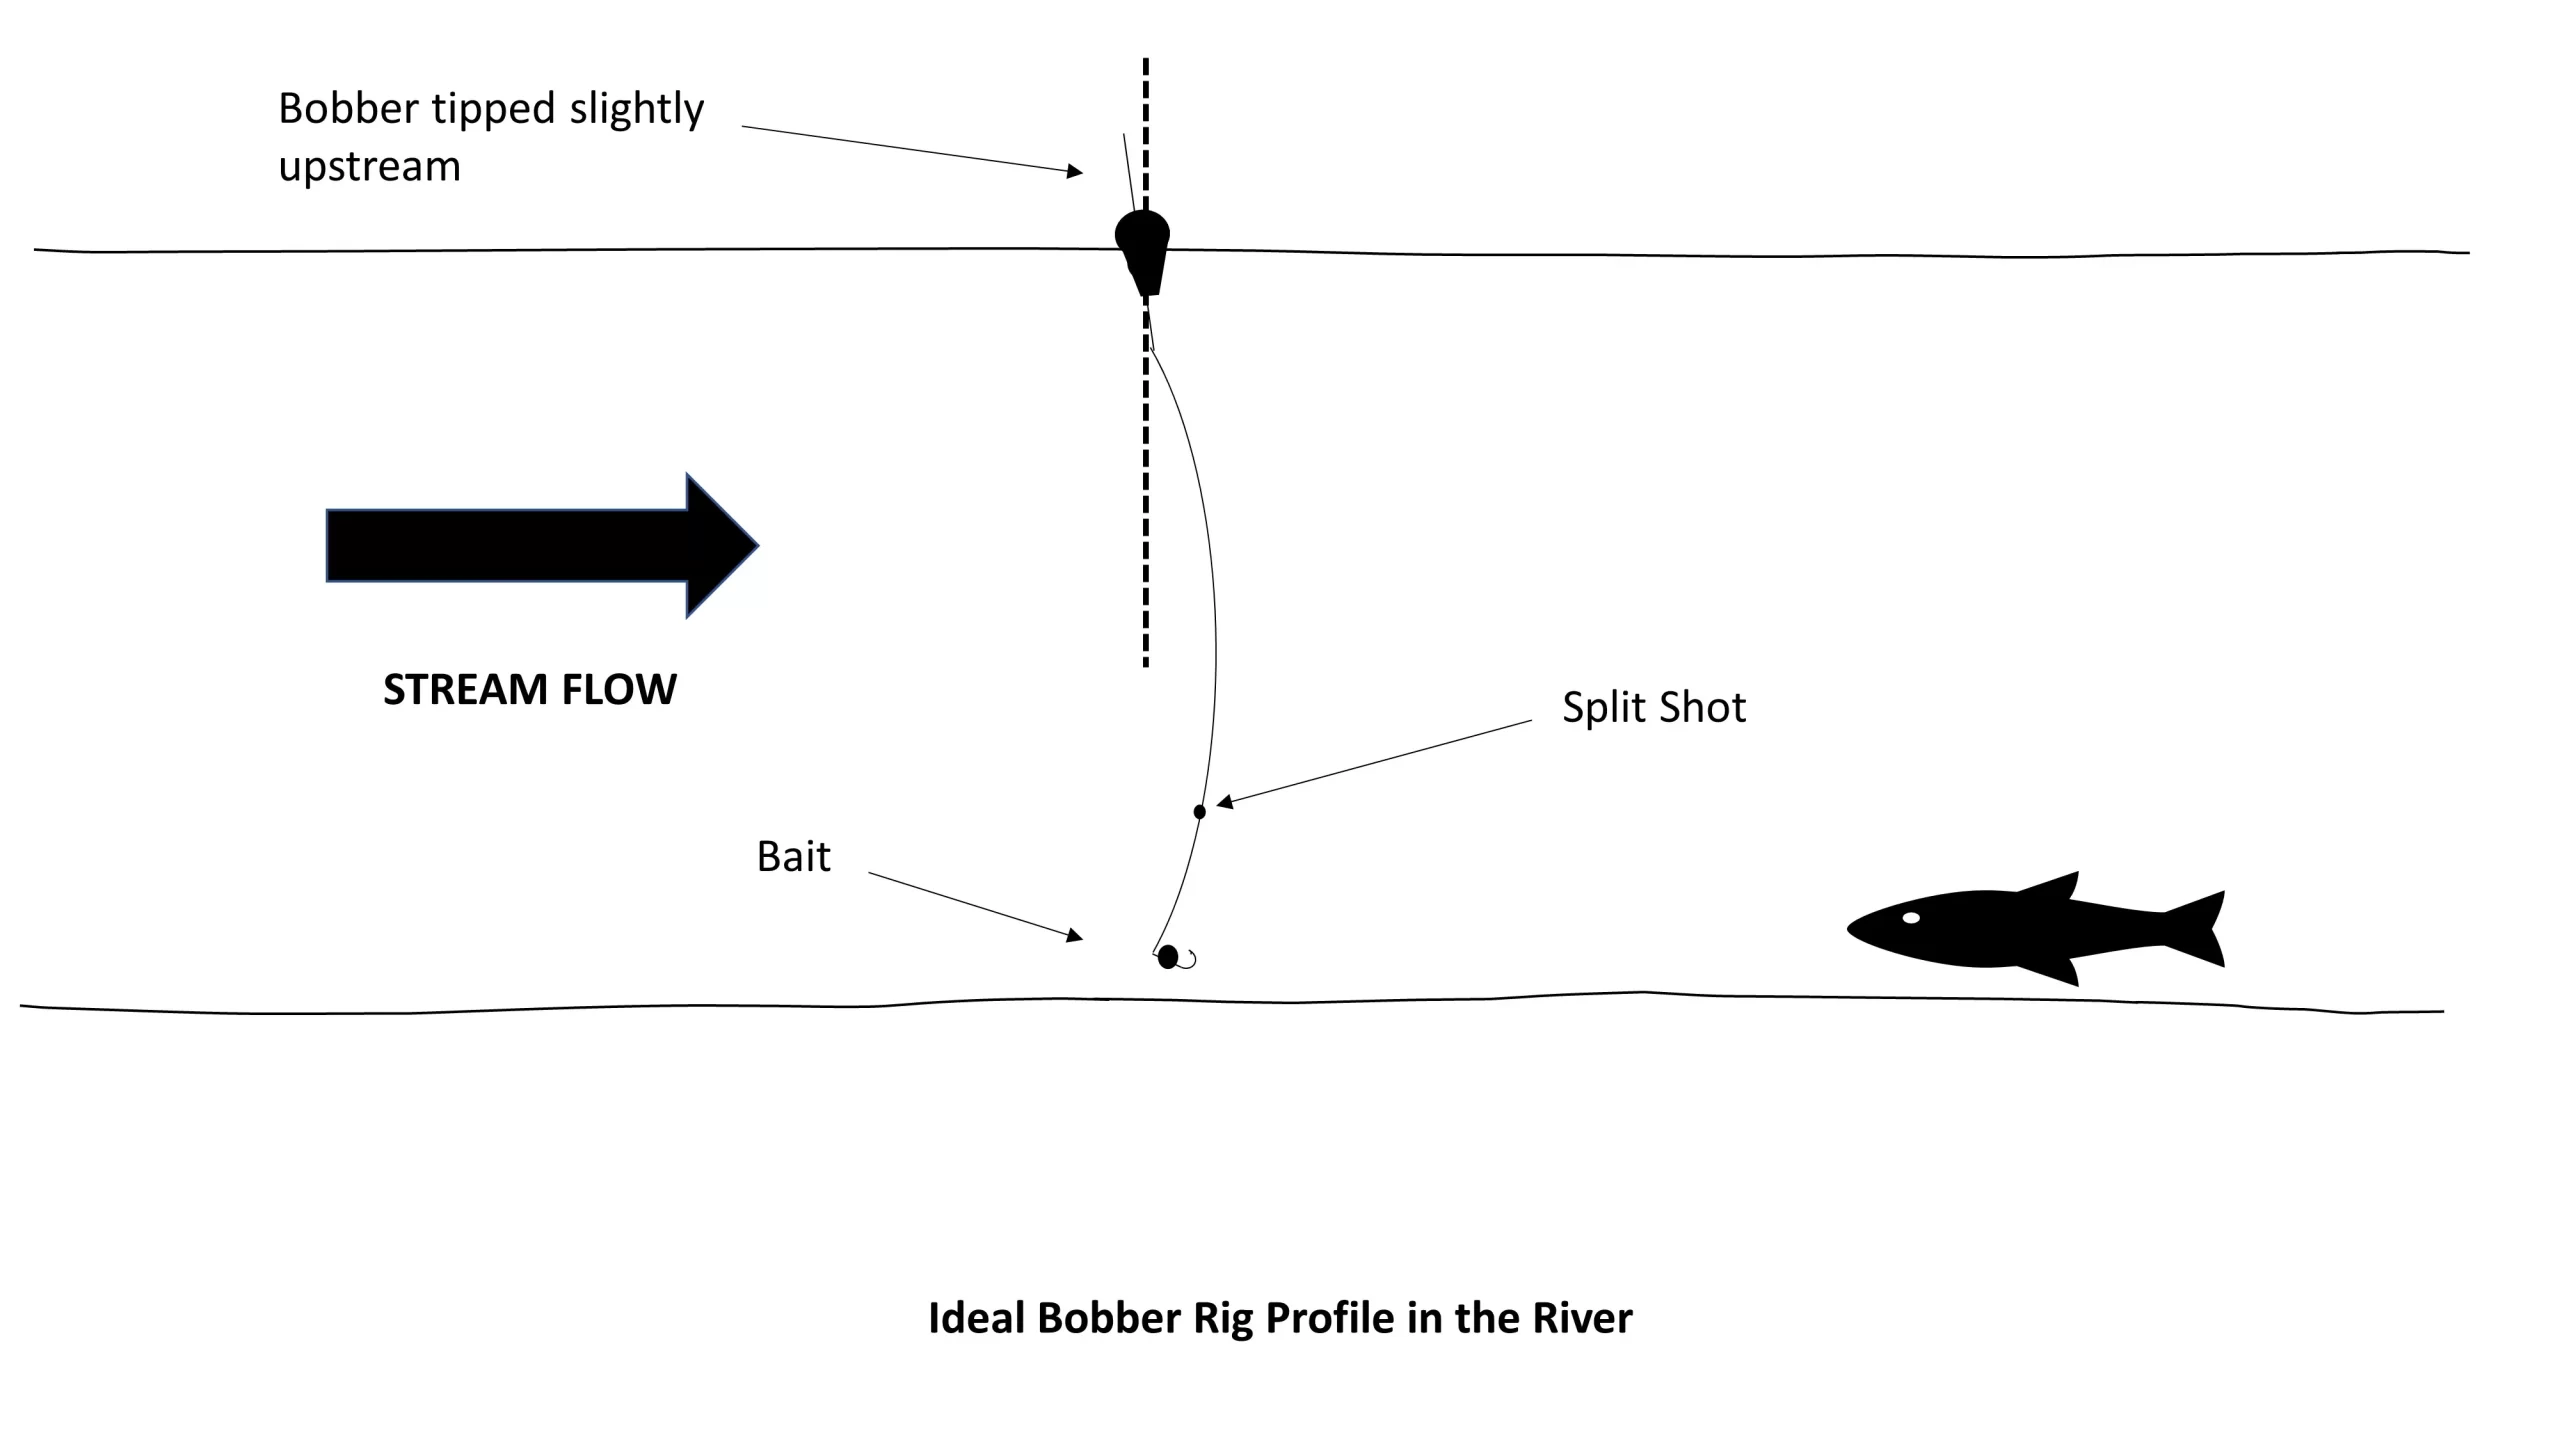
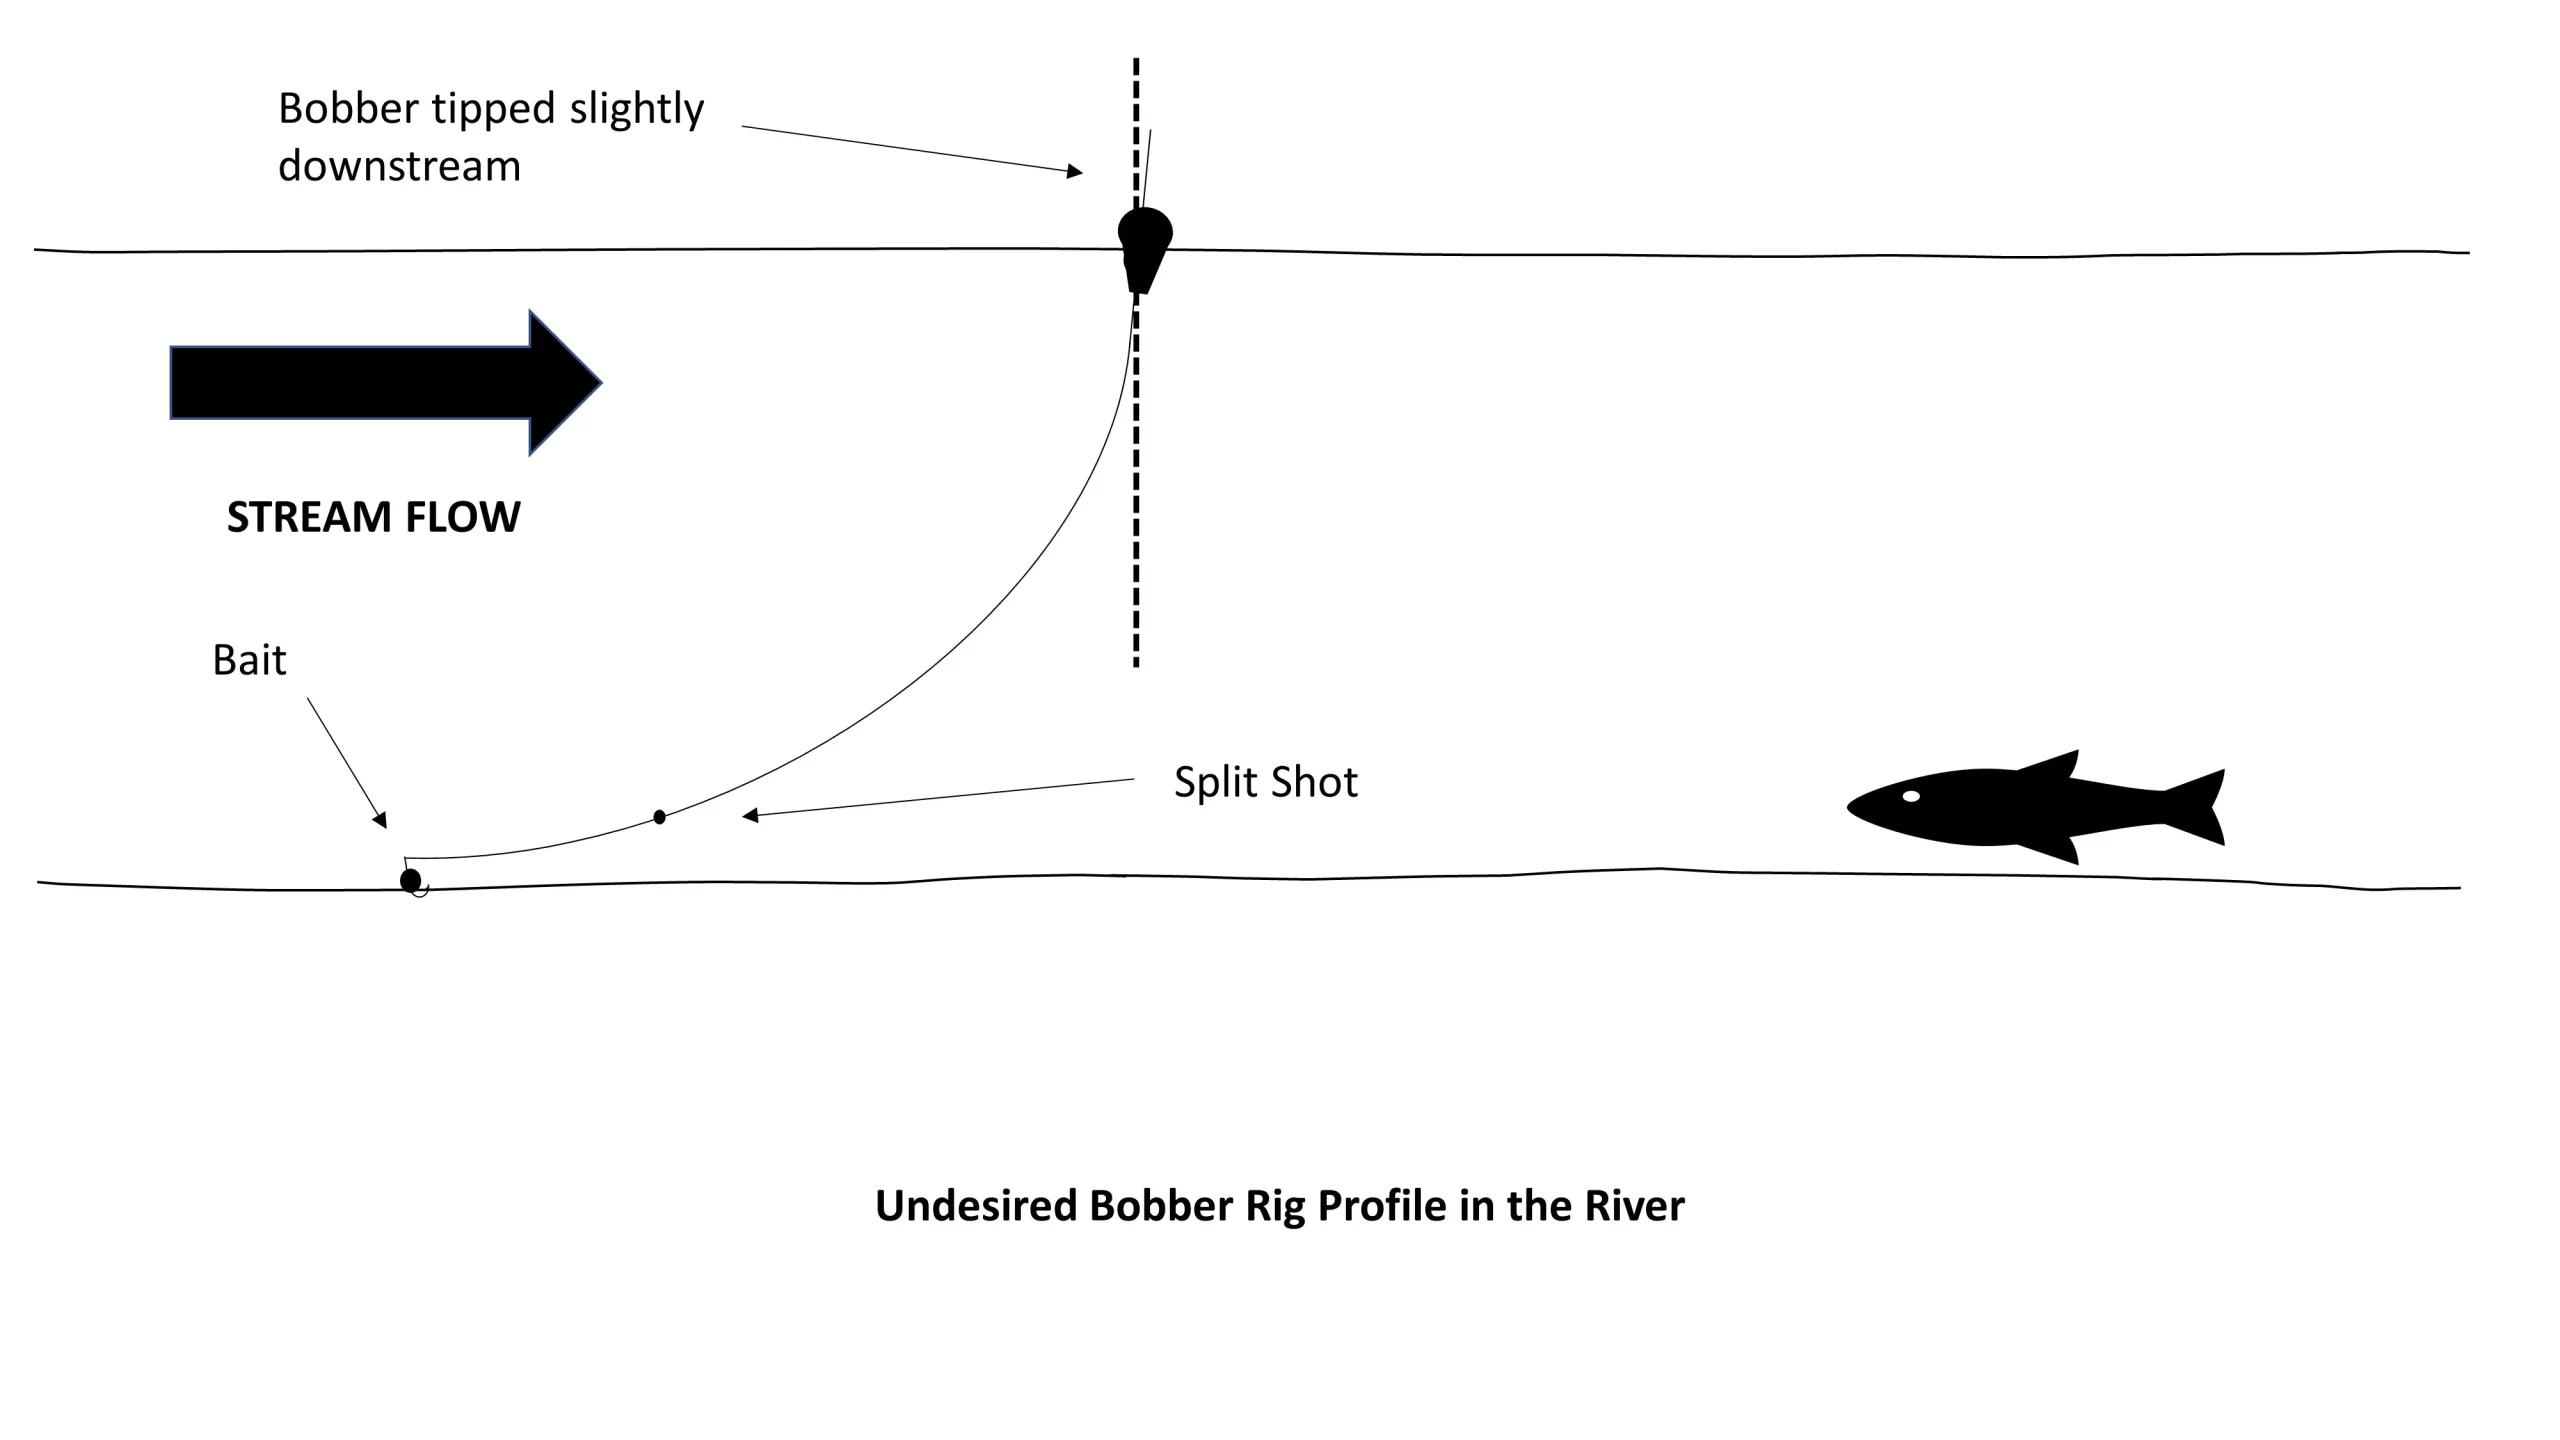
While in the river, the steelhead tend to hang out near the bottom. This is where a lot of food tends to tumble downstream. The length of the bobber rig we used on this guide trip was continually adjusted based on the depth of water in the run of the river that we were fishing. The goal was to have the bait occasionally bump the bottom to assure us that the bait was where the fish were. If the bobber just twitched occasionally, we knew we had it right. If the bobber was continually twitching and leaned forward, it was a sign that the rig was dragging on the bottom and we adjusted our length/weight until we got the twitch pattern we desired.
3. Keep Your Line Out of the Water
This was by far the most interesting thing that I learned on our trip. Our guide was constantly monitoring our lines between the rod tip and the bobber and if that line touched the water, we heard about it. This was one of the most important aspects of the technique and our guide said it could make the difference between a limit of fish and getting skunked.
The reasons for his concern make sense, when you consider what is happening under the water. In order for the bait to look natural, it must be flowing with the other debris that is flowing along the river bottom. If the line between your rod and the bobber lays in the water, the water will pull the line (and thus your rig) downstream faster that it would go naturally.
To better understand this, let’s take a look at the flow profile of a river or stream.
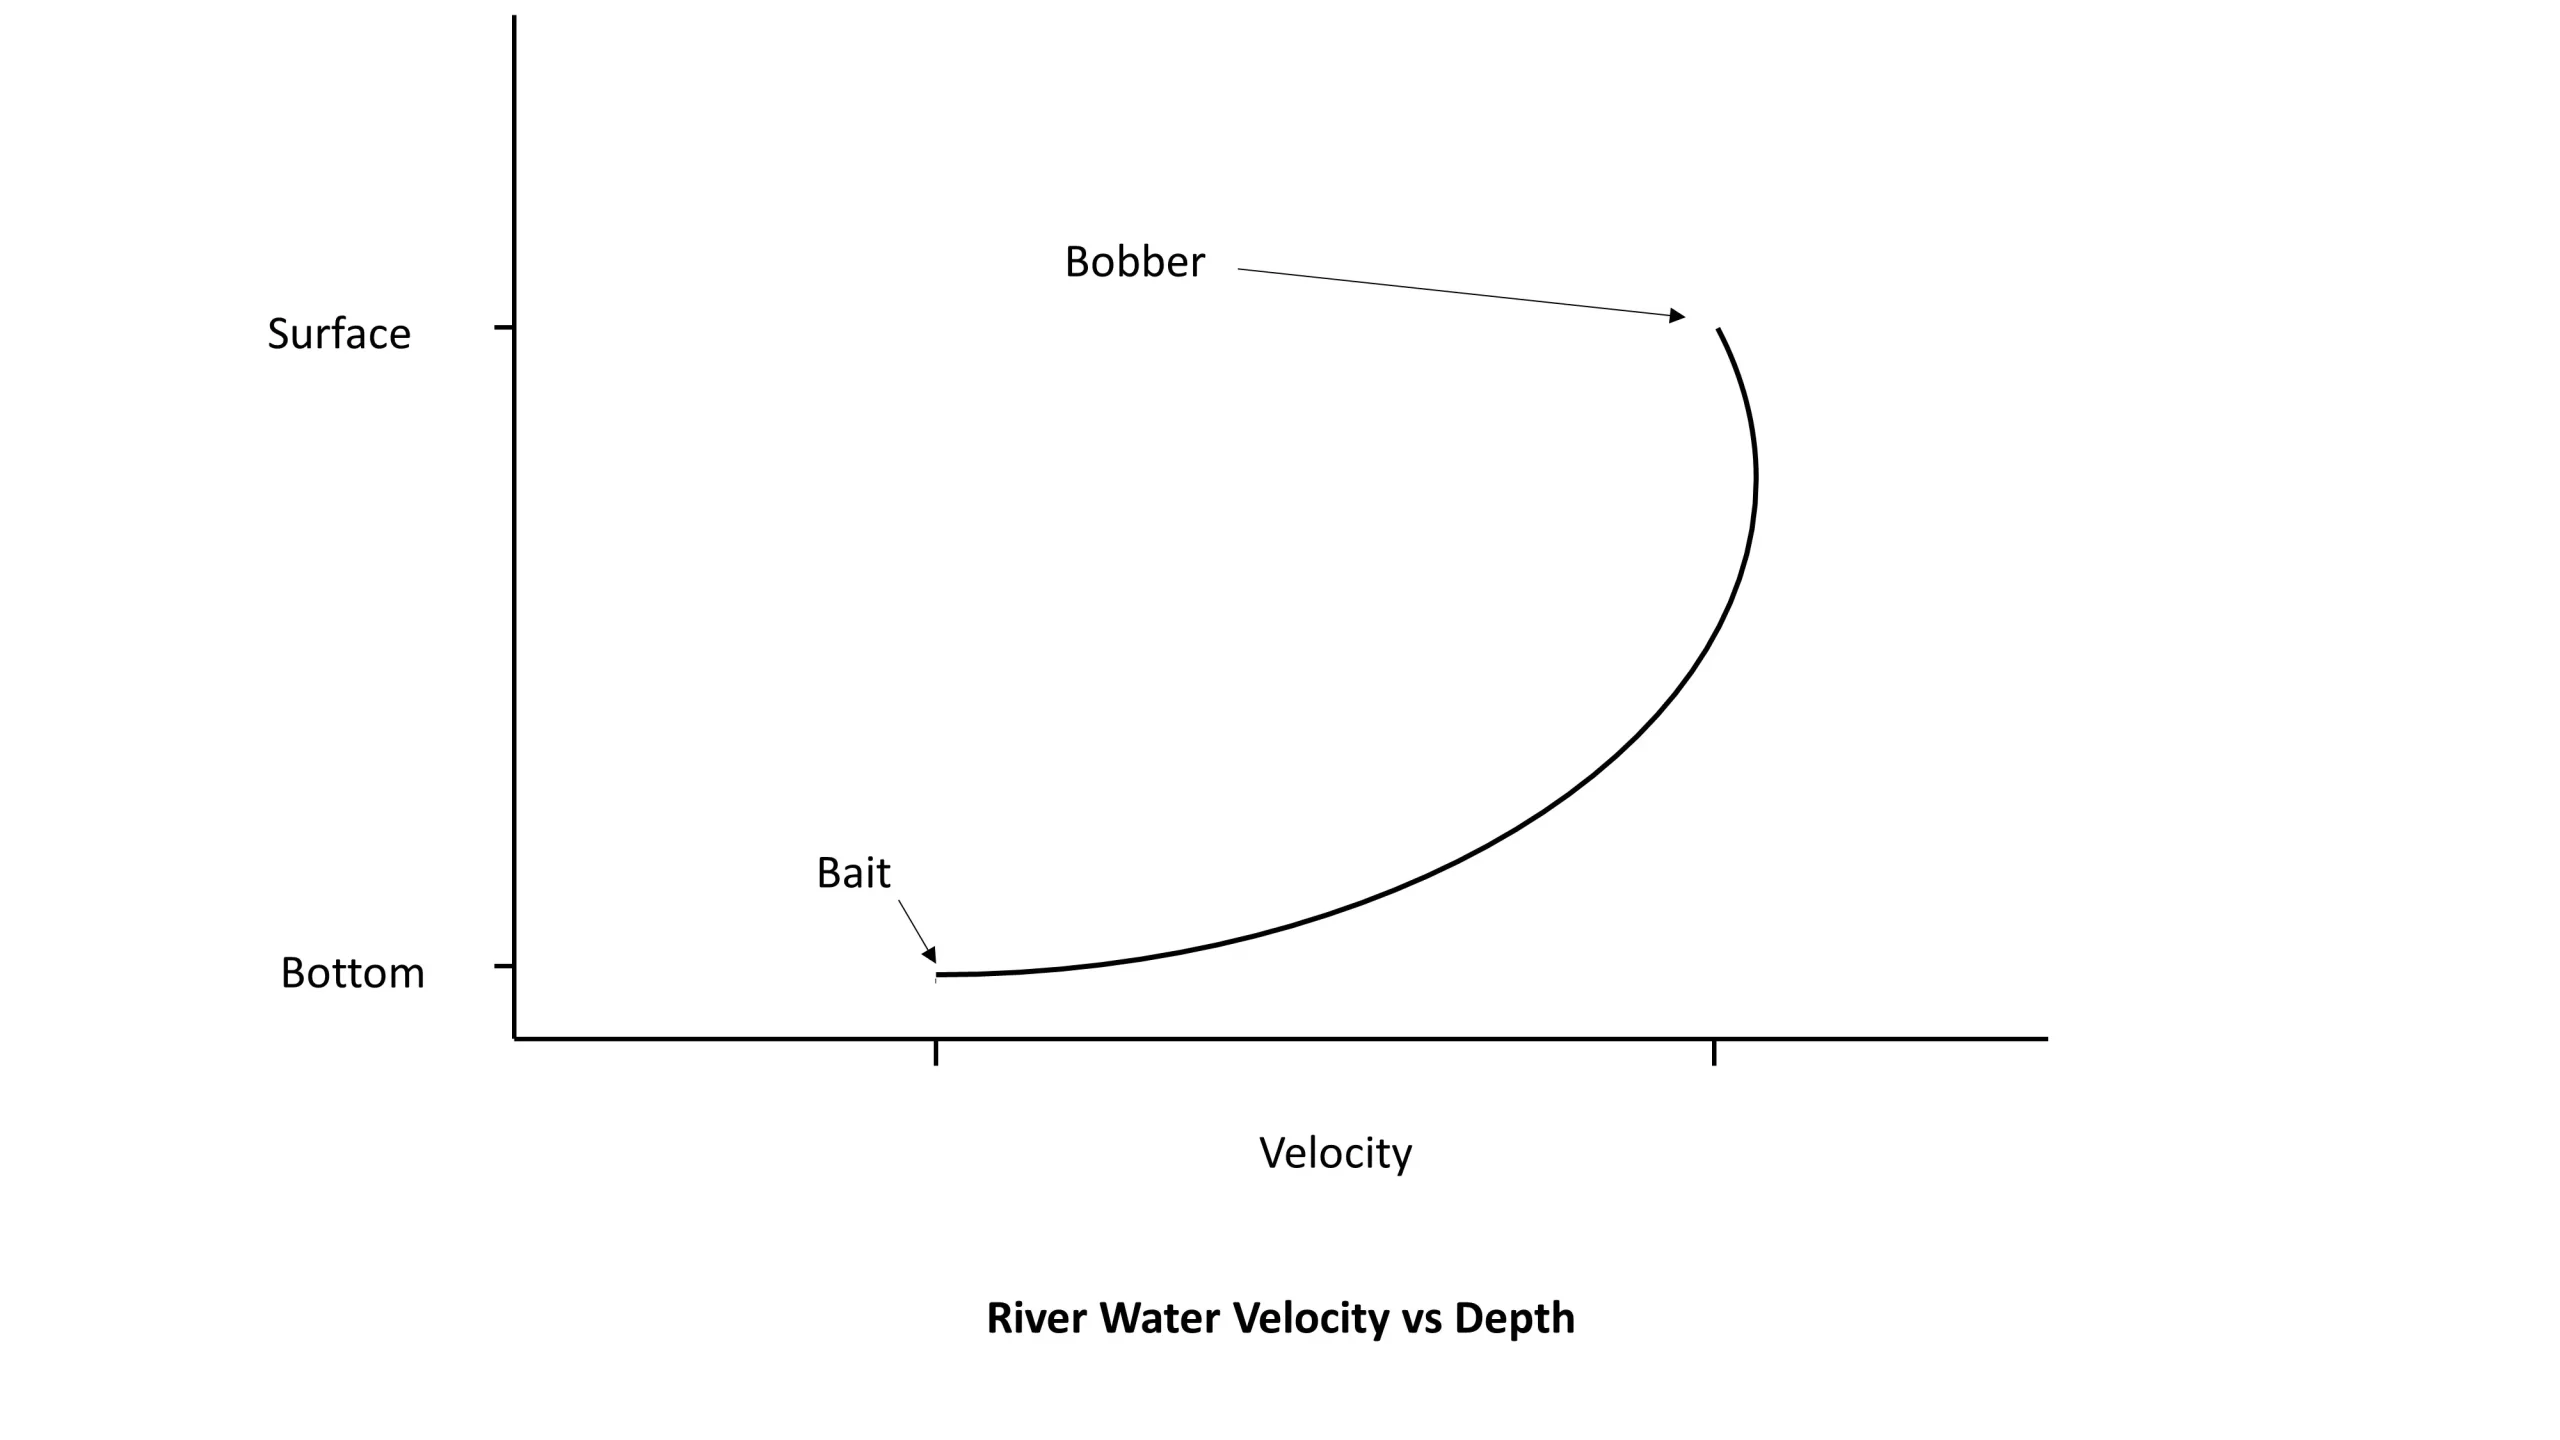
We can see that the river’s peak velocity tends to be located just below the surface, while the velocity near the river bottom is much lower. The water velocity translates into force on our fishing line. The higher the water velocity at a given section of our line, the more force on that line. This velocity profile pulls a bow in the line ahead of the bobber which will cause the bobber to lean back as long as the bait/weight is not dragging on the bottom.
However, if the bait is dragging the bottom (see below) the top of the bobber will tend to tilt downstream. This is an indication that you have too much line out or too much weight on the rig. A bait that is dragging is moving too slow relative to the rest of the debris in the current and your odds of getting bit go down significantly.
The bottom line is make sure the line runs tip to bobber throughout each and every drift!
4. Use Egg Patterns During the Spawn
When approaching any fish, the key is always knowing what they want to eat. For steelhead during the spawn, the answer is simple. The river is full of fish eggs. There are so many fish eggs in the river, that the fish really don’t need to focus on much else. That’s not to say that they won’t, but using egg patterns is a great first choice when fishing during the spawn. If the stretch of river you are fishing is void of eggs, you may need to switch to something else like waxworms or flies. But very often, egg patterns or spawn bags is all you will need.
If you try this technique, drop a comment below and let us know how it goes. We’d love to hear from you!
Three Knots Every Fisherman Should Know
* This page contains affiliate links. The Great Lakes Fisherman may earn a commission on items purchased through these links. For more on this, please click here.
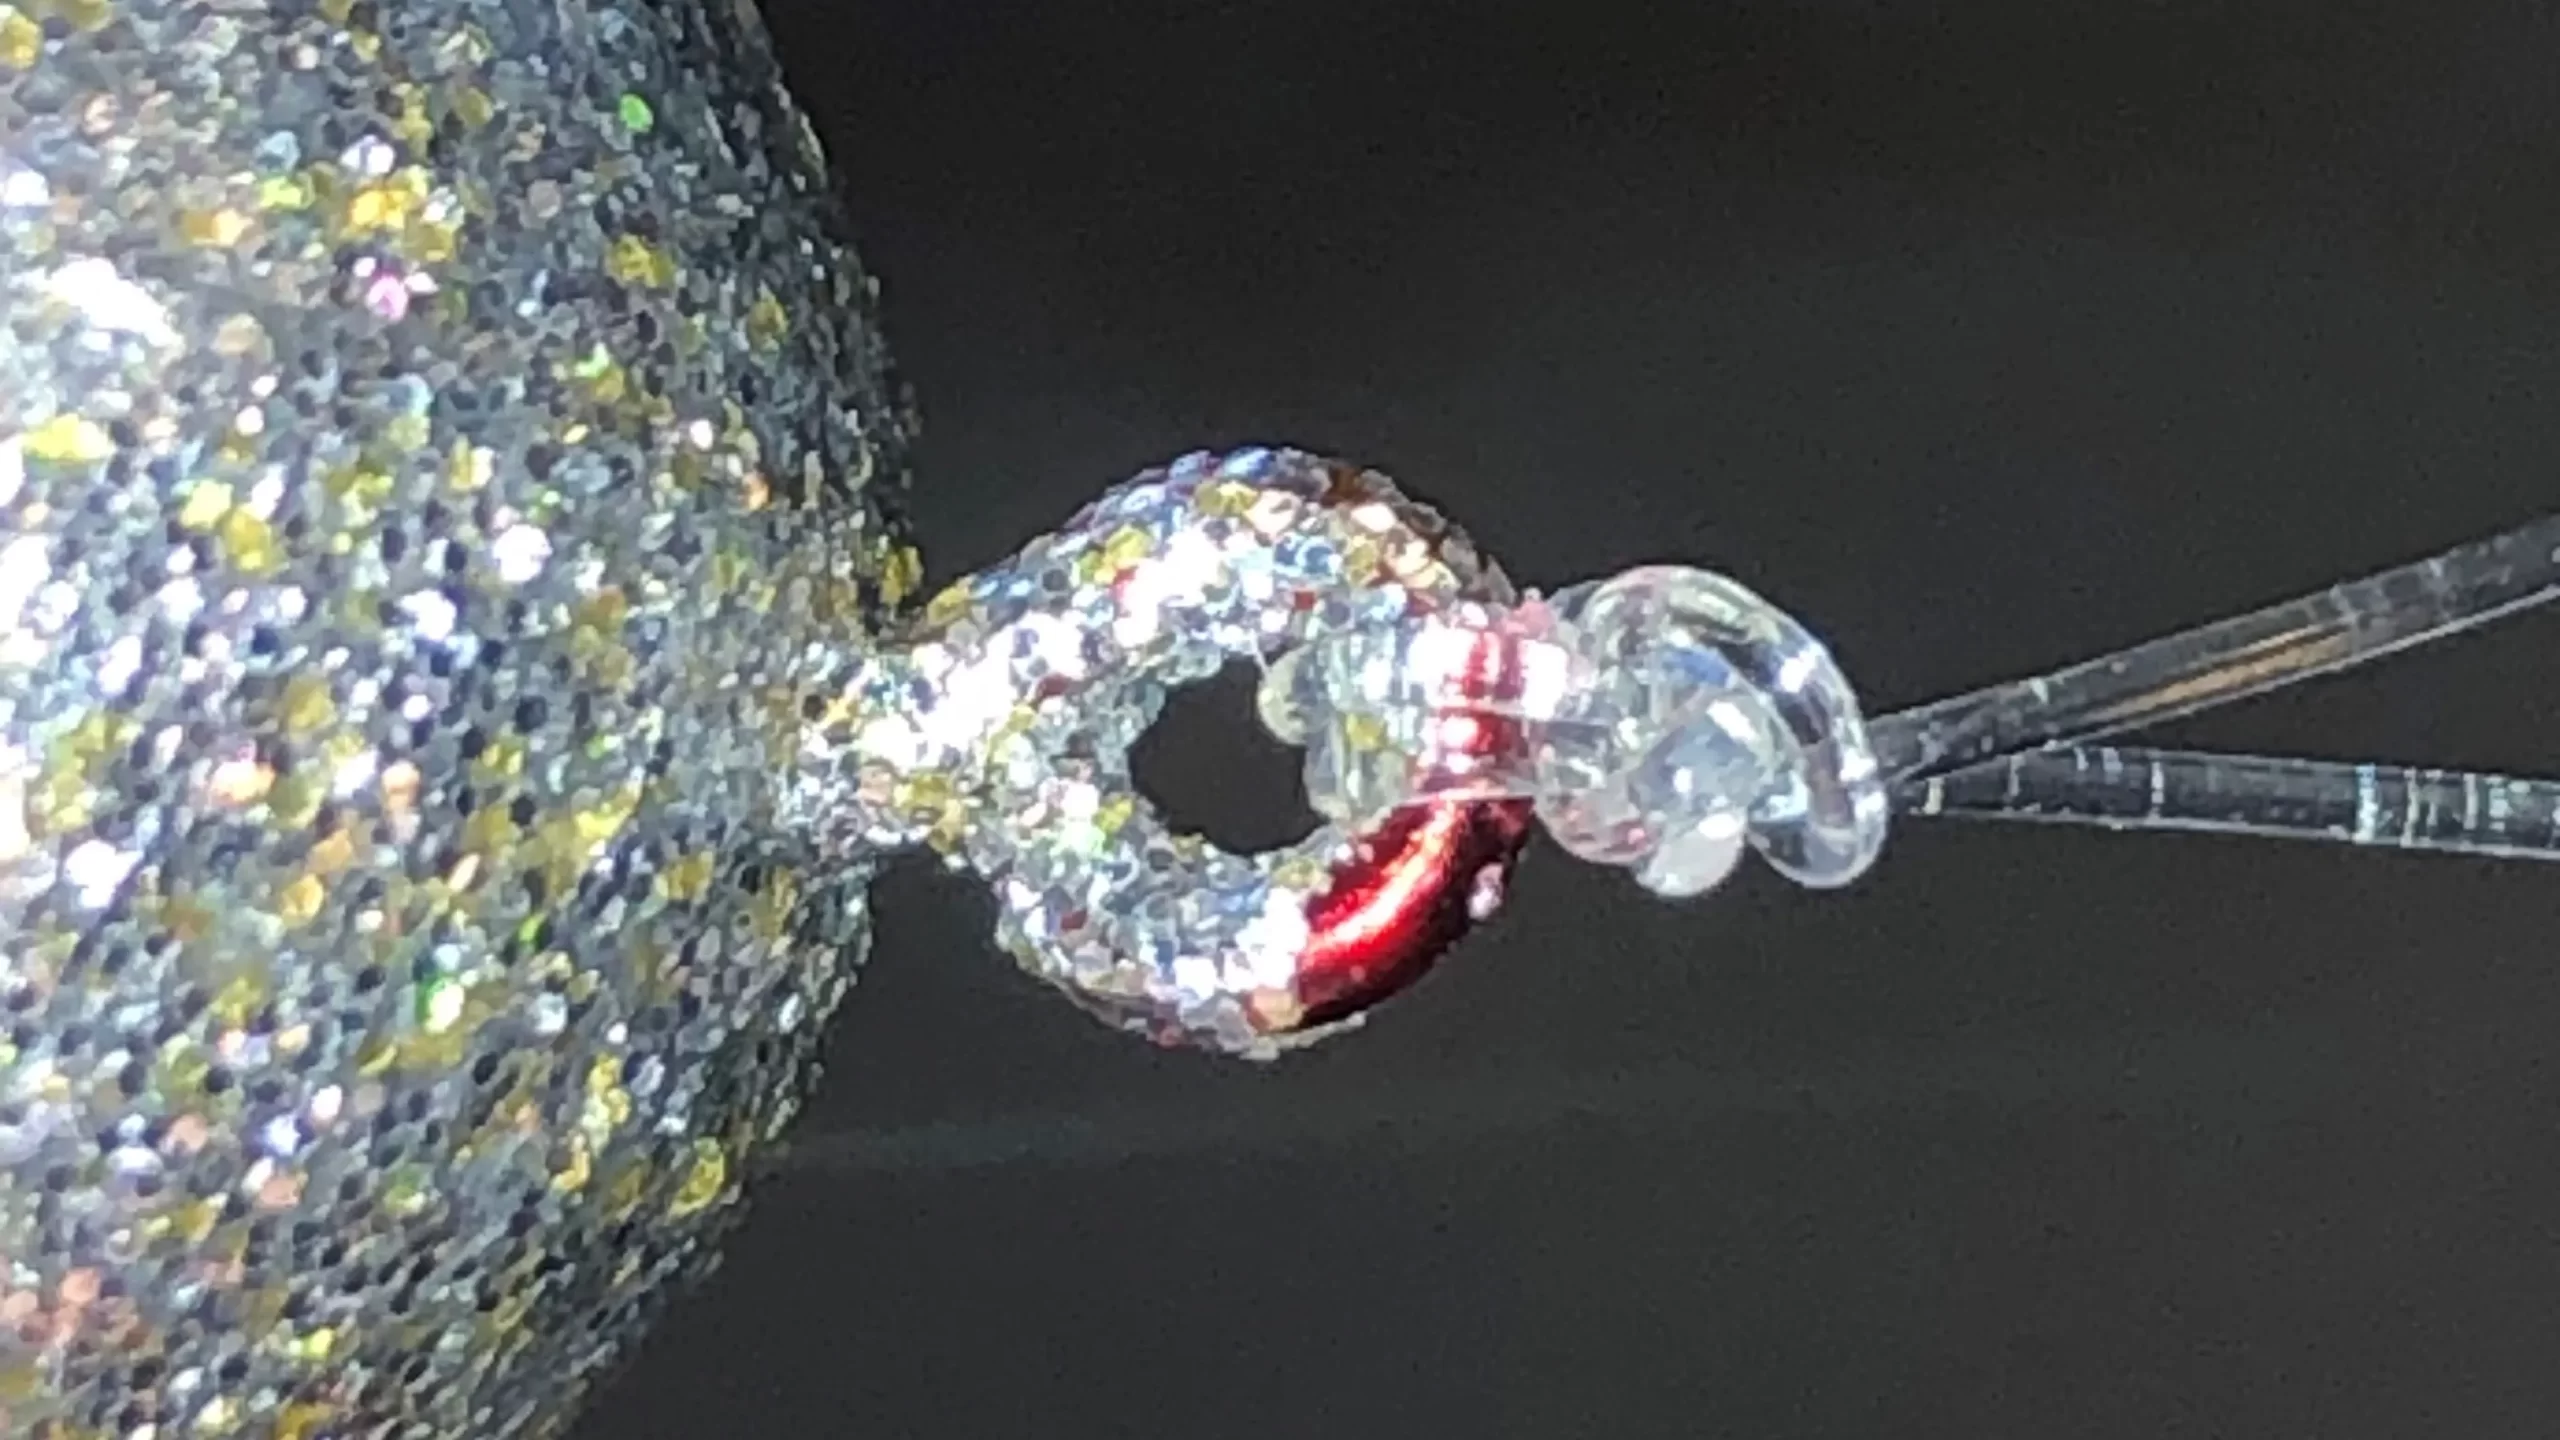
When it comes to fishing knot selection, some are better than others. There are countless knots out there and each have their advantages and disadvantages. For fisherman, knots can be difficult depending on the conditions. Tying a rope is one thing. But trying to tie a 4 lb flourocarbon leader onto a hook with a eyelet the size of a pinhole is another matter completely. Furthermore, doing so while bouncing around in a boat can make the task nearly impossible. While there are plenty of specialty knots to know for specific situations, here are the top three knots that every Great Lakes fisherman should know.
The Palomar Knot
Best Use: Terminating line at hook/lure
Dexterity Level: Easy
Strength Level: Strong
Advantages: Terminating line at terminal tackle
Disadvantages: Threading through small lure eyelets; only practical for terminal tackle.
The Palomar knot is, in my opinion, the best fishing knot for tying on terminal tackle. It’s balance of strength and its ease of use make it the ultimate knot for tying on your lures. One of its major drawback is that can only be used for tying onto your terminal tackle. This is because one of the steps in tying the knot involves passing the lure through a loop in the line. While this is great for hooks, swivels and smaller lures, it can get very cumbersome for tying on a 4 foot long leader, for instance. It is also very difficult to tie onto very small lures and hooks as the line needs to double up though the eyelet. Nonetheless, as fisherman, the final knot that attaches to our larger hooks and swivels are some of the most common knots we tie, which is why this is a favorite of many.
The Improved Clinch Knot
Best Use: Terminating lines at small terminal tackle; attaching leader to a swivel that is already on the main line
Dexterity Level: Easy
Strength Level: Medium
Advantages: Terminating line anywhere; good for smaller tackle
Disadvantages: Not as strong as the palomar; not the best for terminating medium-large tackle.
The improved clinch knot is often the first fishing knot we learn. Its versatility makes it great for use in many situations. It is particularly good for tying smaller line to smaller tackle as the line only passes through the eyelet once. It is also a great knot for adding a new leader into a main with a barrel swivel already on the line.
The Double-Uni Knot
Best Use: Tying 2 lines together
Dexterity Level: Medium
Strength Level: Strong
Advantages: Relatively easy to tie; strength
Disadvantages: There are arguably some stronger line-to-line knots out there
Every fisherman needs to have one knot in their arsenal for line-to-line terminations. In my opinion, this is the best all around knot for this purpose. While no line-to-line knots are easy to tie, especially in a boat, this one is one of the easiest. It is also a very strong knot and should hold up in the toughest situations.
