Best Lures for Northern Pike
* This page contains affiliate links. The Great Lakes Fisherman may earn a commission on items purchased through these links. For more on this, please click here.
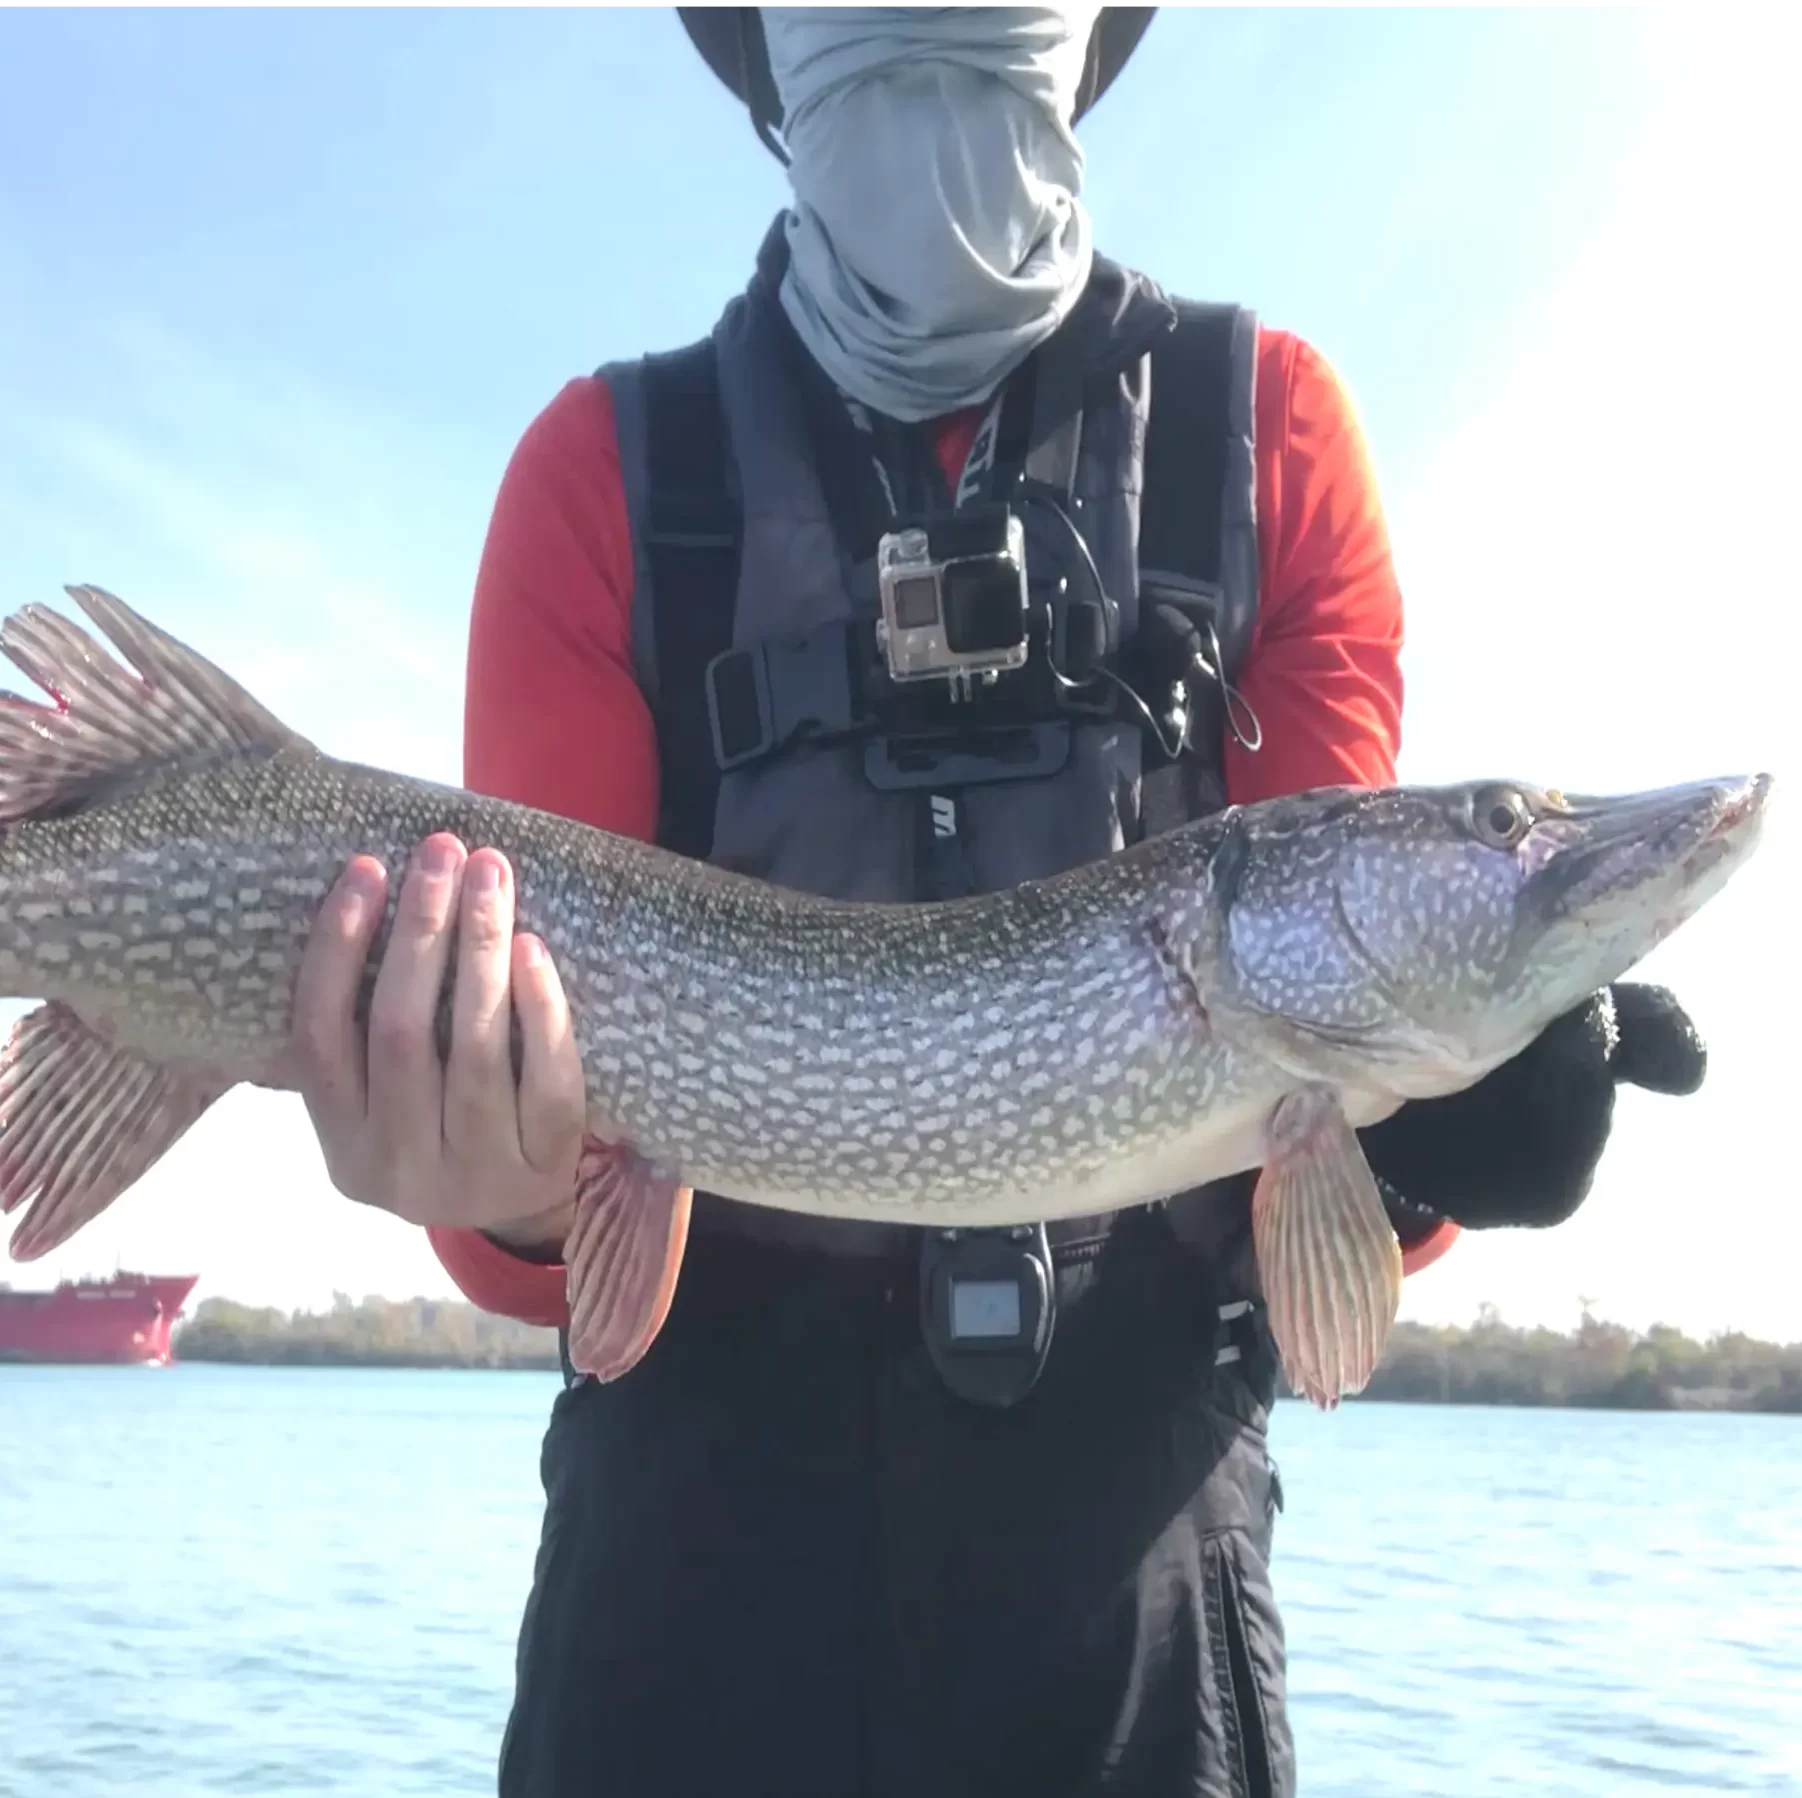
One of the most exciting fish to catch in the northern regions of the US and certainly in Canada is the northern pike. They are one of the most explosive when attacking a moving bait, especially when water temps are above 70 degrees. And while they’ll hit nearly every bait in your tackle box, some work better than others. In this article, I’ll reveal what I believe to be the best three baits for northern pike.
#3: The Jerk Bait
Pike get jacked up at the sight of anything squirming or struggling. To them, it’s a sign that something is injured or is dying and has lost its ability to swim and escape. To them, this means an easy meal. And one of the best artificial baits that can mimic this process, is the jerk bait.
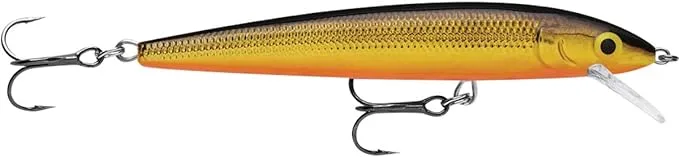
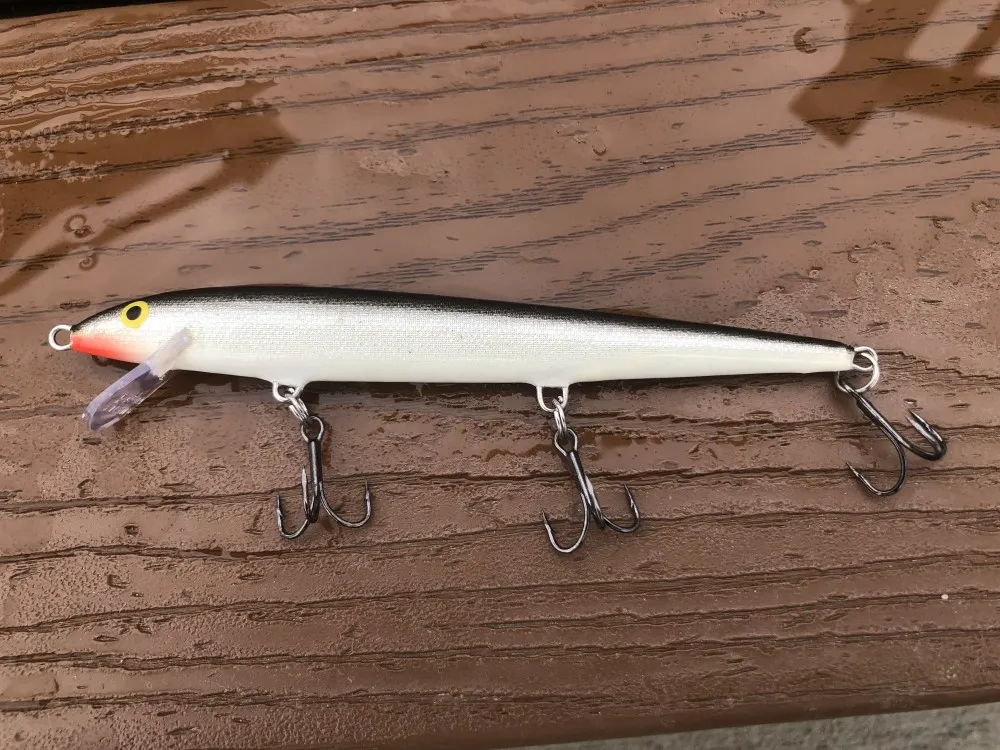
A jerk bait is most effectively fished, as its name suggests, by “jerking” it through the water. Typically, a pause is included between “jerks” to give the bait the illusion of struggle. The baits come in floating, sinking and suspending (neutral buoyancy) varieties. While there are many of these on the market, my personal favorite is the Husky Jerk, made by Rapala.
For pike, I prefer one of the larger varieties (size 12 or 14). This is because pike are fearless and the larger size will give you the best chance at landing a trophy fish. For color patterns, the world is your oyster, but a traditional gold is a great color to start with.
#2: The Five of Diamonds
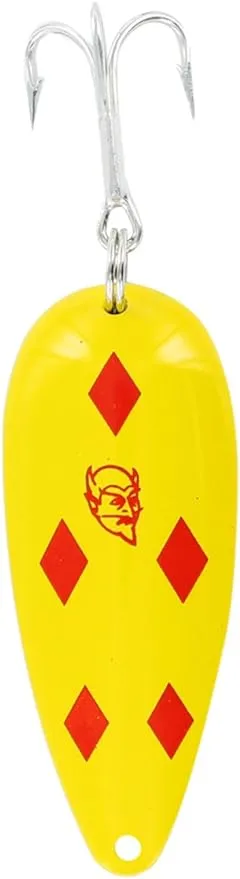
Probably the most traditional pike bait on the market is the Dardevle spoon. And while these are available in a variety of color patterns, none are more infamous and legendary than the five of diamonds. The combination of red and yellow, especially in waters high in tannins (tea-colored water), seems to drive pike crazy. This makes it a very popular color in many northern lakes of the upper Midwest and Canada.
#1: Bucktail Spinners
In my experience, no other bait out fishes bucktails for pike. These can be fished effectively for northern pike, no matter where they roam. And while many of them can be effective, there are two that i have personally had the most success with.
The one I like to use when fish waters with really big pike (30″+) is a large (8″) black bucktail with orange blades. Orange is a great color in shallow water that catches a pike’s attention. And once they start to chase, the wiggling and pulsing black skirt is nearly irresistible.

The other bucktail spinner I like to use for places where are the pike aren’t as big, is the Mepp’s spinner pictured below. This spinner has caught more pike for me than any other lure in the waters of Ontario. The little red tag sticking out of the tail is key. The blade color can depend of the water. Gold is great in tannin-stained water, especially on sunny days. But a silver/chrome blade can be a great one as well.

Give one of these baits a try the next time you chase northerns and your sure not to be disappointed.
Fun Way to Catch Spring/Summer Bluegill
* This page contains affiliate links. The Great Lakes Fisherman may earn a commission on items purchased through these links. For more on this, please click here.
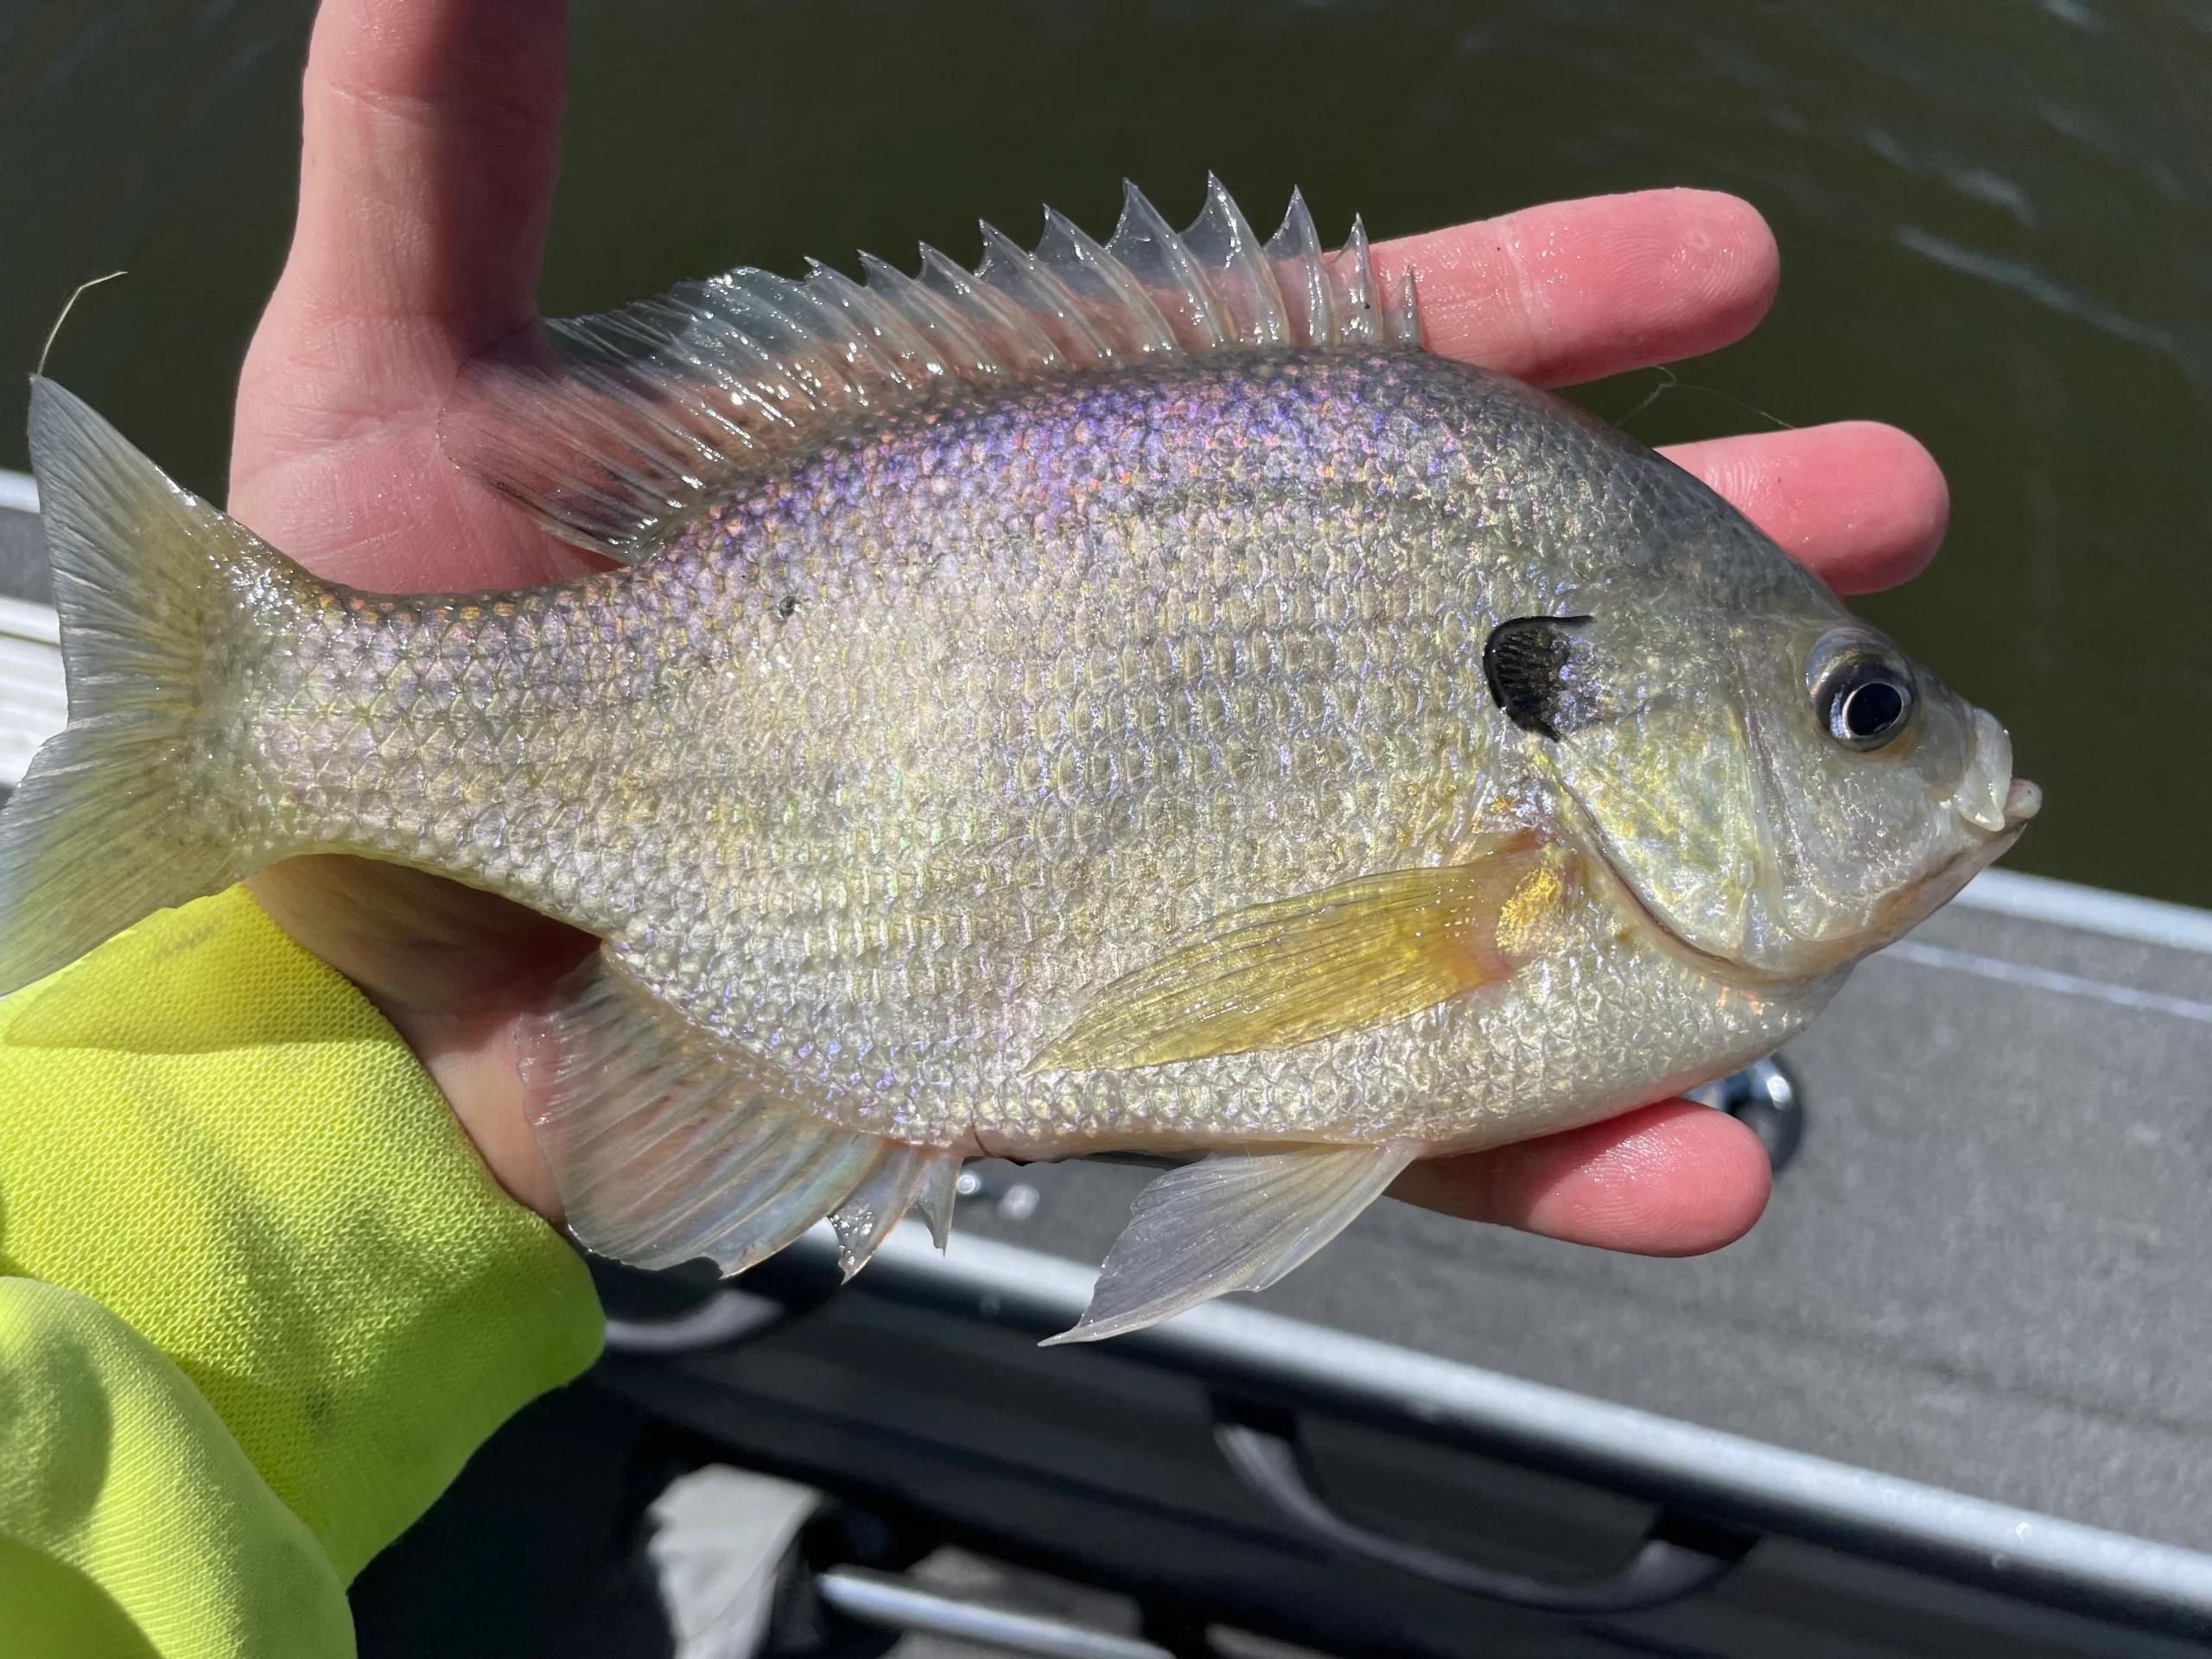
Nearly everyone who calls themselves an angler has caught bluegill. The sunfishes are often the first fish we learn to catch. We all remember the days when fishing meant watching a floating bobber. We often had dreams and even daytime visions of that bobber slipping under the surface, triggering an adrenaline rush in anticipation of what we might bring out of the depths. That excitement was what fishing was all about. But there is another way to catch sunfish that, in my opinion, is even more exciting that the bobber/worm method and a lot less messy.
If you’ve never caught a sunfish on a fly, you are missing out. Now before you dismiss the rest of this article, please understand that you don’t need a fly rod & reel to catch these fish on a fly. In this article, I’ll go through the methods that I use to catch these fiesty critters that is so easy, even a 4 year old can do it!
The Rig
The way you’re going to present the flies to the bluegill without a fly rod is to use a clear plastic float called a casting float to provide weight to the rig. This is followed by a 4′ leader and finally, the fly.
The Floats
The floats used for this rig are called “casting floats”. They are torpedo shaped clear plastic floats and they come in 2 main varieties. The first type lets you pass the line through a rubber tube that runs through the middle and connects two separated ends of the float. Once the line is through, the two ends are rotated in opposite directions to twist the tube which grips the line. This allows you to easily adjust the distance of the float from the fly on the end.
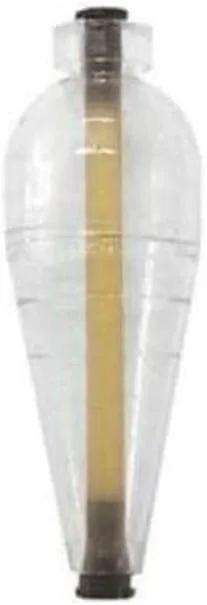
The other type is a single solid piece with eyelets on each end. On this type, you tie your main line to the narrow end of the float and tie the leader to the fat end.

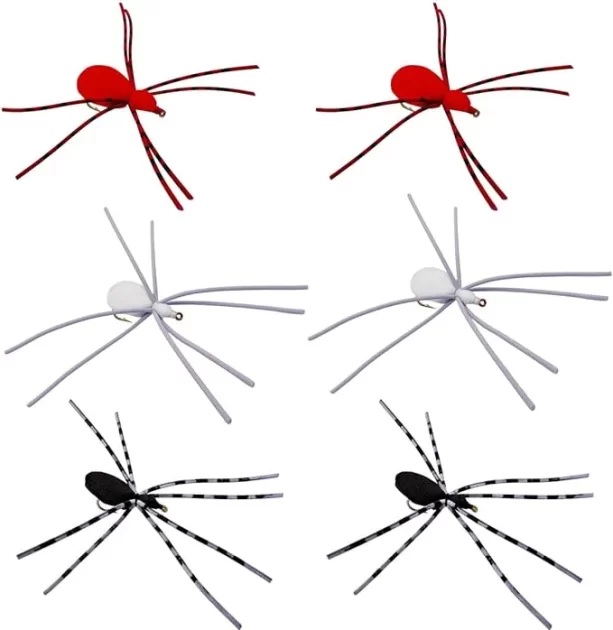
Preferred Flies
Bluegill and other sunfish are aggressive fish and it doesn’t take a lot to fool them. So there are a number of flies that you can use that they will readily take. The real trick is in getting them to see your bait. So a fly that disturbs the water surface is a prime choice. Here, I will present my 2 favorites.
The Popper
The popper is effectively just a piece of cork that is painted, with a hook in it. Most of them also have eyes painted on and some sort feathery tail. Some also have a couple of rubber legs.

The Rubber Spider
The rubber spider is a bait made to look like, well, a spider. The body is usually made from some sort of foam material and the legs are made of rubber. The foam ensures that the bait floats and stays on the water surface.
How to Fish This Rig
Fishing this rig is easy, but it’s important to note that it won’t do well in windy conditions. To fish it, simply cast the float/fly out over water that you suspect has sunfish and reel up any slack. After the bait has settled for 5-10 seconds, give it a twitch. If using a popper, the bait should bubble the water slightly. If using a rubber spider, the legs should leave a slight wake in the water. This disturbance is irresistible to these fish and they will often hit it on the very first twitch. If not, just repeat the same pattern, a twitch, followed by a 5-10 second.
Watching a sunfish hit the surface of the water to take the bait is every bit as exciting watching that bobber plunge. What’s every more exciting is when something even larger than sunfish hits the surface.
First Fishing Gear for Kids
* This page contains affiliate links. The Great Lakes Fisherman may earn a commission on items purchased through these links. For more on this, please click here.
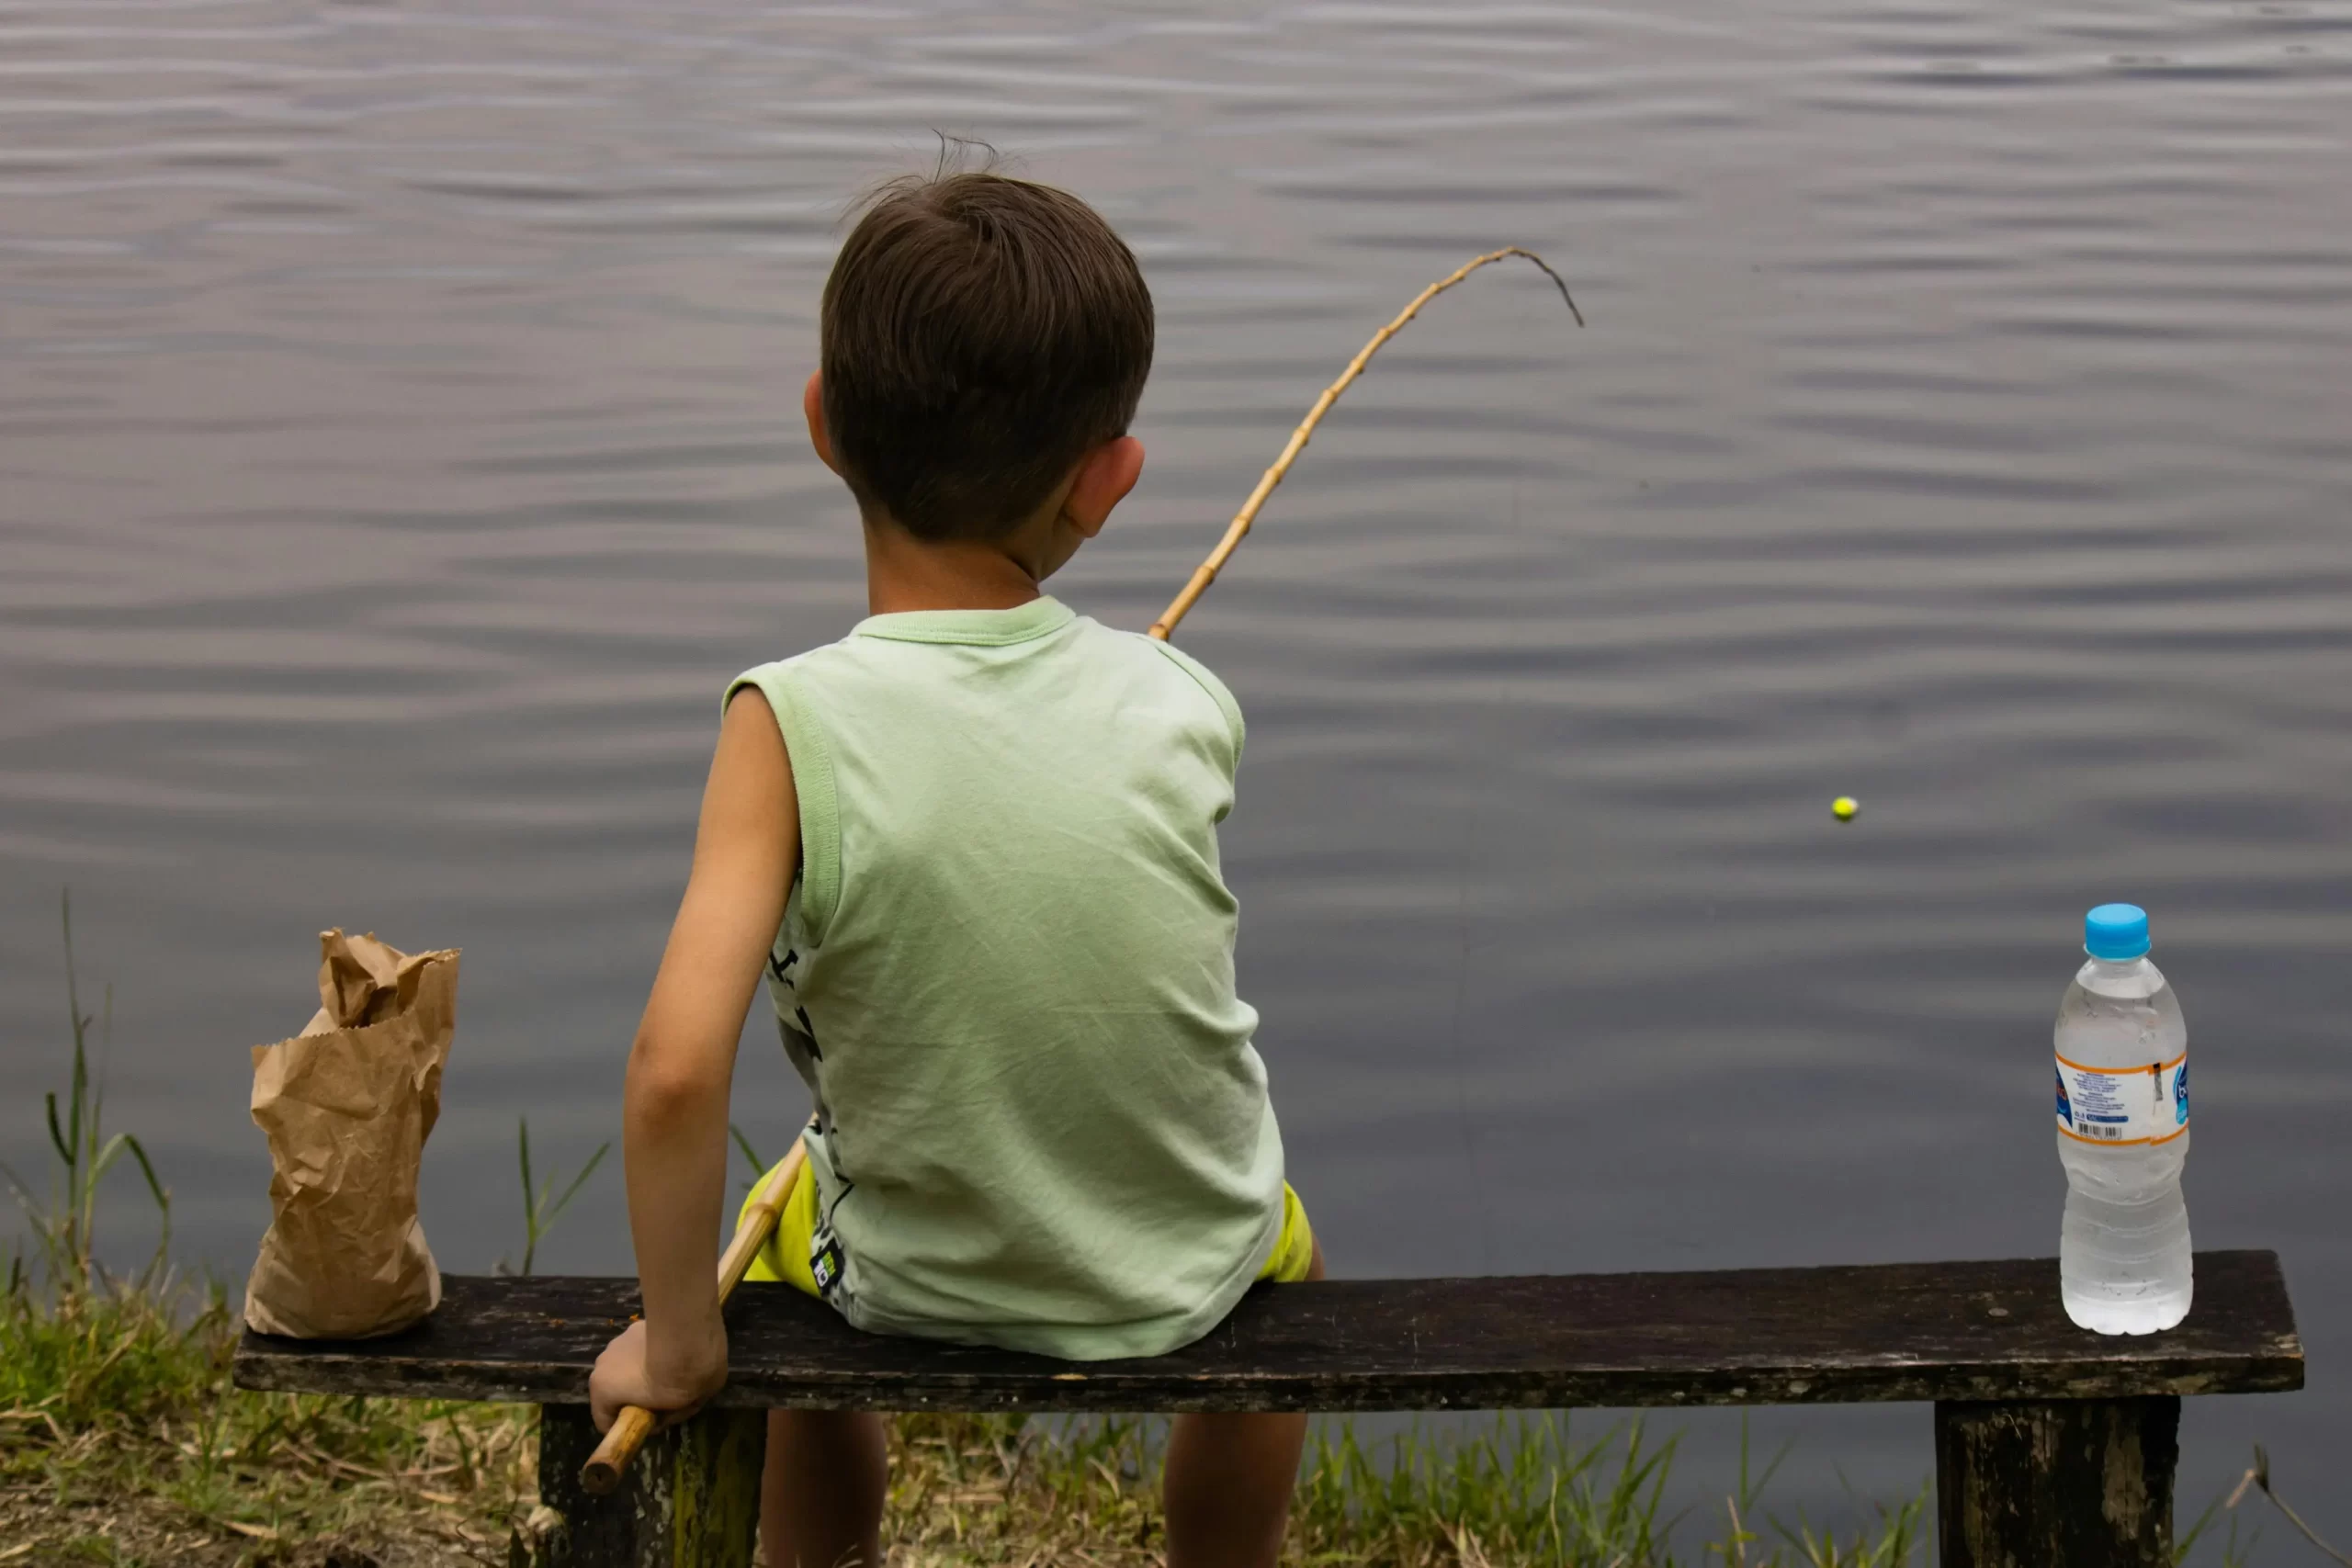
When it’s time to introduce your child to fishing, it can be overwhelming when deciding which gear to buy. There are seemingly infinite choices on the market and with the high inflation the last few years, it can be difficult to know what to spend your money on. Fear not! The Great Lakes Fisherman is hear to help you through this process and ensure that your young angler has an enjoyable day at the lake!
Rod & Reel
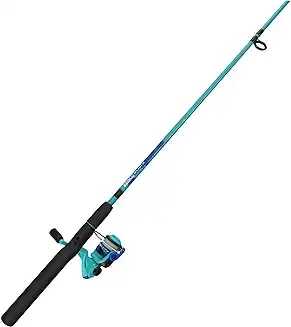
Many kids start out with a closed-face reel. These are certainly the easiest to use, and if the child is 4 or younger, might be the only realistic option. I am not going to cover these reels, because they are not used for very long before your fisherman will be ready to graduate to the next setup. Personally, if the child is 5 years or older, and they can handle it, I like to start them off with a spinning reel right away. A great choice for kids in this age group is this combo made by Zebco. It comes pre-spooled with 6 lb. test line so it’s ready to fish. It gets high marks from Amazon customers and will do the trick for a couple of years until the child has shown a love for the sport at which time a higher quality setup can be acquired.
Tackle Box
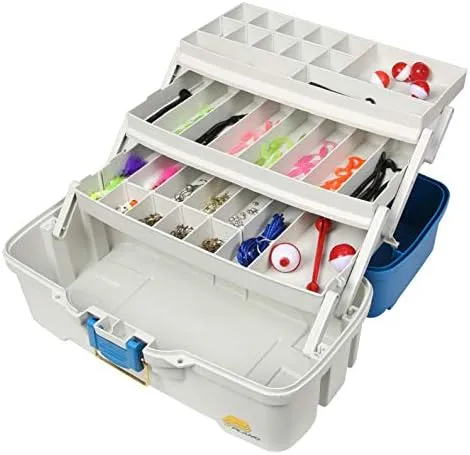
Every young angler needs a tackle box. It’s a badge of honor and let’s the world know, “that’s right, I’m a fisherman”. For starting anglers, it’s hard to beat this one from Plano which comes with all of the basic terminal tackle needed to get a kid started: 1 – Stringer, 1 – Hook Disgorger, 6 – Assorted Floats, 24 – Size 6 hooks, 24 – Size 8 Hooks, 24 – Size 4 Hooks, 18 – Assorted Swivels, 24 – Assorted Split Shot, 18 – 4in Worms, 24 – Assorted Grubs, 12 – Assorted Jig Heads, & 12 – Assorted Crappie Jigs.
Other Baits Worth Trying
The standard bait that everyone is familiar with is a bobber and hook. It’s hard to argue that this setup, baited with a worm, isn’t one of the most productive out there. For most children who lack focus, it is probably the best choice. However, if your child is more focused than your average kid, trying a small jig with a grub or other plastic bait can be as productive and will likely catch some larger fish as well.
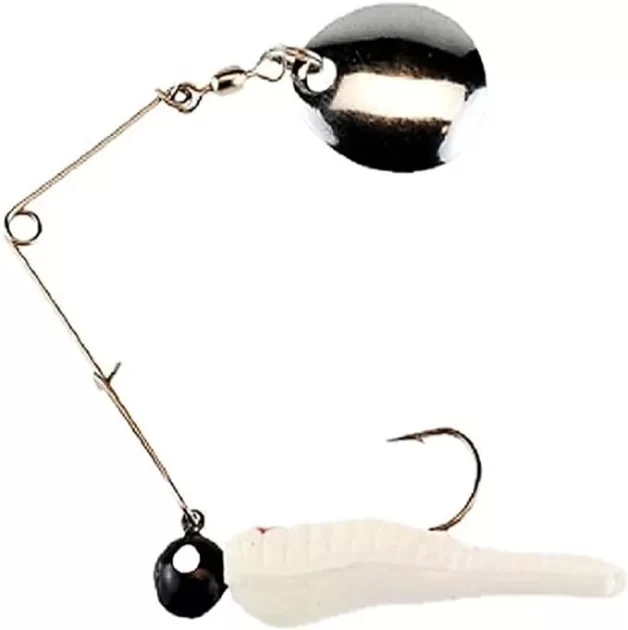
Another bait that I think is great for kids who can cast and retrieve is the Beetle Spin. This bait is generally for catching fish that are a bit larger that the smaller sunfish. Crappie, bass and pike will readily hit this bait and it is one of the most productive baits in my tackle box. This bait is made to be cast out and then slowly retrieved. You will be surprised at how productive this bait is. It may just be the bait that catches that first lunker and solidifies your child’s love of fishing for life.
A Final Word
The biggest mistake many parents make when introducing their child to fishing is not making it fun for them. At these young ages, a child’s attention span is short and trying to keep them fishing when they are clearly ready for something else, will only make them hate it. When taking your kid fishing, have a back up plan for when they get bored. Better yet find something that keeps their interest while you wait for active fish to show up. Doing so could be the difference between one and done and a lifelong love for the sport!
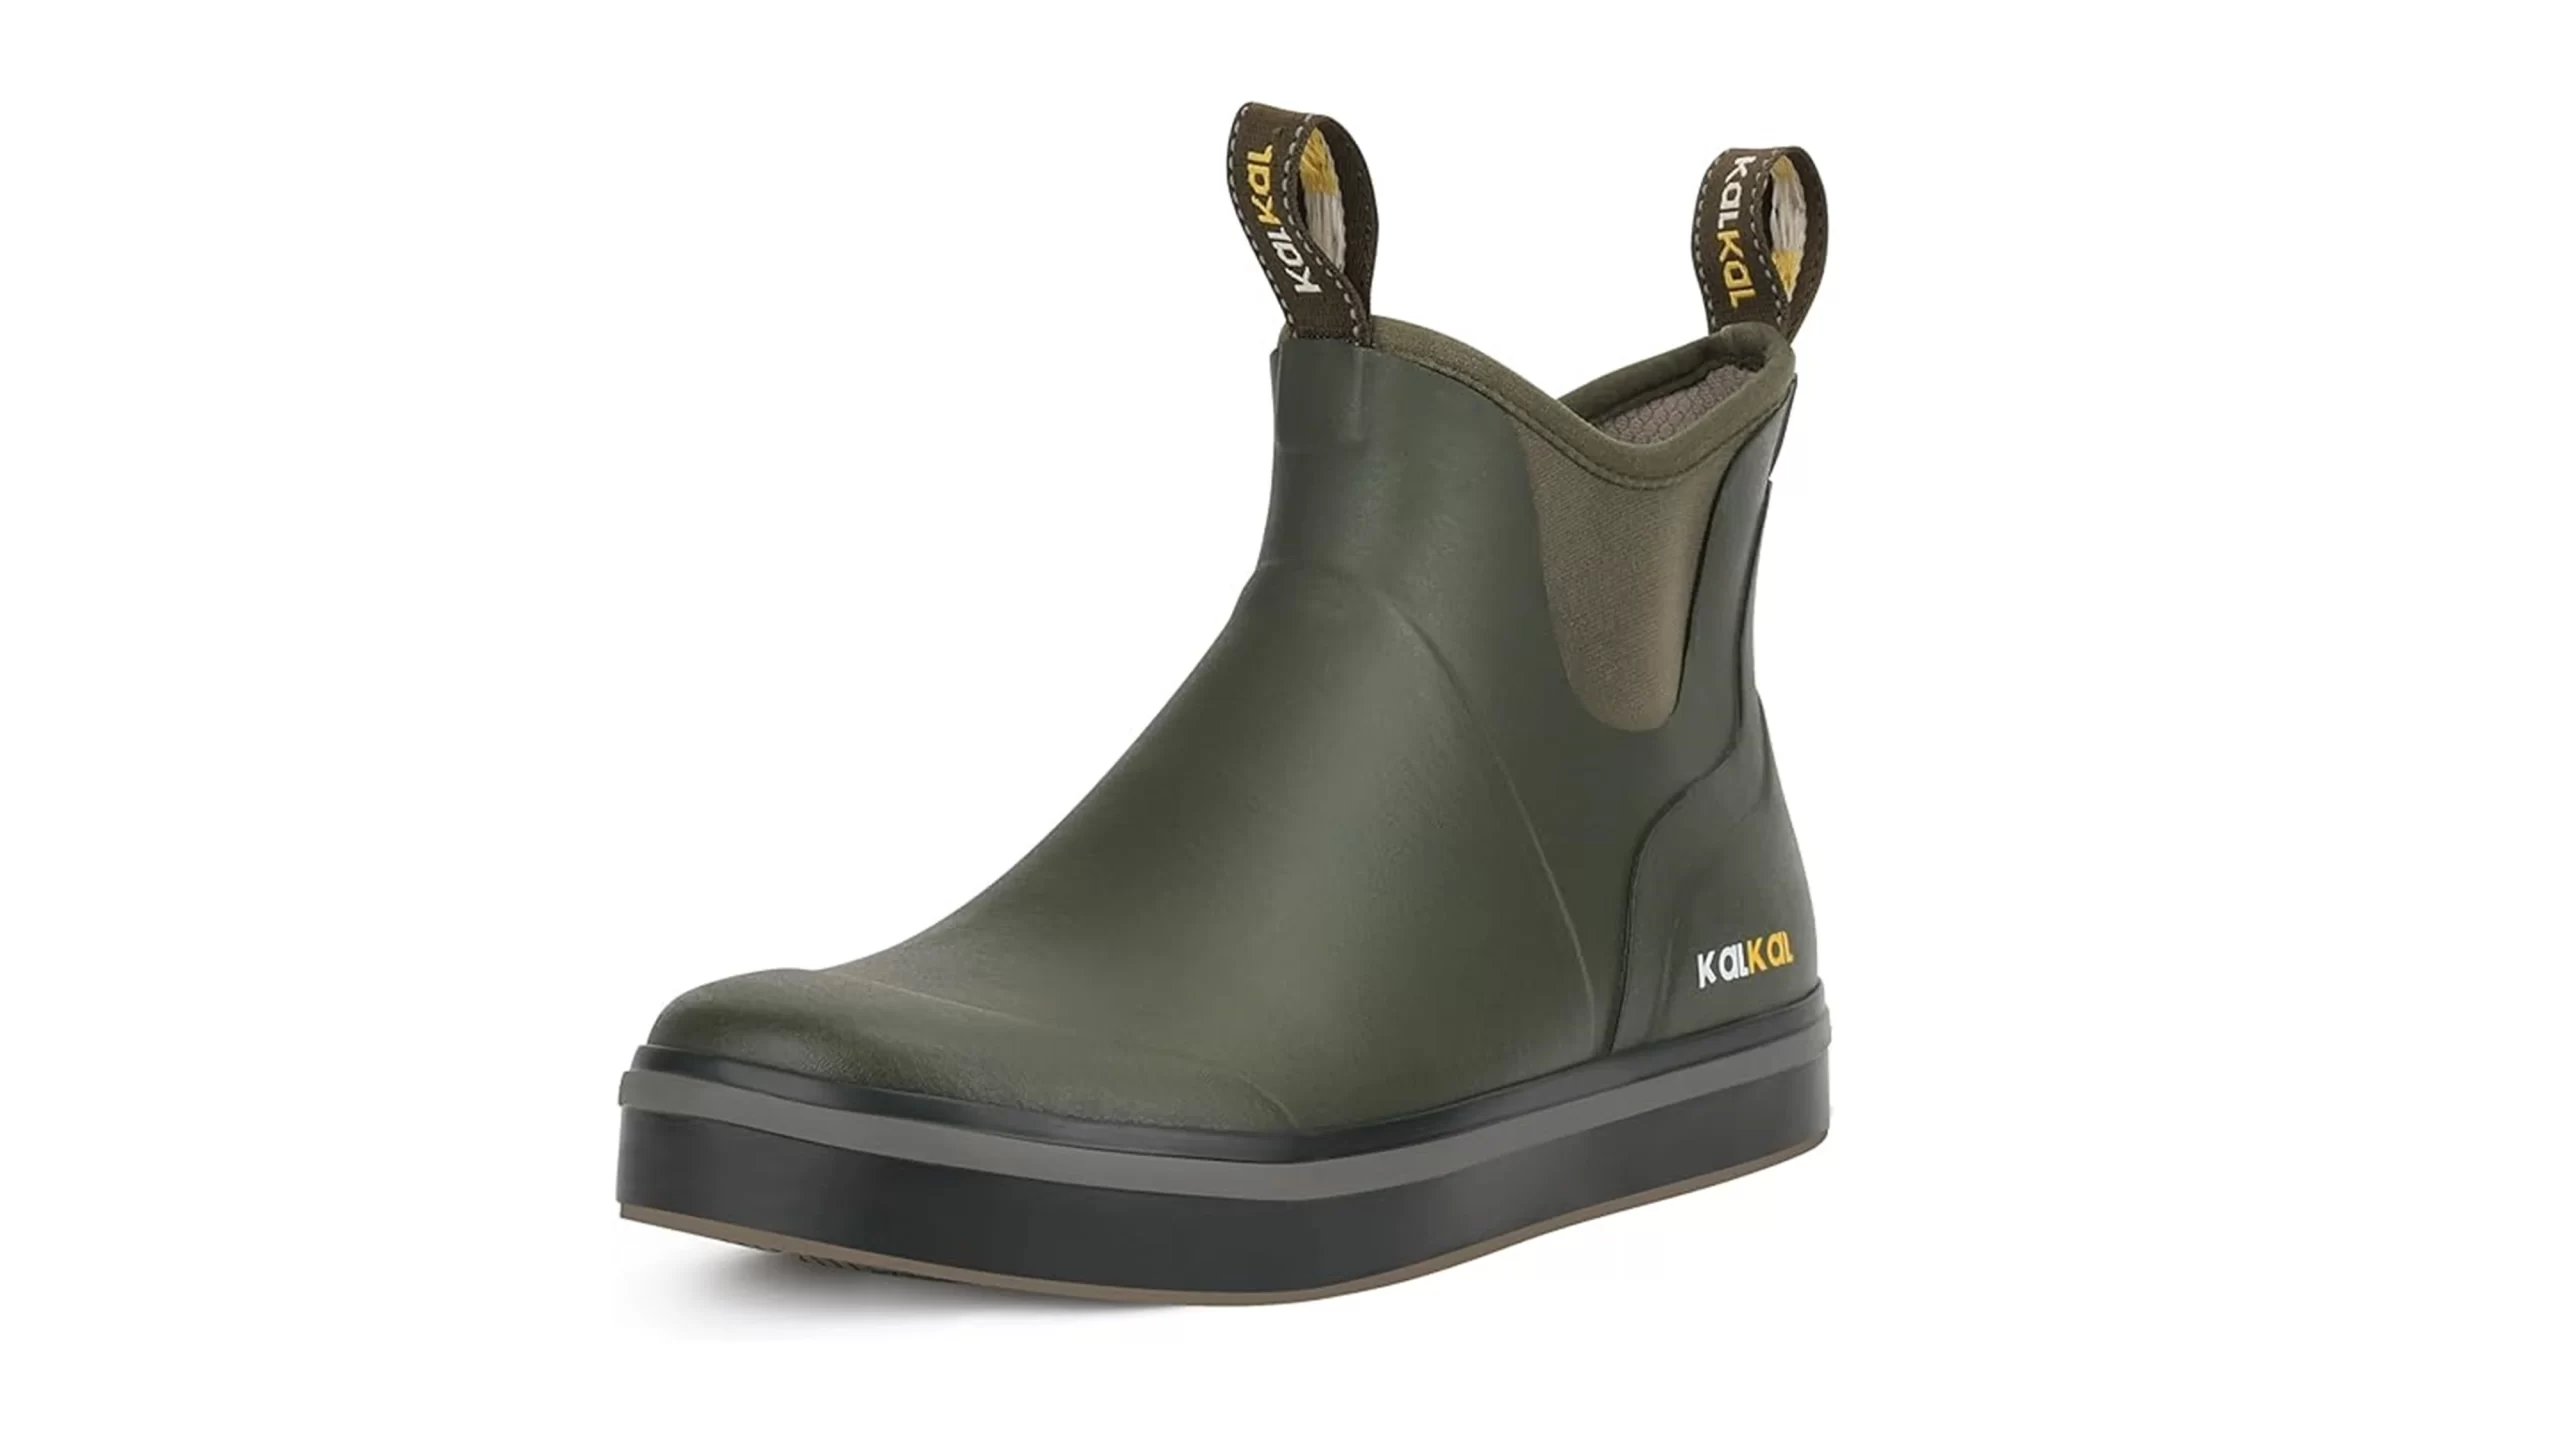
Product Review: Kalkal Deck Boots
* This page contains affiliate links. The Great Lakes Fisherman may earn a commission on items purchased through these links. For more on this, please click here.
We’ve all had those moments when fishing from a wet, slippery surface where you feel like your next step will put you on the deck or in the water. If you own a boat with a fiberglass, vinyl, or other type of non-carpeted decking, you’ve probably had more of these moments than you can count. So what can you do get a better grip in these wet conditions, while keeping your feet perfectly dry and comfortable? Maybe it’s time for a pair of deck boots. In this article, I’ll review Kalkal deck boots so you can decide if they’re the right boot for you.
Grip/Traction
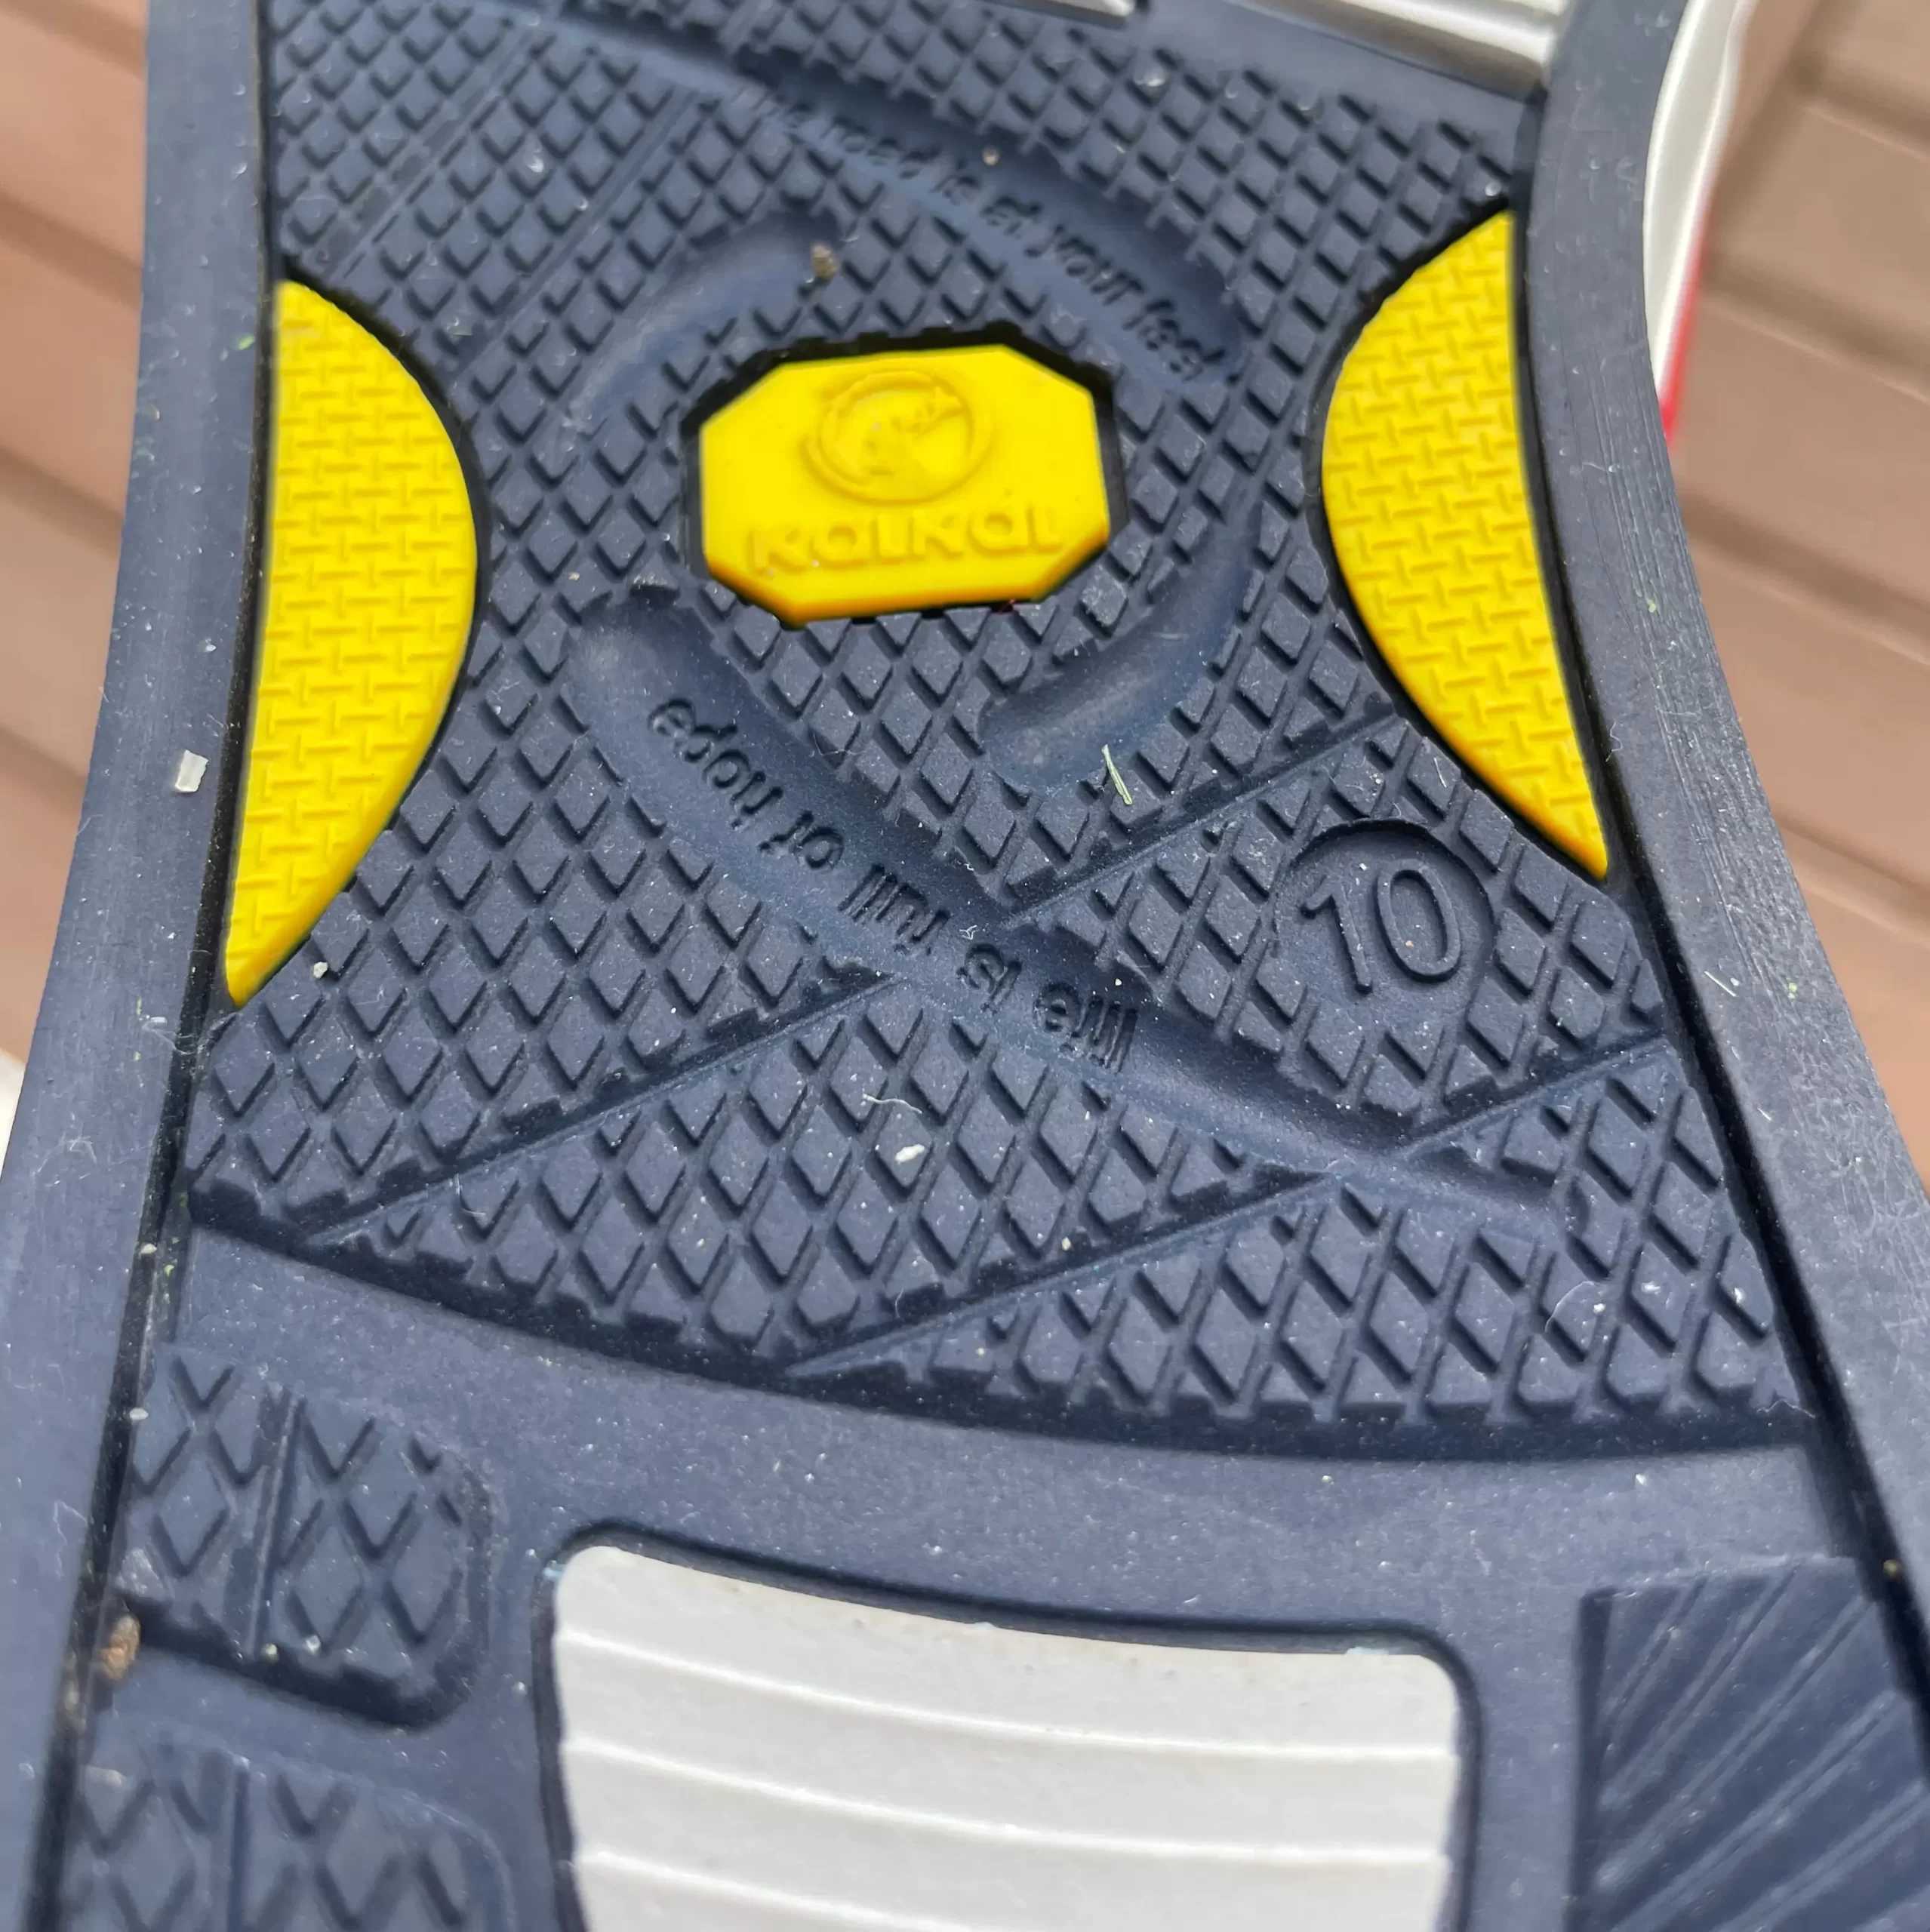
The grip of these boots is very solid. I had no problems working in the rain on my vinyl decking. I had high confidence in my footing and never felt like I might slip. The deep grooved design of the sole provides space for the water, allowing the boot’s sole to maintain constant contact with the surface.
Comfort
I give these boots get very high marks when it comes to comfort. They are some of the most comfortable boots that I’ve ever worn. First, the neoprene lining is very soft against the skin, making them perfect for slipping on and off when needed, even when barefoot. In addition, they are waterproof and will keep your feet dry and warm in the wettest of conditions. Finally, the cushioning inside allow you to enjoy long hours on the water without aching feet. My wife even tried them on and remarked on how comfortable these boots were!
Style
Kal-Kal offers several color styles to match your preference: Black, Army Green, Gray, Blue and Brown. So no matter what activity you engage in from boating to sailing to fishing or even hunting, there is a color pattern for you.
Practicality
The best way to make use of these boots, in my opinion, is to keep a pair on your boat or in your car or truck. This keeps them accessible anytime rain or wet conditions present themselves, whether planned or not. And the pull tabs make them easy to pull on and off when needed.
Some of the best uses for these boots are as follows:
- Boats with hard decking (vinyl, fiberglass, wood)
- Marinas
- Pier or dock or jetty fishing
- Launching and retrieving boats (wet boat ramps)
Cost
These boots are right in the middle of the price range when it comes to modern deck boots of comparable design. They can be purchased on Amazon for between $50 and $60 depending on size and preference.

Conclusion
These deck boots from Kal-Kal offer a perfect solution for those activities that require you to stay focused while on slippery wet surfaces. Whether you are a boater, sailer or fisherman, a pair of these deck boots kept with your car, truck or boat will help ensure you stay dry, comfortable and slip-free in those wet, slippery conditions.
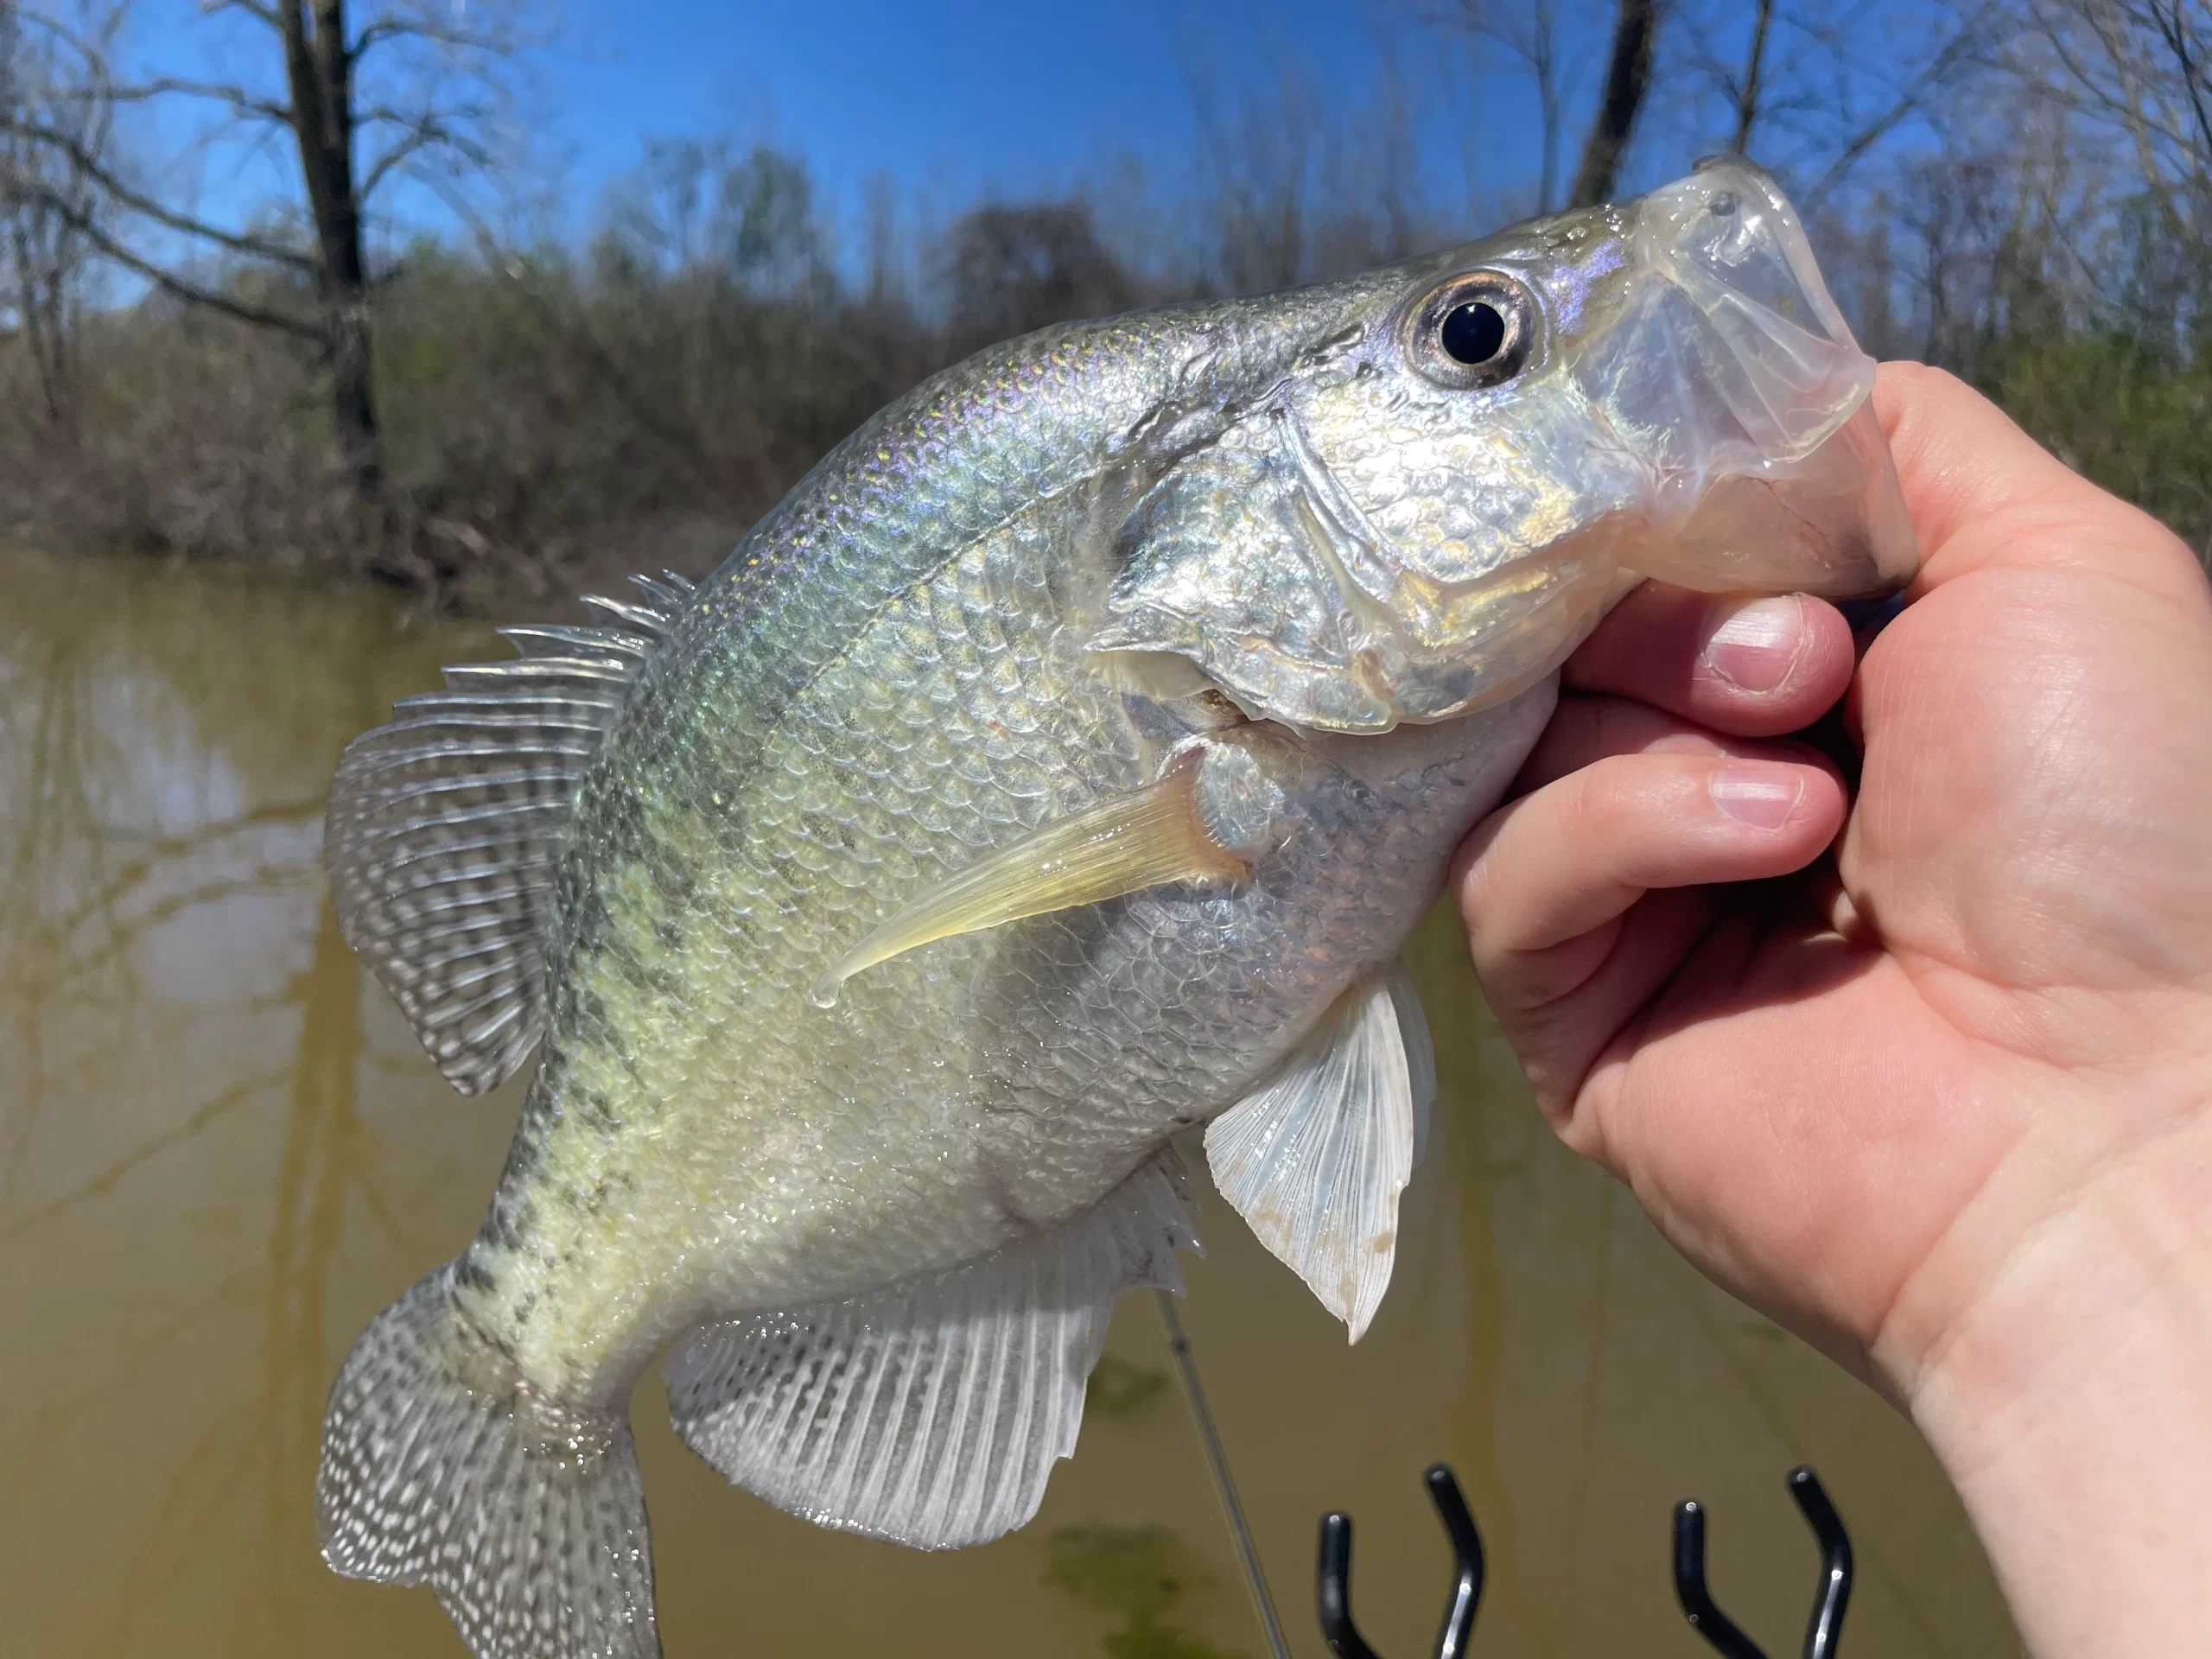
Best Bait for Finding Crappie
* This page contains affiliate links. The Great Lakes Fisherman may earn a commission on items purchased through these links. For more on this, please click here.
When fishing a new lake for crappie, the first and biggest question is where to begin? This can be answered by taking a look at a lake map and eliminating water that likely holds no fish. The second question is, what is the best bait for finding crappie. And to that question, I have the answer: a 1/16 ounce jig with a Charlie Brewer Slider.
Why It Works
All lakes have minnows. While other forage may be present in any given body of water, with a few exceptions, minnows are a staple for crappie in nearly all inland lakes in North America. A jig rigged with a Charlie Brewer Slider, when fished properly, does the best job of imitating minnows, in my 40+ years of fishing experience.
How to Fish This Bait
There are two very effective ways to use this bait. First, it can be slow-trolled. This can be done by long line trolling the jig behind the boat. But for crappie, the more common method I like to use is spider rigging.
Another way to use this bait, when fishing around structure is to cast it and retrieve it. Here is how I do it.
First, cast the jig out to the location you are checking for fish. Then let the jig drop to the depth you believe them to be. Now retrieve the bait back to you by simply giving the rod a slow lift while reeling in very slowly in an effort to hold the bait at the same depth the entire way through the retrieve. This is KEY! In doing so, you can methodically check multiple depths by letting the bait fall a little more with each cast by counting it down.
))/3107326.json)
Favorite Color Patterns
In the clear waters of the Great Lakes Region, I prefer to use the baby bass pattern with a chartreuse tail. This is hands-down the most productive pattern for me. Other colors that produce are orange/chartreuse, chartreuse, and white. Good luck out there!
Top Plastic Jig Baits for Detroit River Walleye
* This page contains affiliate links. The Great Lakes Fisherman may earn a commission on items purchased through these links. For more on this, please click here.
Walleye fishing on the Detroit River should be on every walleye fisherman’s bucket list. Nowhere in the world are walleye more concentrated then they are in this river during the spring spawning run. But even if you miss the spring spawning run, there are very good numbers of walleye present in the Detroit River all year. For those who have or intend to fish it, here are some of the top plastic jig baits for Detroit River Walleye in no particular order.
Blue Ice
Blue Ice is a great color pattern for walleye when the river is very clear. This pattern has a more natural look in the water and is possibly the top minnow imitator when the water is at its clearest. Use a matching blue ice jig head for maximum effect. For a little added color flair, dip the tail in a chartreuse dye called Spike-It.

Purple Ice
Purple Ice is another effective bait on the Detroit River. Like Blue Ice it is effective in clearer water due to its natural pattern. Again, Spike-It can add a bit of color to catch the fish’s eye.

Wonderbread
Wonderbread is a great pattern for when the water is more stained. The overall white body color stands out and the little flecks of color help to catch the fish’s eye in the cloudier conditions.
))/3775968.json)
Pimp Daddy
Although I haven’t used this one to date, I hear a lot of fisherman have had success with this pattern. Pimp Daddy has a natural body with a bright tail. It’s another great bait to use in semi-clear conditions.
))/2703975.json)
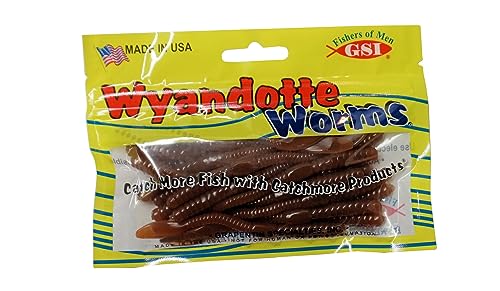
#1 Wyandotte Worm
Although at times not the most effective, the Wyandotte Worm will usually catch fish any time of year. It’s a standard that any Detroit River walleye fisherman should have in their tackle box!
Basic Equipment for Spider Rigging
* This page contains affiliate links. The Great Lakes Fisherman may earn a commission on items purchased through these links. For more on this, please click here.
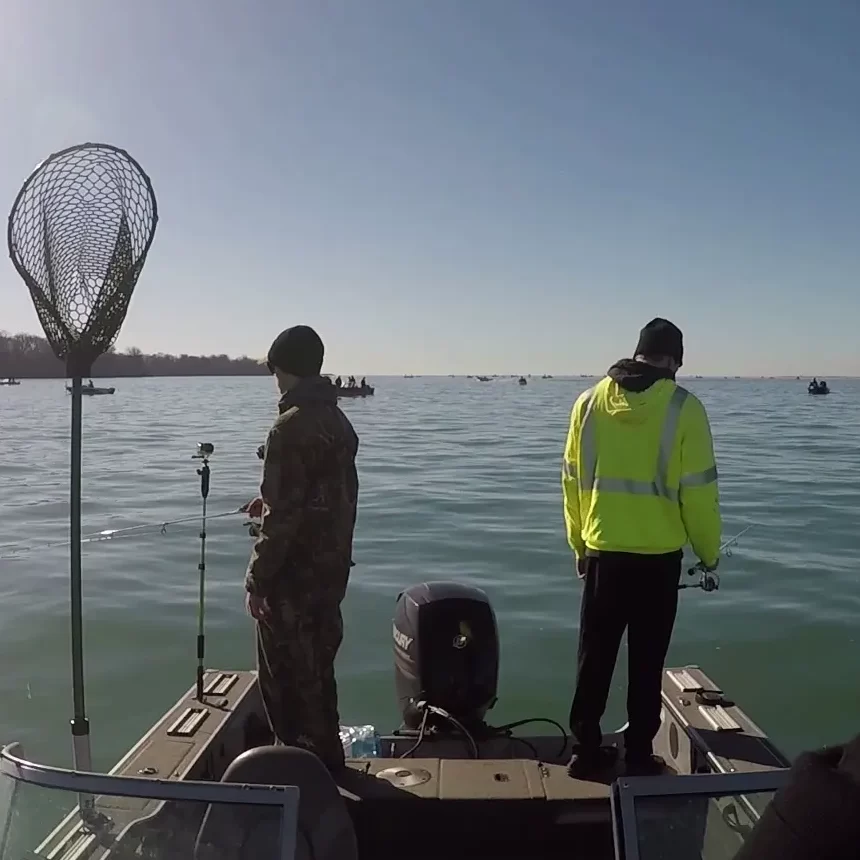
Crappie fishing one of my favorite species of fish to chase. This is because they are found in most fresh water lakes and streams, they’re a prolific breeder, meaning that they are found in large numbers, they are one of the best tasting fish, and they are a perfect target for young anglers. And probably the most productive way to catch these fish is using a technique known as “spider rigging”. But what is the basic equipment for spider rigging and how can you get started?
Spider rigging is a slow trolling technique whereby the trolling rods are placed horizontally off the boat with the baits trolled directly under the rod tip. This is done by using a heavy weight to keep the line from swinging back too far. In addition, long specialized rods are used to get the baits far enough from the boat such that the crappie aren’t spooked. These rods can be up to 16′ long or even longer!
In this article, I’ll go over the setup and the basic equipment necessary to get started in spider rigging.
The Boat
By definition, spider rigging is done from a boat. Many different boats can be used for this. While boats with some sort of front deck, such as a bass boat, are the most popular, many other boats can be used. In fact, the very first time I was introduced to spider rigging was on a pontoon boat. I have also seen small 12′ jon boats set up for spider rigging.
The Rods
The rods used for spider rigging start at 12′ and get as long as 20′. The length of the rod you’ll need is dependent of a few factors including the size of your boat, the depth of water you intend to target, and the clarity of the water. For most anglers, 14′ is the standard rod length, but more and more anglers are opting for 16′ rods, especially when trolling in very shallow or clear waters where the boat may spook the fish more easily. A great rod to get started is the Buck’s Graphite Jig pole by B’N’M in 14′ length.
The Reels
The reels for this don’t need to be anything special. Because of the rod length, the fish will often just be lifted and swung into the boat with no reeling necessary. I would go cheap here. These reels are a great choice.
Rod Holders
This is the third and final requirement for getting into spider rigging. You’ll need a rod holder for each rod. These rod holders are mounted in a horizontal oriention so that when placed in the holder, they are level with the water. These holders should be mounted on the boat where you plan to sit. The most popular location for this is at the front of the boat because as the boat moves in a forward direction, the baits trolled here are the least likely to spook the fish.
While rod holders can be mounted individually, the most popular way to do this is to mount a tree with 3-4 rod holders mounter to it. This allows 3-4 rods to be accessed from the same sitting position Usually, 2 of these trees will be mounted at the front of the boat, with one left of and one right of the bow. In this way 6-8 rods can be accessed from one or two seats mounted on the front deck. There are several styles of these, but a popular one is this one made by Millenium Marine.
Dual Seat Mounts
Many crappie fisherman like to setup the front of their boats for 2 anglers to fish side by side. This setup is great for taking a kid or a buddy fishing and is one of my favorite ways to fish, period.
In order to mount a second seat to the deck of your boat, you’ll need a specially made mounting system like this one from Millenium Marine. You’ll want to check to be sure that your boat’s seats fit this mount. If you’d prefer to buy the seats with the mount, a pair of these are popular and will go with the mount above.
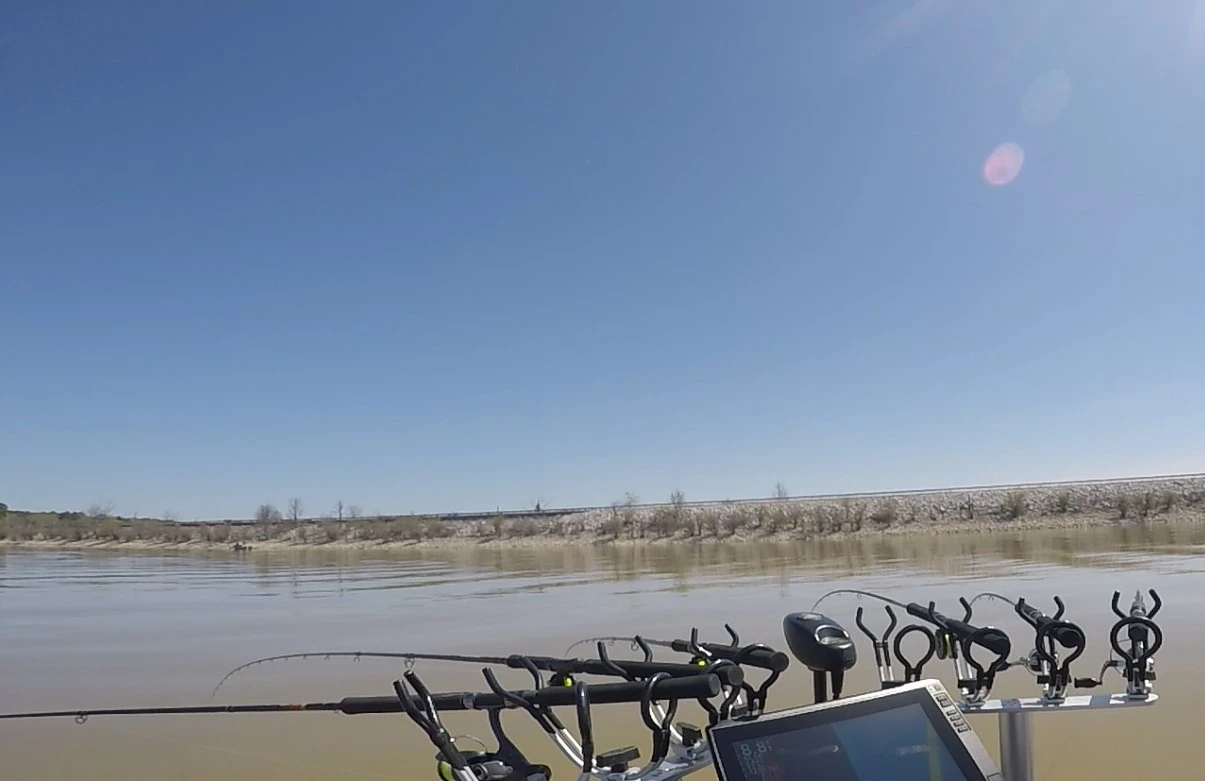
The Line
High vis line is highly recommended for this application. When running 3 or more rods, it can be difficult to see bite on any given rod. The high vis line helps tremendously here as you can see any movement more easily, especially i f the fish pulls sideways, which often happens in shallower water.
I use 6lb. test for the main line and use 4 lb. flourocarbon for the rig material.
The Rig
The rig starts with an egg weight slid onto the main line. This weight will ideally be as light as necessary to keep your lines from trailing back. You want the lines vertical. I typically use a 1 oz. egg weight but you can go heavier or lighter based on the baits used and the speed trolled.
Next, I tie on a standard barrel swivel followed by an 18-24″ leader made of the 4 lb flourocarbon line I mentioned earlier. Finally, a 1/16 oz. jig with your favorite plastic is tied on to the end of the leader. My all around very favorite bait to use in this application is the original Charlier Brewer Slider in various colors on a 1/16 oz. chartreuse jig head.
How to Catch Walleye at Night
* This page contains affiliate links. The Great Lakes Fisherman may earn a commission on items purchased through these links. For more on this, please click here.
Walleye are a great fish to eat and can be caught any time of the day when using the right technique. This makes them a very popular gamefish. But one of the best times to chase these toothy critters is at night. That’s when walleye become the apex of apex predators. And when fishing for them at night there is one lure that shines above all others: the original floating Rapala! Read on to learn how to catch walleye at night.
Walleye are very light sensitive and prefer low-light conditions. This same light sensitivity means that they have excellent night vision. This gives them an enormous advantage over many other fish species when night falls. So when the sun hits the horizon, walleye will often move into shallower water to chase prey.
For the angler, this means coming up with the right color combination for the fish to see well. In low light conditions, the rod cells of a fish’s eyes are doing the predominant work. They don’t detect color, only shades of grey, black and white. But they can see these contrasts very well, even in their peripheral vision. This means that contrasting black and whites are easily seen in these conditions. And this is what makes the original floating Rapala so effective.
The Rapala can be effective by casting it if you are fishing from shore. Find areas along the lake or river that tend to hold bait fish on waters where walleye are known to live. If you are in a boat, the most effective technique is to troll it along the same bait filled shallow waters. Trolling parallel to the edge of weed beds is particularly effective.
We have used this technique on many different bodies of water. From the smaller walleye lakes of Ontario to the Detroit River and the Great Lakes and it has proven to be effective on all of them.
And fishing at night has some advantages. The lake is much quieter at night as most boaters have docked for the day. This leaves much of the lake available to fish. In addition, in the heat of the summer, when many of us have time to fish, the night bite can be more comfortable from a temperature perspective (just don’t forget the bug spray).
So if you haven’t tried night fishing for walleye in the summer, be sure to give it a try. And don’t forget the original floating Rapala. It’s likely the only bait you’ll need.
Spike-It!

* This page contains affiliate links. The Great Lakes Fisherman may earn a commission on items purchased through these links. For more on this, please click here.
Visibility and scent are two of the three main ways fish sense their prey (vibration is the third). They are also the ones fish rely on the most. When fishing, it is therefore important that we try to make our baits appeal to these senses as much as possible. And there is a product on the market that I have come to rely on that really helps in that endeavor. The product is known as Spike-It.
Spike-It is essentially a dye that comes in various colors and flavors. I like to use the product to add visibility to my plastic baits. Rather than buy different plastics that have all sorts of different colors, which can get rather expensive, I just buy Spike-It and when my bait needs a flash of chartreuse or pink, I just dip the tail of the bait in bottle and I’m good to go.
Chartreuse is probably the color I use most often, but hot pink is another popular choice. Remember, it is often just a flash of color that catch’s a fish’s attention. And it sometimes only takes that little something extra to go from being skunked to putting a limit in the boat.
I have used this product successfull for crappie, walleye and bass. And it often increases my catch rate immediately. I usually like to add the color to the tip of the tail of the plastic bait, which is usually the part of the bait that has the most action in the water.
Another great feature of Spike-It is the ability to add color without changing baits. This is great when you’re locked onto a school of fish and don’t want to take the time to tie on a new bait. With Spike-It, just a quick dip and you’re ready to go.
If you use a lot of plastic baits when fishing, Spike-It is a product you must try. You likely won’t spend better money than you will on this product!
The One Flasher/Fly Combo You Must Have
* This page contains affiliate links. The Great Lakes Fisherman may earn a commission on items purchased through these links. For more on this, please click here.
Flashers and flies have been used for years as part of a salmon fishermen’s trolling spread. When the right color is used, the bright flash allows fish to see rig from many feet away, even in deeper water. And when they do, the darting movement of the fly chasing it is irresistable. But what is the best flasher/fly combo color combination to use?
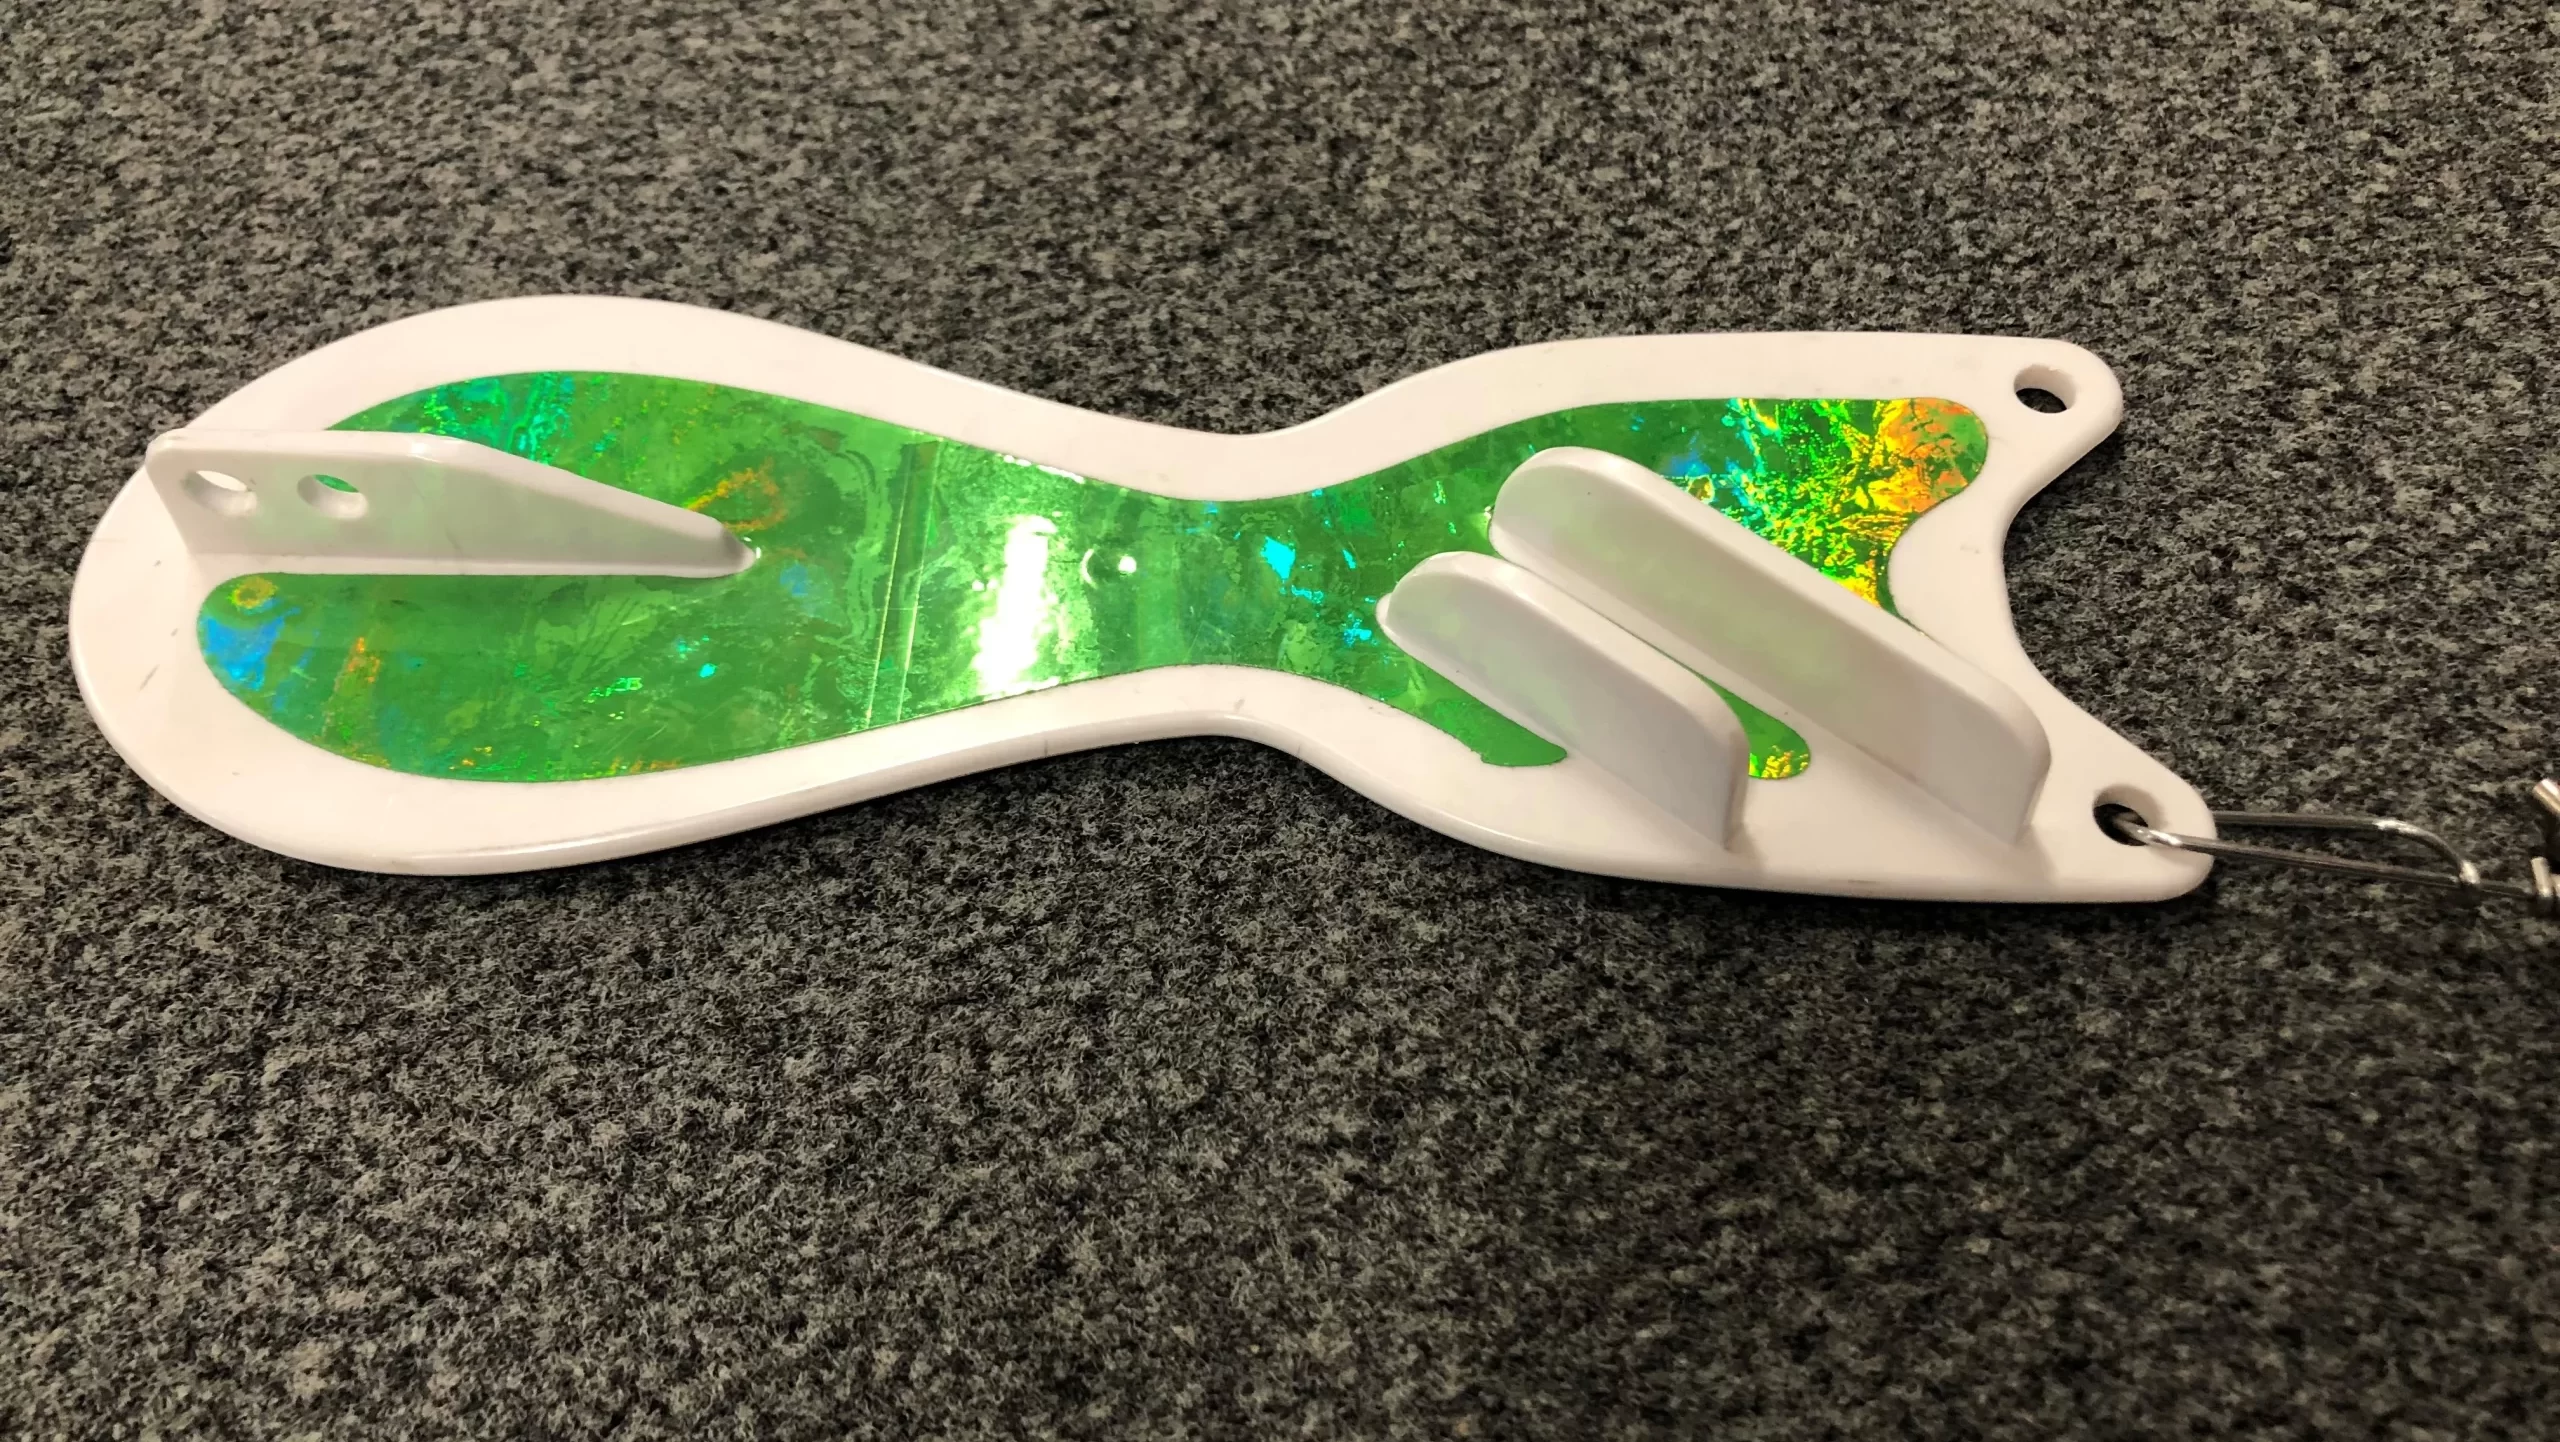
While there are many colors that can and do work, some work better than others in certain conditions. But if there was one color combo that you want to be sure is in your setup at all times what would it be? Well that’s easy. The one flasher combo I make sure I always have in my setup is a green spin doctor with a green/tinsle fly. Here’s why.
Green is the color that stands out most prominently in relatively clear and deep lake water. The reasons for this are a bit complex and for a full explanation, you can watch this video. But suffice it to say that green wavelengths from sunlight penetrate great lakes waters deeper than other colors. And because fish spend much of their lives swimming in this deeper water, the color green looks much more like what they’re chasing down there, than other colors. (Red for instance doesn’t show up at all in deep water).
Now don’t get me wrong, this is not to say that other color combinations won’t catch fish. They certainly will and I have caught many salmon on other colors. But green will usually outfish any other color combo out there, over time. It is especially effective when the fish are in the deeper water in mid summer.
If you don’t believe me, just pay attention to the color selections most tackle shops long Lakes Michigan and Huron carry. About 2/3 of them include green or hues of green as part of the color scheme. If you still don’t believe me, go to Dreamweaver’s website and sort their Spin Doctors by popularity.
As far as size goes, a lot of that depends on your preference and target species. I have found the 8″ model to be a great size for all species, but pick whatever size you find works best for your setup.
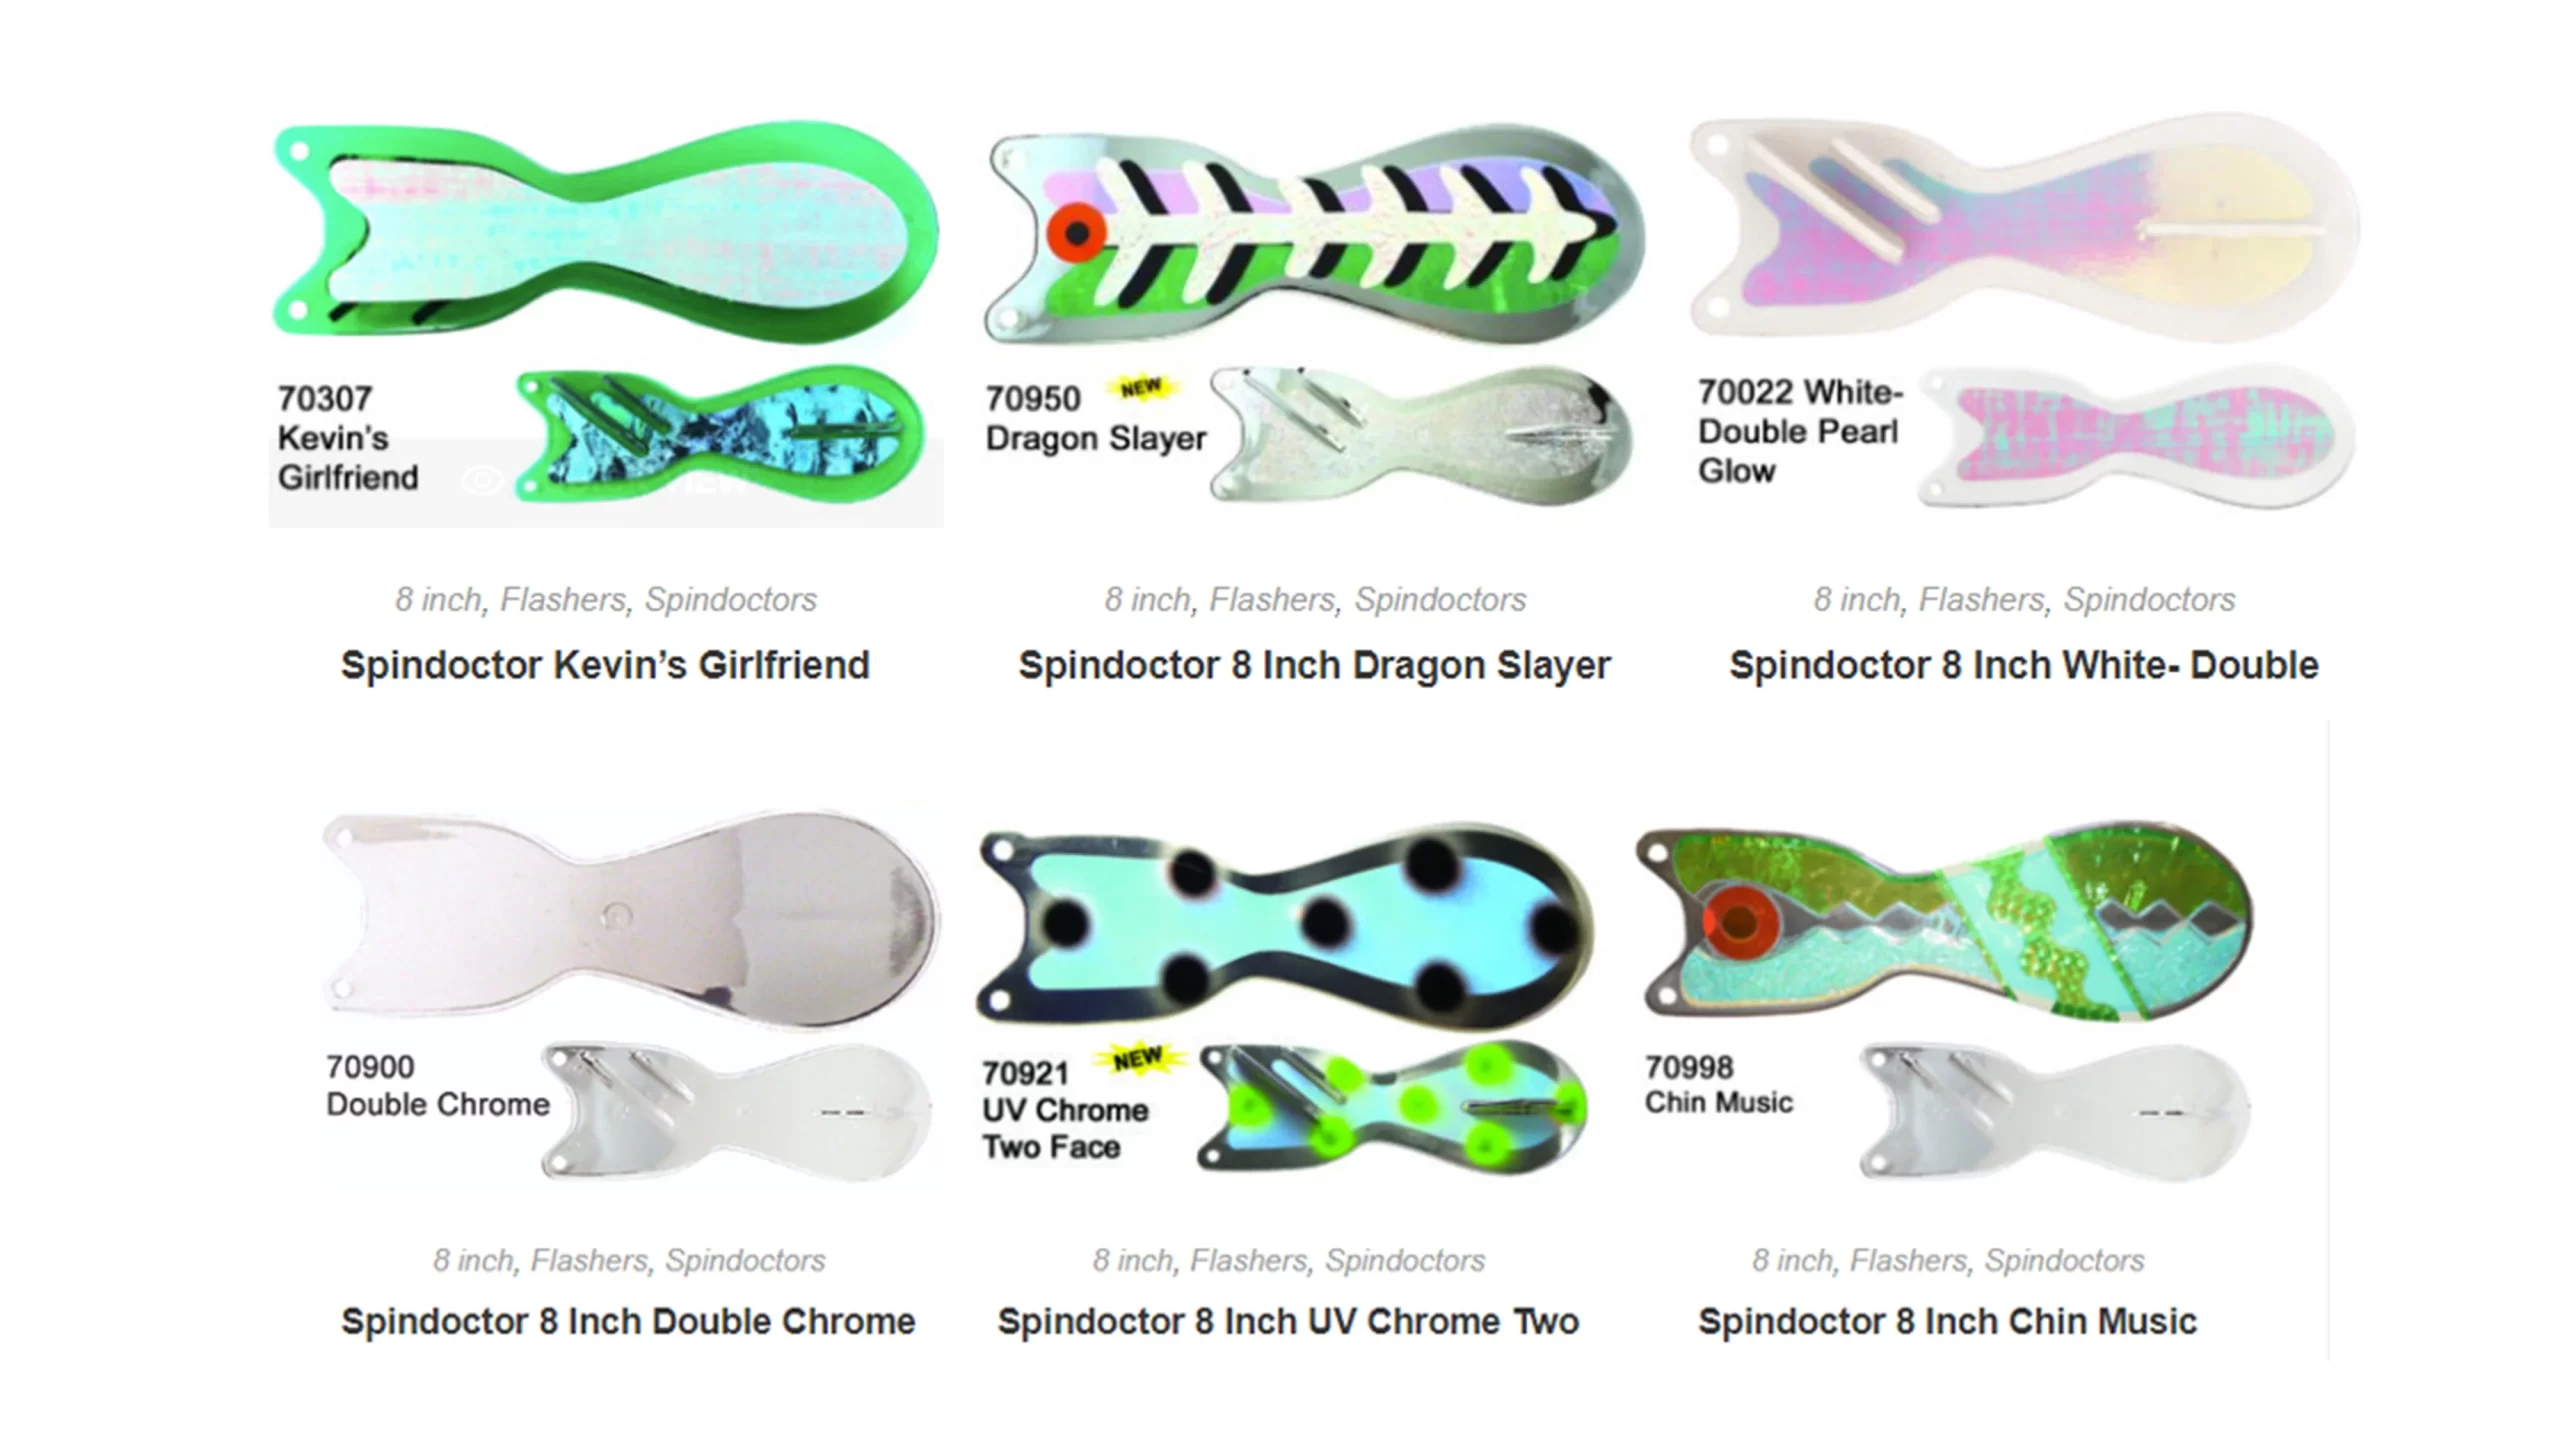
Now as far as which exact pattern works best, that’s less important than the color, in my opinion. We have had a lot of success with various patterns. The important thing is that it include green as a the main color. Some great options are:
Kevin’s Girlfriend
Dragon Slayer
UV Green/Yellow
The fly running behind the Dipsy should also be green but with some tinsel or flashabou mixed in. The flash will help keep the fish focused on the fly. This has, by far, been the best flasher/fly combo I have ever used.
In addition, I have found that the best color for Dipsy divers is, you guessed it, green. When running these flasher/fly combos on Dipsy rods, we always run them off of a green dipsy. I have 4 of these on my boat and can run both High and Low Divers using this color. If you don’t feel the added green helps, use a black Dipsy.
So give green a try. Keeping at least one of these setups in your trolling regimen is almost certain to improve your catch rate.