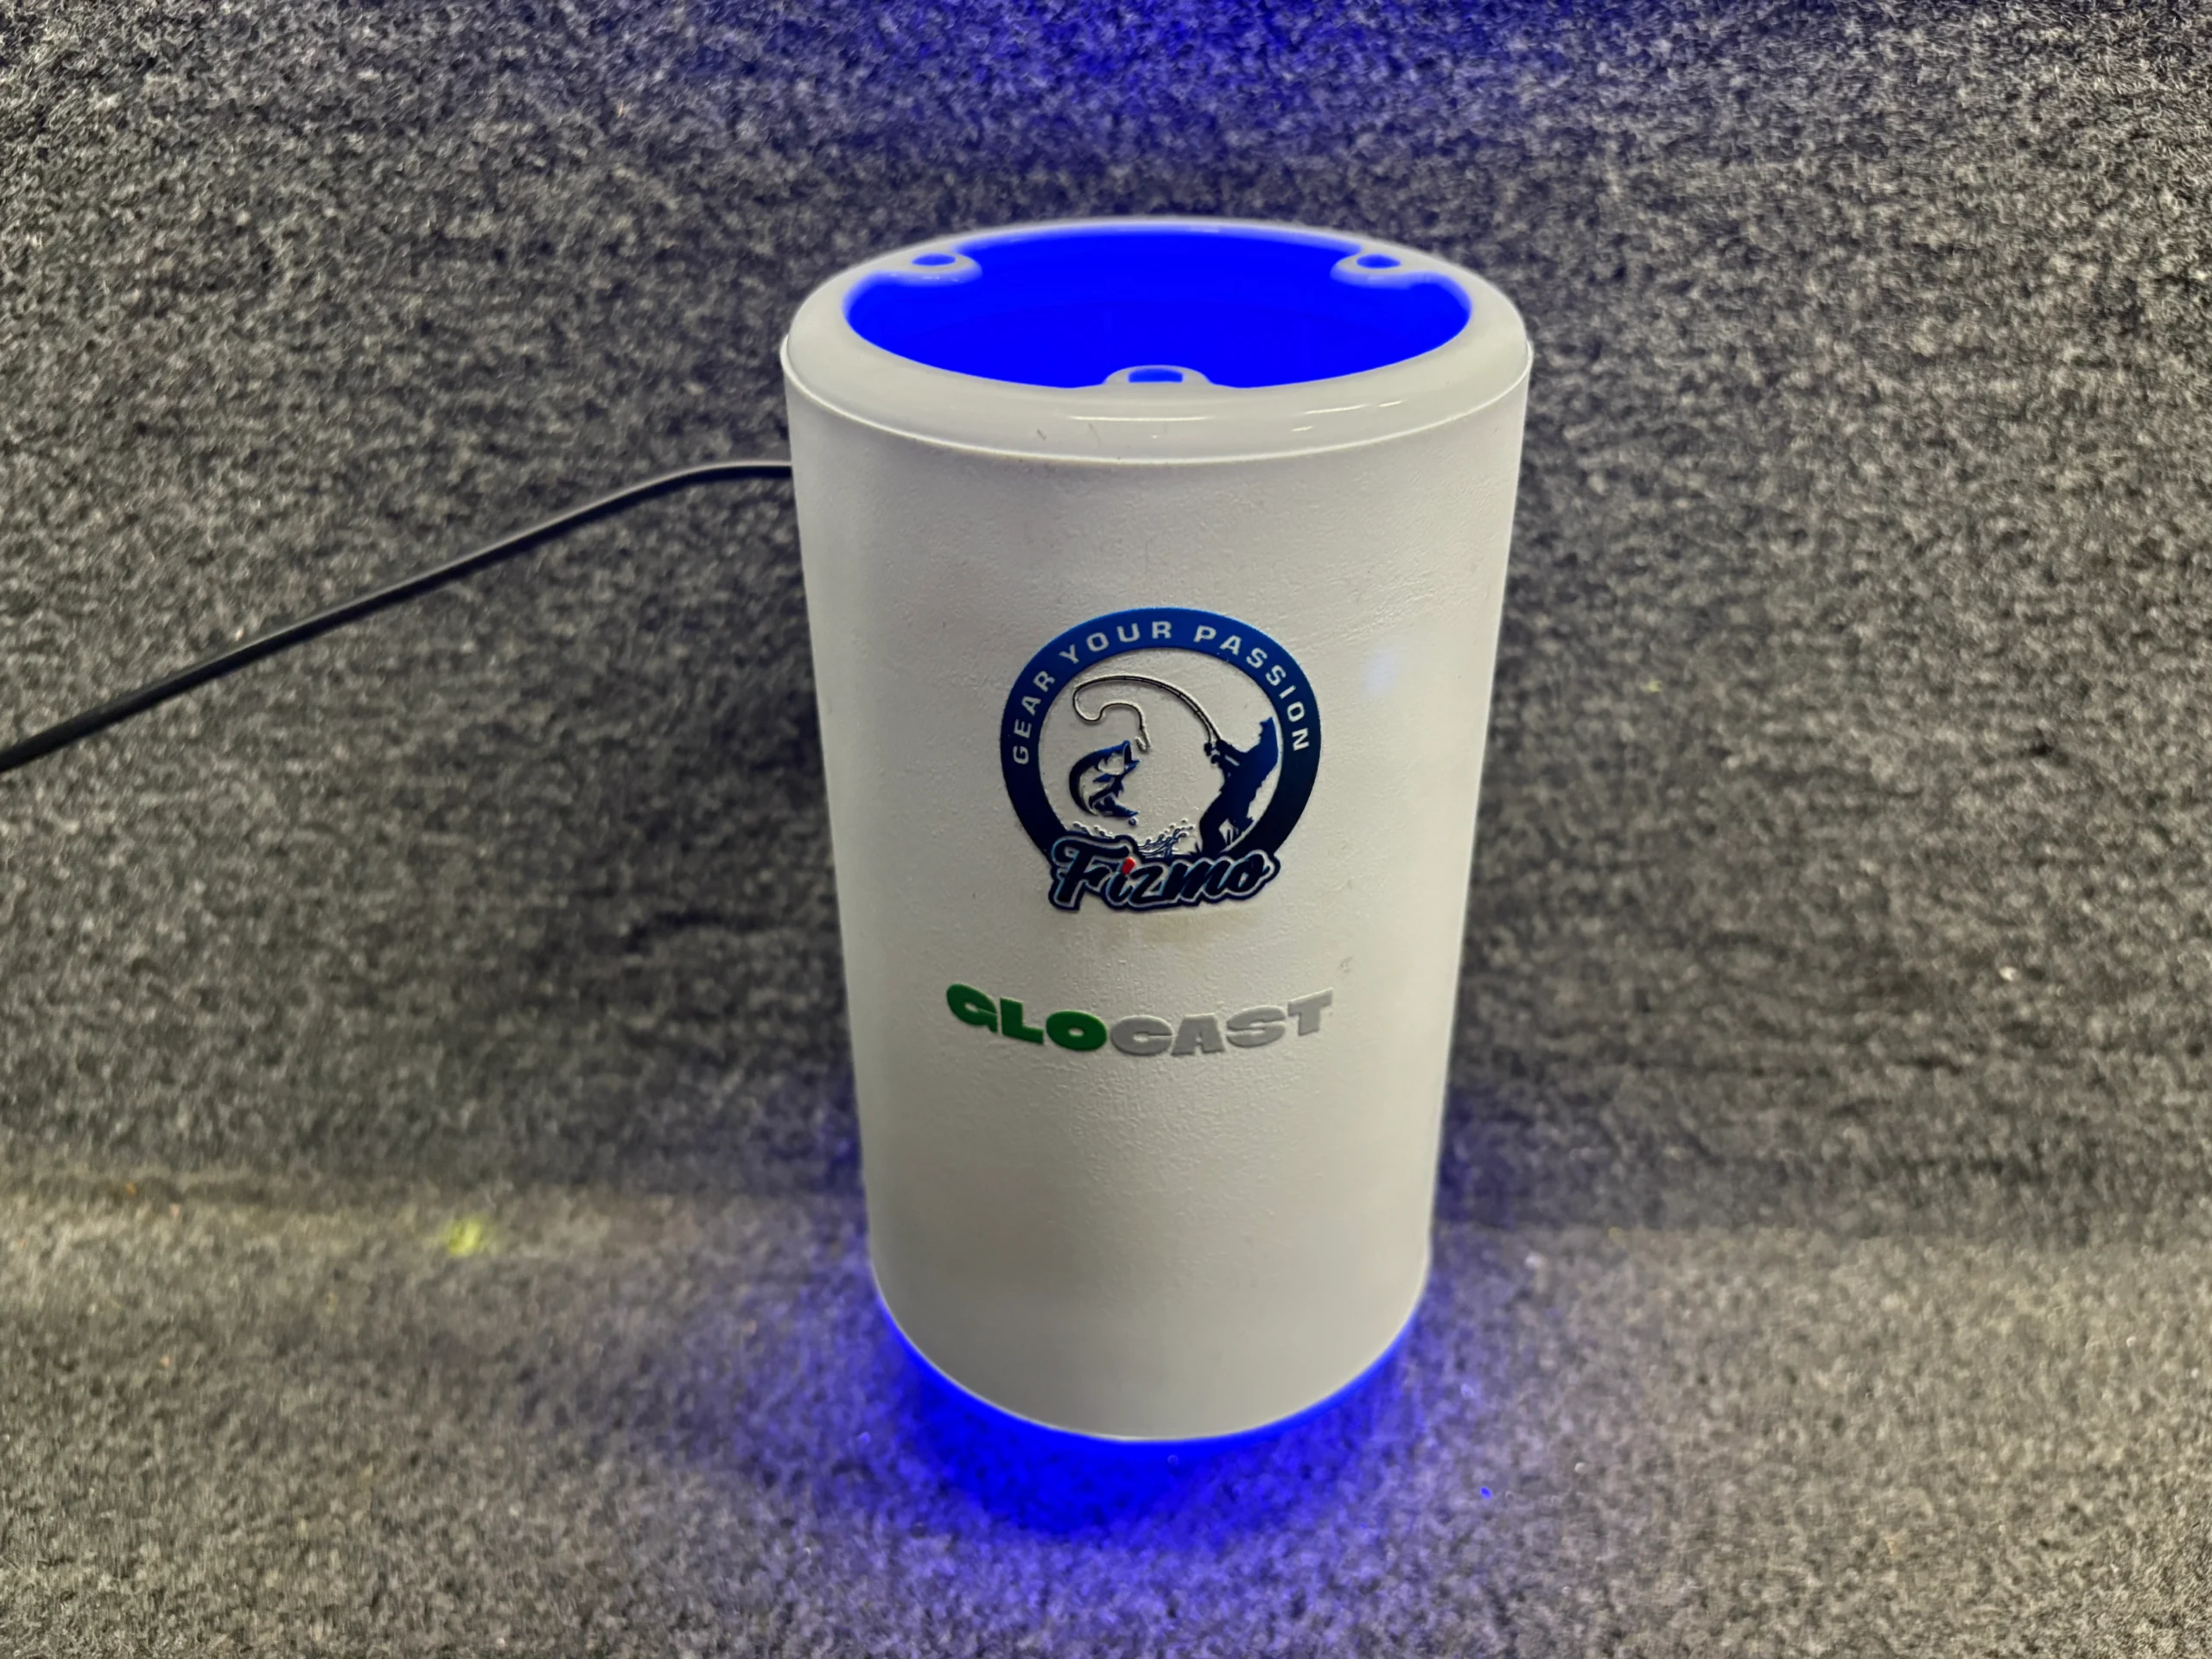
Supercharge Your Salmon Fishing with Fizmo’s GloCast Canister
* This page contains affiliate links. The Great Lakes Fisherman may earn a commission on items purchased through these links. For more on this, please click here.
For anglers chasing the thrill of salmon fishing, success often hinges on standing out in the murky depths where these elusive fish thrive. Enter the GloCast Canister by Fizmo, a game-changing UV LED charger designed to supercharge your glow-in-the-dark lures and boost your catch rates. Whether you’re casting for king salmon in the Pacific Northwest or trolling the Great Lakes, this innovative tool ensures your lures shine brighter and longer, giving you the edge to land that trophy fish.
Why GloCast is a Must-Have for Salmon Fishing
Salmon are notorious for their aggressive strikes, especially in low-light conditions like dawn, dusk, or deep river runs where light penetration is minimal. The GloCast Canister is engineered to maximize the glow of phosphorescent lures, making them irresistible to salmon. Here’s why it’s a must-have in your tackle bag:
- Rapid 5-Second Charging: With GloCast’s patent-pending UV LED technology, a quick 5-second blast charges your lures to glow brighter than ever. This is equivalent to 20 minutes under typical light sources, ensuring your lures are ready for action with every cast. No more waiting for sunlight or juggling flashlights on the water.
- Enhanced Visibility for Salmon: Salmon, like kings and coho, often stage in deeper waters or near river mouths, where light is scarce. GloCast’s specialized UV beam activates the phosphorescent materials in lures, creating a radiant glow that mimics natural prey and triggers aggressive strikes. This is especially effective in murky waters or during the peak salmon runs in September and October.
- Versatile for All Glow Lures: Whether you’re using glow spoons, jigs, or plugs for salmon fishing, GloCast works with all phosphorescent-based tackle. Its spacious 6 in × 2.8 in rack design accommodates large salmon spoons, allowing you to charge multiple lures at once for uniform, 360° glow.
- Built for Rugged Adventures: Salmon fishing often means battling tough conditions—think splashing rivers, rainy days, or offshore swells. The GloCast Canister’s sealed, splash-resistant housing and snag-proof UV LED shield are designed to withstand freshwater and saltwater environments, from the Salmon River in New York to the coastal waters of British Columbia.
Real-World Impact on Salmon Fishing
Anglers across the globe are raving about the difference GloCast makes. One fisherman shared, “Night fishing for salmon used to be a struggle because my lures lost their glow too quickly. With GloCast, I charge them in seconds and keep them glowing all night. My catch rates have skyrocketed!” Another noted, “Fishing deep pools for king salmon is a breeze now. GloCast’s bright charge makes my lures pop, and I’ve hooked more fish than ever.”
The science backs it up: glow lures are highly effective in low-light conditions, where salmon rely on visual cues to strike. By emitting a focused UV light at the optimal wavelength, GloCast ensures your lures radiate stored light energy, making them more visible in the dark, murky waters where salmon roam. This is particularly critical during the fall salmon runs, when fish like king salmon enter rivers from estuaries, as seen in places like the Douglaston Salmon Run in New York.
Elevate Your Salmon Fishing Experience
The GloCast Canister isn’t just a tool—it’s a game-changer that transforms your salmon fishing adventures. Its USB-powered design means you can run it from a power bank or boat USB panel, eliminating the need for batteries in the field. The hands-free operation with a continuous on/off switch lets you focus on fishing, not fumbling with gear. Plus, its compact, coffee-mug-sized footprint slips easily into a vest pocket or boat cupholder, making it a practical addition to any salmon angler’s setup.
Whether you’re fly fishing for Atlantic salmon in Connecticut’s Naugatuck River or trolling for coho in British Columbia, GloCast gives you the confidence to fish smarter. It eliminates the frustration of dim lures and maximizes your time on the water, letting you focus on the thrill of the fight. As one angler put it, “GloCast is worth every penny. It’s durable, easy to use, and outperforms any flashlight I’ve tried.”
Join the GloCast Revolution
Fizmo’s GloCast Canister is more than just a lure charger—it’s your ticket to unforgettable salmon fishing stories. Designed with sustainability and performance in mind, it empowers anglers to fish with precision and confidence. Don’t let dim lures hold you back from landing that monster salmon. Step up your game, embrace the thrill, and let GloCast illuminate every cast.
Ready to supercharge your salmon fishing? Visit shopfizmo.com to get your GloCast Canister today and experience the difference a brighter lure can make.
Crappie Nibbles: A Must-Have for Crappie & Panfish Anglers
* This page contains affiliate links. The Great Lakes Fisherman may earn a commission on items purchased through these links. For more on this, please click here.
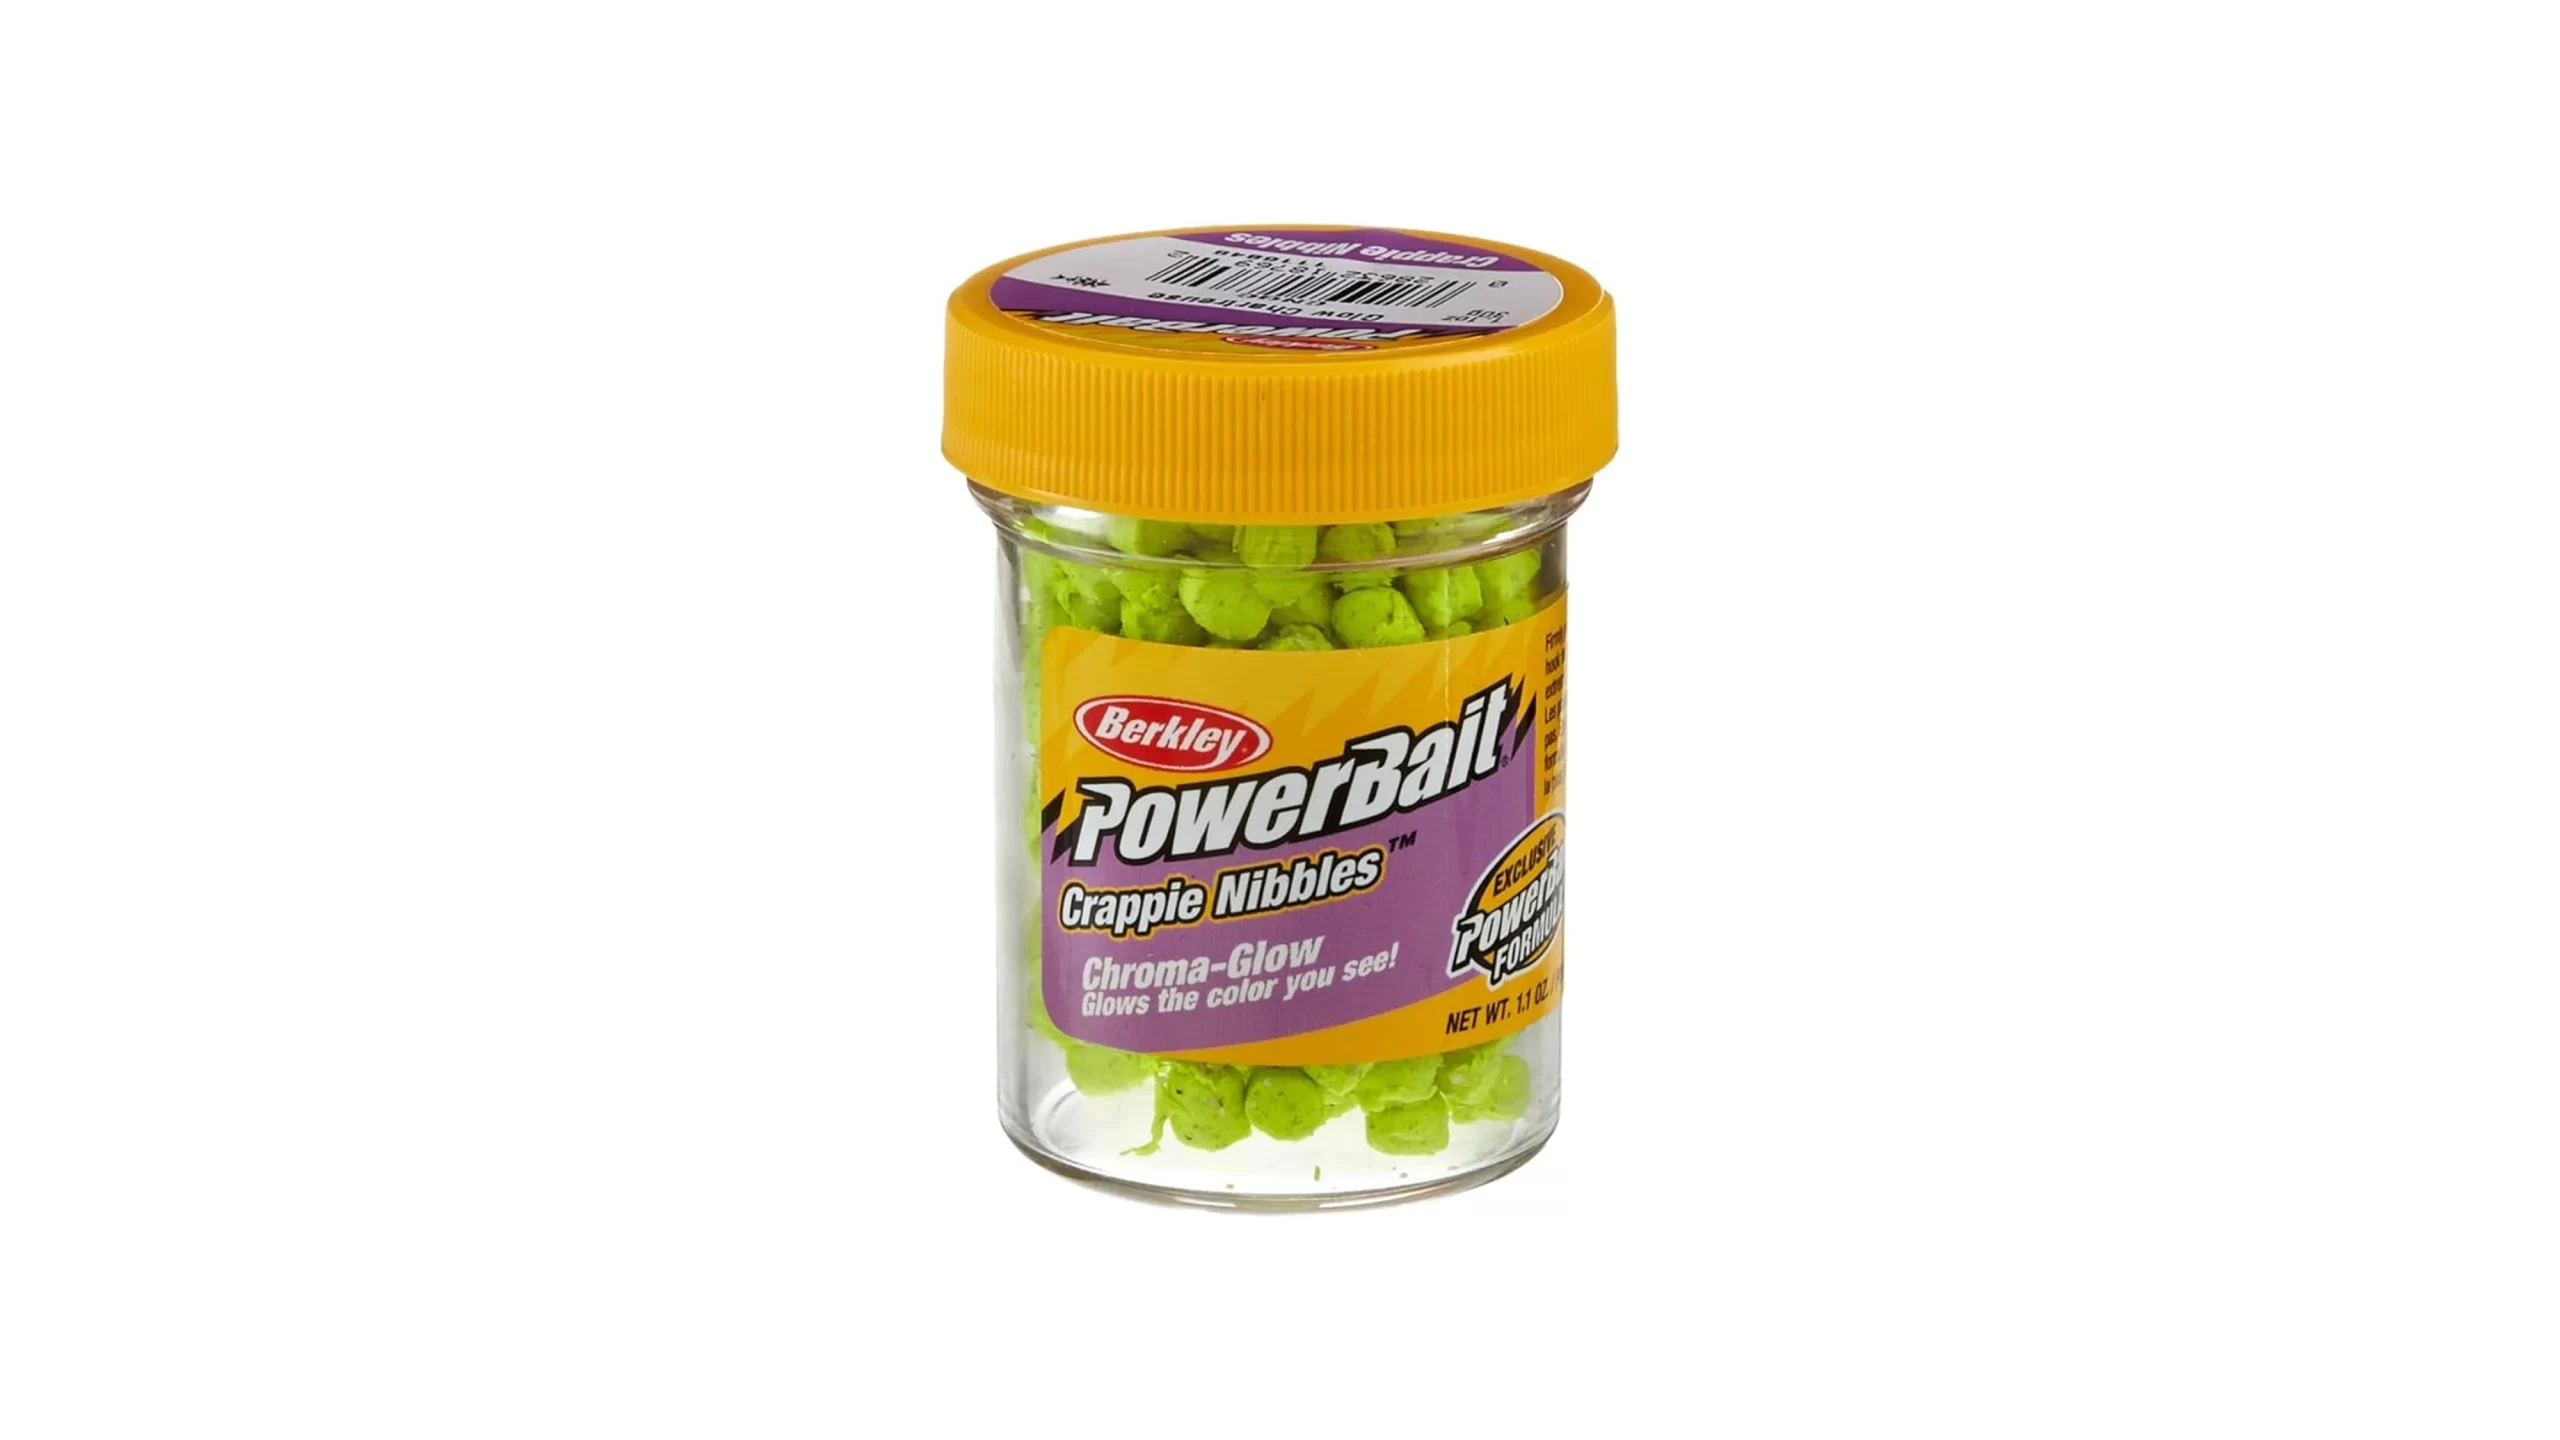
In the realm of fishing, especially for avid anglers targeting crappie, having the right bait can make all the difference between a successful outing and a frustrating day on the water. One of the lesser-known yet highly effective baits in this niche are crappie nibbles. These small, potent pellets pack a punch when it comes to attracting crappie, making them a favorite among seasoned anglers.
What are Crappie Nibbles?
Crappie nibbles are essentially small, biodegradable pellets infused with powerful attractants that lure crappie towards your hook. They come in various colors, typically bright and eye-catching, designed to mimic natural food sources for crappie. These pellets dissolve slowly in water, releasing a scent trail that crappie find irresistible.
Why Choose Crappie Nibbles?
Effective Attractants
The primary allure of crappie nibbles lies in their scent. Packed with fish-attracting substances, these nibbles create a trail that crappie can’t resist, drawing them closer to your baited hook.
Convenience
Unlike live bait, crappie nibbles are easy to store, handle, and use. They don’t require special storage conditions and won’t perish quickly, making them a convenient option for both casual and serious anglers. Even when minnows are your go-to bait, when they aren’t locally available, crappie nibbles are the perfect backup plan.
Versatility
Crappie nibbles can be used in various fishing techniques. Whether you prefer jigging, trolling, or still fishing, these pellets can enhance your bait’s attractiveness and increase your chances of a successful catch.
Cost-Effective
Compared to live bait, crappie nibbles are relatively inexpensive. A small jar can last multiple fishing trips, providing good value for money while consistently delivering results.
How to Use Crappie Nibbles
Using crappie nibbles is straightforward. Simply thread one or more onto your hook. Their soft texture allows them to stay firmly in place during casting and retrieval. They can be used alone or in combination with other baits, enhancing their effectiveness further. And while they are effective on their own, some anglers experiment with mixing different colors or scents to see which combination works best in specific fishing conditions.
Tips for Success
Match the Hatch
Choose crappie nibble colors that match the prevalent baitfish in the water. This helps in creating a more natural presentation.
Stay Patient
While crappie nibbles can increase your catch rate, patience is key. Allow enough time for crappie to locate and strike your bait.
Adjust Depth
Crappie often feed at different depths depending on weather conditions and time of day. Experiment with different depths until you find where the fish are biting.
Crappie nibbles have quietly earned a place in the tackle boxes of many crappie anglers for their reliability and effectiveness. Whether you’re a beginner or a seasoned pro, adding crappie nibbles to your fishing arsenal can significantly improve your chances of landing that prized crappie. With their simplicity, affordability, and proven results, these tiny yet mighty pellets are a testament to the constant innovation in the pursuit of the perfect catch. So next time you head out to the water, consider giving crappie nibbles a try—they might just be the secret weapon you’ve been looking for.
Catching Walleyes at Night
* This page contains affiliate links. The Great Lakes Fisherman may earn a commission on items purchased through these links. For more on this, please click here.
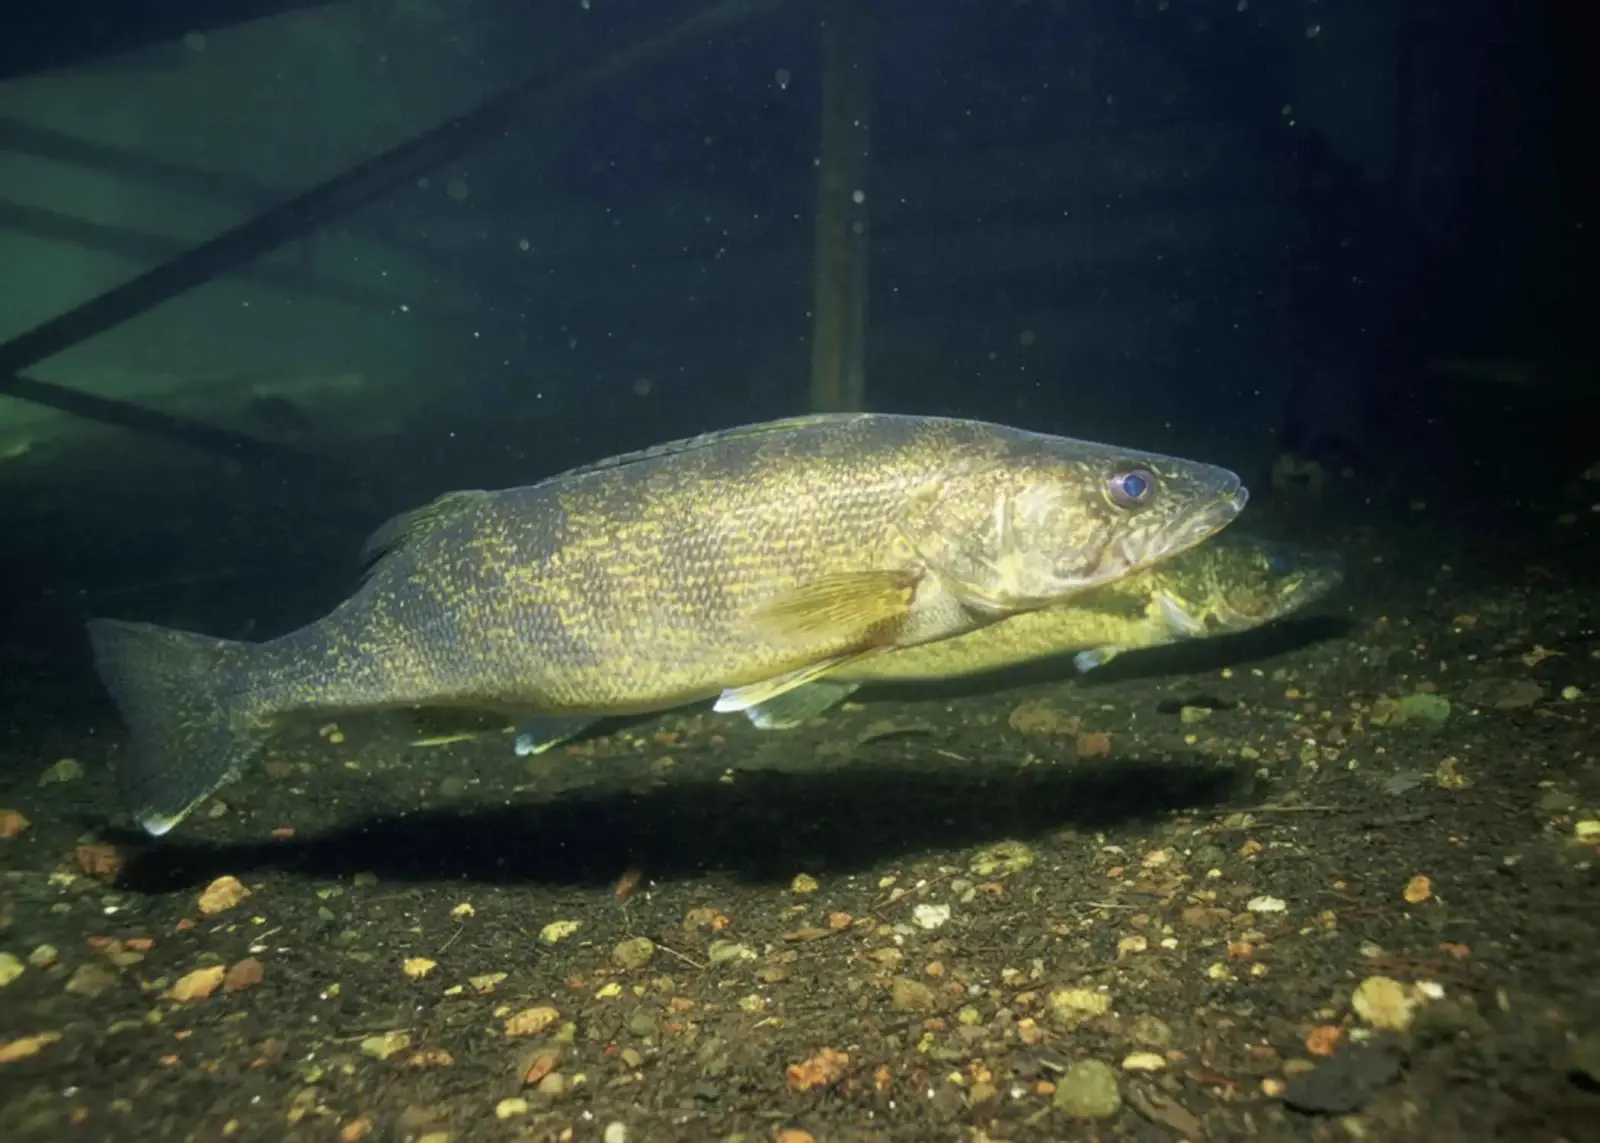
When the sun sets and darkness envelops the waters, a new realm of fishing opportunities emerges—particularly for walleye, a species known for its nocturnal feeding habits. Here’s how you can master the art of catching walleyes at night.
Rapala lures are renowned for their lifelike swimming action and ability to mimic injured baitfish—traits that are particularly effective in low-light conditions. Walleye, known for their keen sense of smell and sight in murky waters, are naturally drawn to the erratic movements and realistic appearance of Rapalas, making them a preferred choice for night anglers.
Selecting the Right Lure
When targeting walleye at night, consider the following factors when choosing your lure:
Size and Color
Opt for lures that closely resemble the size and color of the walleye’s natural prey in your fishing area. Darker colors like black, purple, or blue are often effective in low-light conditions. But to be honest, the original black and white floating Rapala is all I have ever used.
Lip and Action
Choose lures with a moderate diving depth and a subtle swimming action. Walleye can be attracted to both shallow-running and deeper-diving lures depending on the water depth and structure.
Noise and Vibration
Some lures are designed with rattles or internal weights that create noise and vibrations, which can be particularly enticing to walleye during the night when visibility is limited.
Techniques for Night Fishing
Casting and Retrieval
Cast your lure near underwater structures such as rocky points, weed beds, or drop-offs where walleye are likely to congregate. Retrieve the lure with a steady, slow pace interrupted by occasional pauses or jerks to mimic a wounded baitfish.
Trolling
If fishing from a boat, consider trolling at a slow to moderate speed. Adjust the depth of your lure by varying the length of line or using sinkers to target walleye at different water levels. For a bit of added action, hold the trolling rod by hand and give it a forward jerk every few seconds. Again this additional action mimics injured bait will noticeably increase your catch.
Jigging
In deeper waters or when walleye are holding near the bottom, jigging with a Jigging Rap can be effective. Drop the lure vertically and use short, sharp movements to create a fluttering action that mimics a struggling prey fish.
Tips for Night Fishing
Bugs
Night fishing can be a blast, but the experience can be completely ruined if you are not prepared for insects. A good bug spray with deet can significantly improve your experience, but the best protecting is clothing. And a head net is a game changer.
Monitor Moon and Weather Conditions
Walleye feeding patterns can be influenced by moon phases and weather conditions. Fishing during a new moon or under overcast skies can sometimes improve your chances of success.
Be Patient and Observant
Night fishing requires patience and keen observation. Pay attention to subtle strikes or changes in water movement that indicate walleye activity.
Night fishing for walleye is a rewarding experience that requires preparation, patience, and a good understanding of walleye behavior. By selecting the right lure, mastering effective fishing techniques, and embracing responsible fishing practices, you can enhance your chances of a successful night on the water. So, pack your gear, embrace the darkness, and let Rapala lures guide you to an unforgettable walleye fishing adventure under the stars. Happy fishing!
In-Line Planer Boards for Lake Erie Walleye
* This page contains affiliate links. The Great Lakes Fisherman may earn a commission on items purchased through these links. For more on this, please click here.
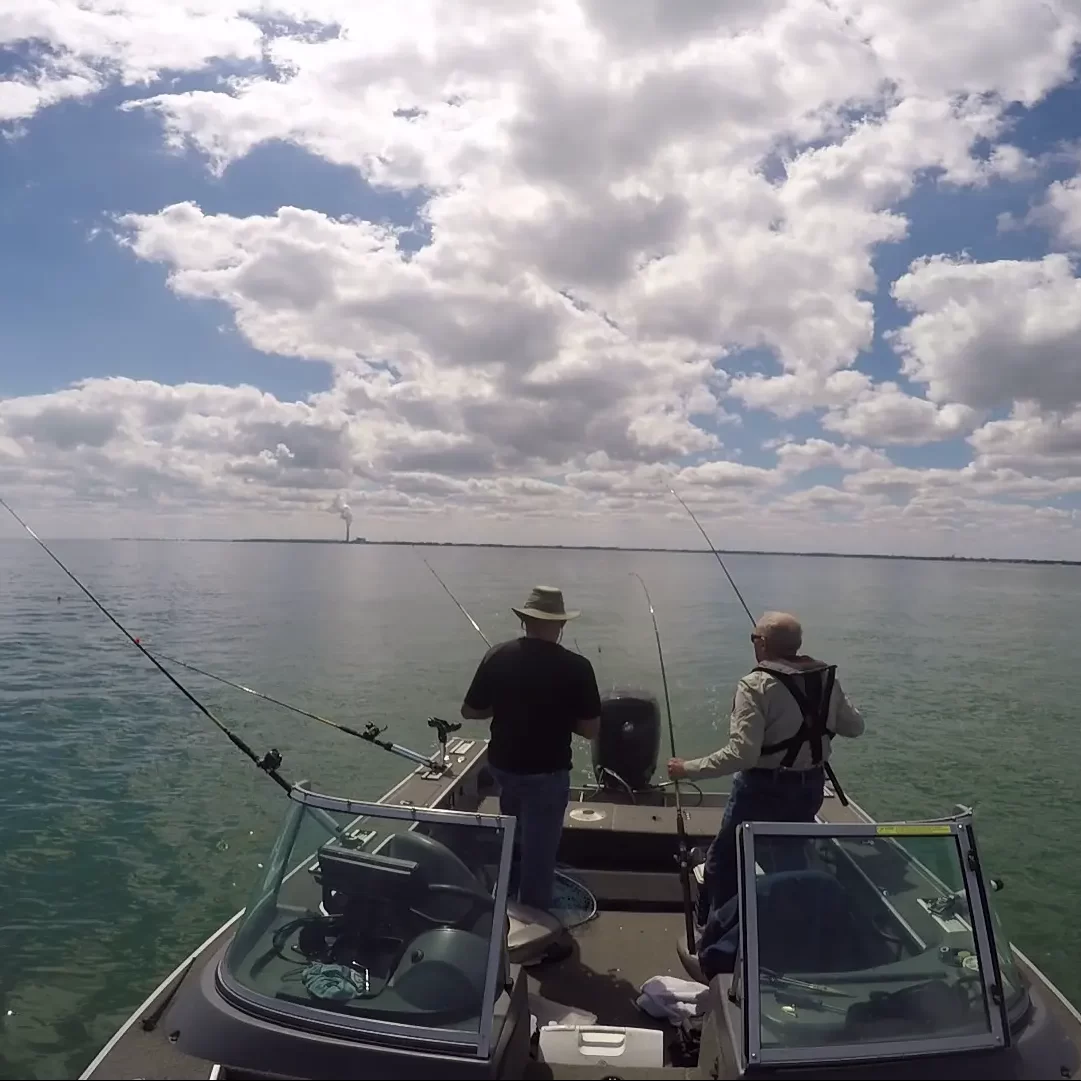
Lake Erie is renowned among anglers for its abundant walleye population, offering thrilling opportunities for both seasoned and novice fishermen alike. One of the most effective techniques for targeting walleye in this vast lake is using in-line planer boards. These simple yet ingenious tools allow anglers to spread out their lines, cover more water, and precisely target where the walleye are feeding, making them indispensable for successful fishing expeditions.
Understanding In-Line Planer Boards
In-line planer boards are designed to run perpendicular to your boat, carrying your fishing lines away from the vessel. This method serves two primary purposes: first, it helps in spreading out your lines horizontally, covering a wider swath of water; second, it keeps your lines away from the disturbance caused by the boat itself, reducing the likelihood of spooking wary walleye.
These boards come in various designs, but the fundamentals remain similar: they clip onto your fishing line and are equipped with a flag or other visual indicator to show when a fish strikes. The board itself rides on the water’s surface, gliding smoothly and allowing you to fish multiple lines simultaneously without tangling.
Choosing the Right Board
Select boards that match the size of your boat and the conditions of the water. Larger boards are ideal for choppy waters, whereas smaller ones are sufficient for calmer conditions. For smaller vessels, like my 18′ boat, this mini board made by Church works just fine. However, Church makes a larger board for walleye which is also very popular.

Positioning the Boards
Attach the boards to your main fishing line using release clips. Space them evenly along both sides of the boat, ensuring they run at different distances from the vessel. This setup maximizes coverage and increases your chances of hooking into a walleye.
Tackle & Bait Selection
Use walleye-specific tackle such as deep diving crankbaits, worm harnesses, or spoons. Adjust the depth of your baits according to the walleye’s feeding preferences, typically near the bottom or suspended above structure.
Monitoring Strikes
Keep a close eye on the flags or indicators on your planer boards. When a walleye strikes, the flag will pop up or the indicator will change position, signaling it’s time to reel in your catch.
Tips for Effective Use
While using in-line planer boards, employ these techniques to optimize your walleye fishing experience:
Depth Control
Adjust the distance of your bait from the planer board to control the depth at which you’re fishing. Walleye often feed at specific depths depending on factors like water temperature and time of day.
Speed and Direction
Experiment with boat speed and the angle at which you deploy your boards. Walleye can be sensitive to these factors, so varying your approach can trigger strikes. One trick for varying speed is to troll in a zig-zag pattern. This cause the presentations on the inside of the turn to slow down and the outside to speed up. If you notice a consistent pattern of inside or outside hits, you can adjust your speed accordingly.
Staggering Lines
Vary the lengths of line between each planer board to cover a wider range of depths and increase your chances of intercepting walleye as they move through the water column.
Conclusion
In-line planer boards are invaluable tools for targeting walleye on Lake Erie, offering versatility and efficiency that traditional fishing methods may lack. By spreading out your lines and keeping them away from the boat’s disturbance, you significantly enhance your chances of landing a prized walleye. With proper setup, technique, and a bit of patience, mastering the use of in-line planer boards can lead to memorable fishing adventures and impressive catches on one of North America’s premier walleye fisheries. So next time you head out to Lake Erie, consider adding in-line planer boards to your fishing arsenal for a rewarding and productive outing.
The Mepps Spinner
* This page contains affiliate links. The Great Lakes Fisherman may earn a commission on items purchased through these links. For more on this, please click here.
Fishing with a Mepps spinner is a time-tested technique that has consistently proven effective across various fishing conditions and species. Whether you’re targeting trout in mountain streams or bass in lakes, the Mepps spinner’s versatility and reliable action make it a favorite among anglers worldwide. In this guide, I’ll delve into the essentials of using a Mepps spinner effectively to enhance your fishing experience.
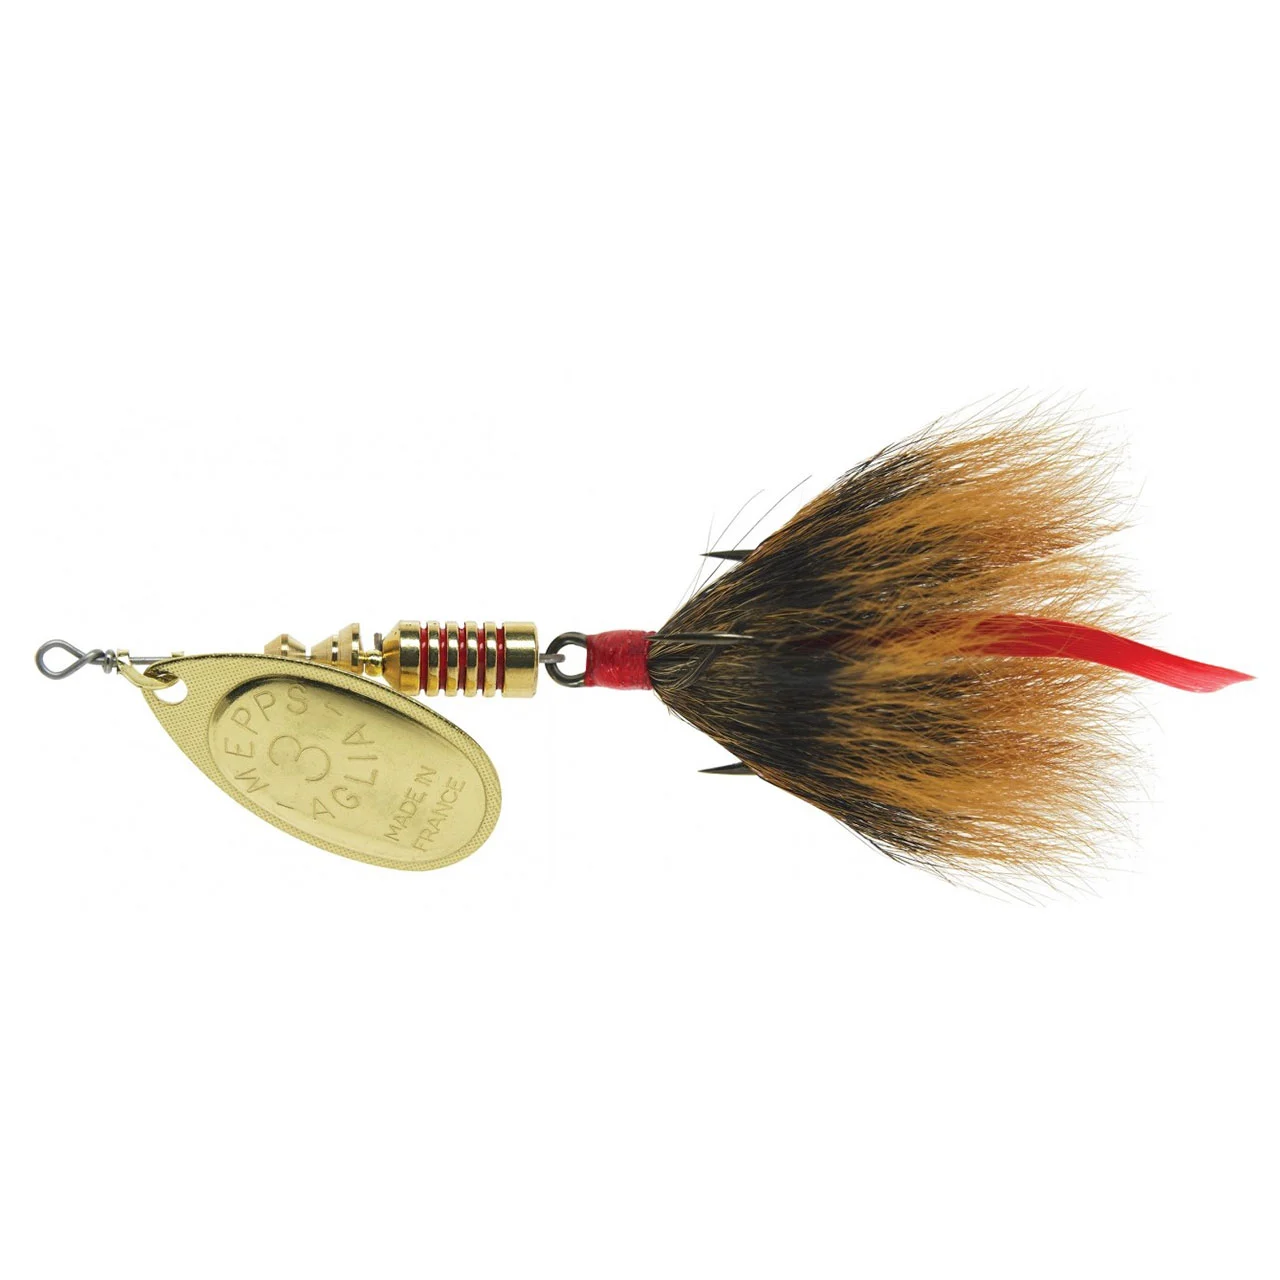
Understanding the Mepps Spinner
The Mepps spinner is renowned for its simplicity and effectiveness. It consists of a blade (often metallic and reflective) that rotates around a shaft, creating flash and vibration underwater. This design mimics the movement of a small fish or insect, enticing predatory fish to strike.
Choosing the Right Mepps Spinner
Mepps spinners come in various sizes and colors, each suited for different fishing conditions.
Choose a spinner size based on the target species. Smaller sizes (e.g., 0 to 2) are ideal for trout, panfish, and smaller species, while larger sizes (e.g., 3 to 5) are better for bass, pike, and walleye.
The blade color can influence fish behavior. Bright colors like chartreuse or red can be effective in murky waters, while silver or gold blades work well in clear water.
Gear Setup
To fish with a Mepps spinner effectively, use a light to medium-weight spinning rod and reel combo. Here’s a basic setup:
- Rod: A 6 to 7-foot rod with a light to medium action.
- Reel: Match the reel size to your rod and fishing line.
- Line: 4 to 10-pound monofilament or fluorocarbon line, depending on the target species and fishing conditions.
Fishing Techniques
- Casting: Cast the Mepps spinner upstream or across the water body you’re fishing. Allow it to sink briefly before starting your retrieve.
- Retrieve Speed: The key to fishing a Mepps spinner lies in the retrieve speed. Start with a slow to medium retrieve, allowing the spinner to spin and produce flash and vibration. Adjust your retrieve speed based on fish activity and water conditions.
- Depth Control: Vary the depth at which you fish by adjusting your retrieve speed and the angle of your rod tip. This versatility allows you to target fish holding at different depths.
- Pause and Twitch: Occasionally pause your retrieve and give the rod tip a slight twitch. This can mimic the erratic movements of injured prey, triggering predatory strikes.
Targeting Specific Fish Species
- Trout: Use smaller Mepps spinners (sizes 0 to 2) in streams and rivers. Focus on pools, riffles, and eddies where trout often lie in wait.
- Bass and Pike: Opt for larger Mepps spinners (sizes 3 to 5) when targeting bass and pike in lakes and larger bodies of water. Target weed edges, drop-offs, and structure where predatory fish lurk. (My favorite Mepps spinner for pike is this one.)
Tips for Success
- Be Observant: Pay attention to water conditions and adjust your tactics accordingly.
- Experiment: Try different spinner sizes, colors, and retrieve speeds until you find what works best on a given day.
- Consistency: Practice and consistency in your retrieve technique can often make a difference between a good day and a great day of fishing.
Conclusion
Fishing with a Mepps spinner is not just about technique; it’s about understanding fish behavior and adapting to the environment. With its proven track record and versatility, a Mepps spinner can elevate your fishing adventures to new heights. Whether you’re a seasoned angler or just starting out, the Mepps spinner is a valuable addition to any tackle box, promising excitement and success on the water. Happy fishing!
The Influence of Barometric Pressure on Fishing Success

* This page contains affiliate links. The Great Lakes Fisherman may earn a commission on items purchased through these links. For more on this, please click here.
Fishing enthusiasts are well aware that success on the water isn’t just about the right bait or technique—it’s also influenced by various natural factors, including barometric pressure. Barometric pressure, also known as atmospheric pressure, refers to the weight of the air in the Earth’s atmosphere. It may seem unrelated to fishing at first glance, but understanding its effects can significantly enhance your chances of a fruitful fishing expedition.
What is Barometric Pressure?
Barometric pressure is crucial for weather forecasting and can fluctuate due to weather systems moving through an area. It’s measured in inches of mercury (inHg) or millibars (mb). High-pressure systems (often associated with fair weather) exert more force on the water’s surface, resulting in higher barometric readings. Conversely, low-pressure systems (typically associated with stormy weather) exert less force.
How Barometric Pressure Affects Fishing
Fish Behavior
Changes in barometric pressure can directly impact fish behavior. Many fish have swim bladders that allow them to adjust their buoyancy and maintain stability in the water. When the barometric pressure drops (indicating a low-pressure system or an approaching storm), fish may become more active and move towards shallower waters to feed. On the other hand, during high-pressure systems, fish might move deeper and be less active, making them harder to catch.
Feeding Patterns
Lower barometric pressure tends to stimulate fish feeding activity. This is why many anglers notice increased bites and catches before a storm arrives. The decreasing pressure signals to fish that conditions are suitable for feeding, prompting them to become more aggressive in their pursuit of prey.
Preferred Feeding Times
Experienced anglers often plan their outings around barometric trends. Fishing during decreasing or stable pressure periods can yield better results than during rising pressure periods when fish are less likely to be actively feeding.
Species-Specific Reactions
Different fish species may react differently to changes in barometric pressure. For example, some species like bass and trout may be more sensitive and responsive to these changes compared to others.
Tips for Fishing Based on Barometric Pressure
Monitor Weather Forecasts
Before heading out, check the barometric pressure trends in your area. Tools like weather apps or barometers can provide real-time data.
Adjust Fishing Techniques
During periods of low pressure, use techniques that attract fish to the surface or shallow areas. Experiment with different baits and presentations to match the fish’s increased activity levels. Topwater presentations can be a great choice in these conditions.
Be Flexible
Fish can be unpredictable, so while barometric pressure can provide insights, it’s not a guarantee of success. Adapt your strategies based on actual fishing conditions and the behavior you observe.
Conclusion
Understanding the impact of barometric pressure on fish behavior is a valuable tool for any angler. By paying attention to these natural cues, anglers can increase their chances of having a successful fishing trip. Whether you prefer freshwater or saltwater fishing, being aware of how barometric pressure influences fish can turn a good day on the water into an exceptional one. So, next time you plan a fishing adventure, consider checking the barometer—it might just make all the difference.
The Mayfly & the Great Lakes
* This page contains affiliate links. The Great Lakes Fisherman may earn a commission on items purchased through these links. For more on this, please click here.
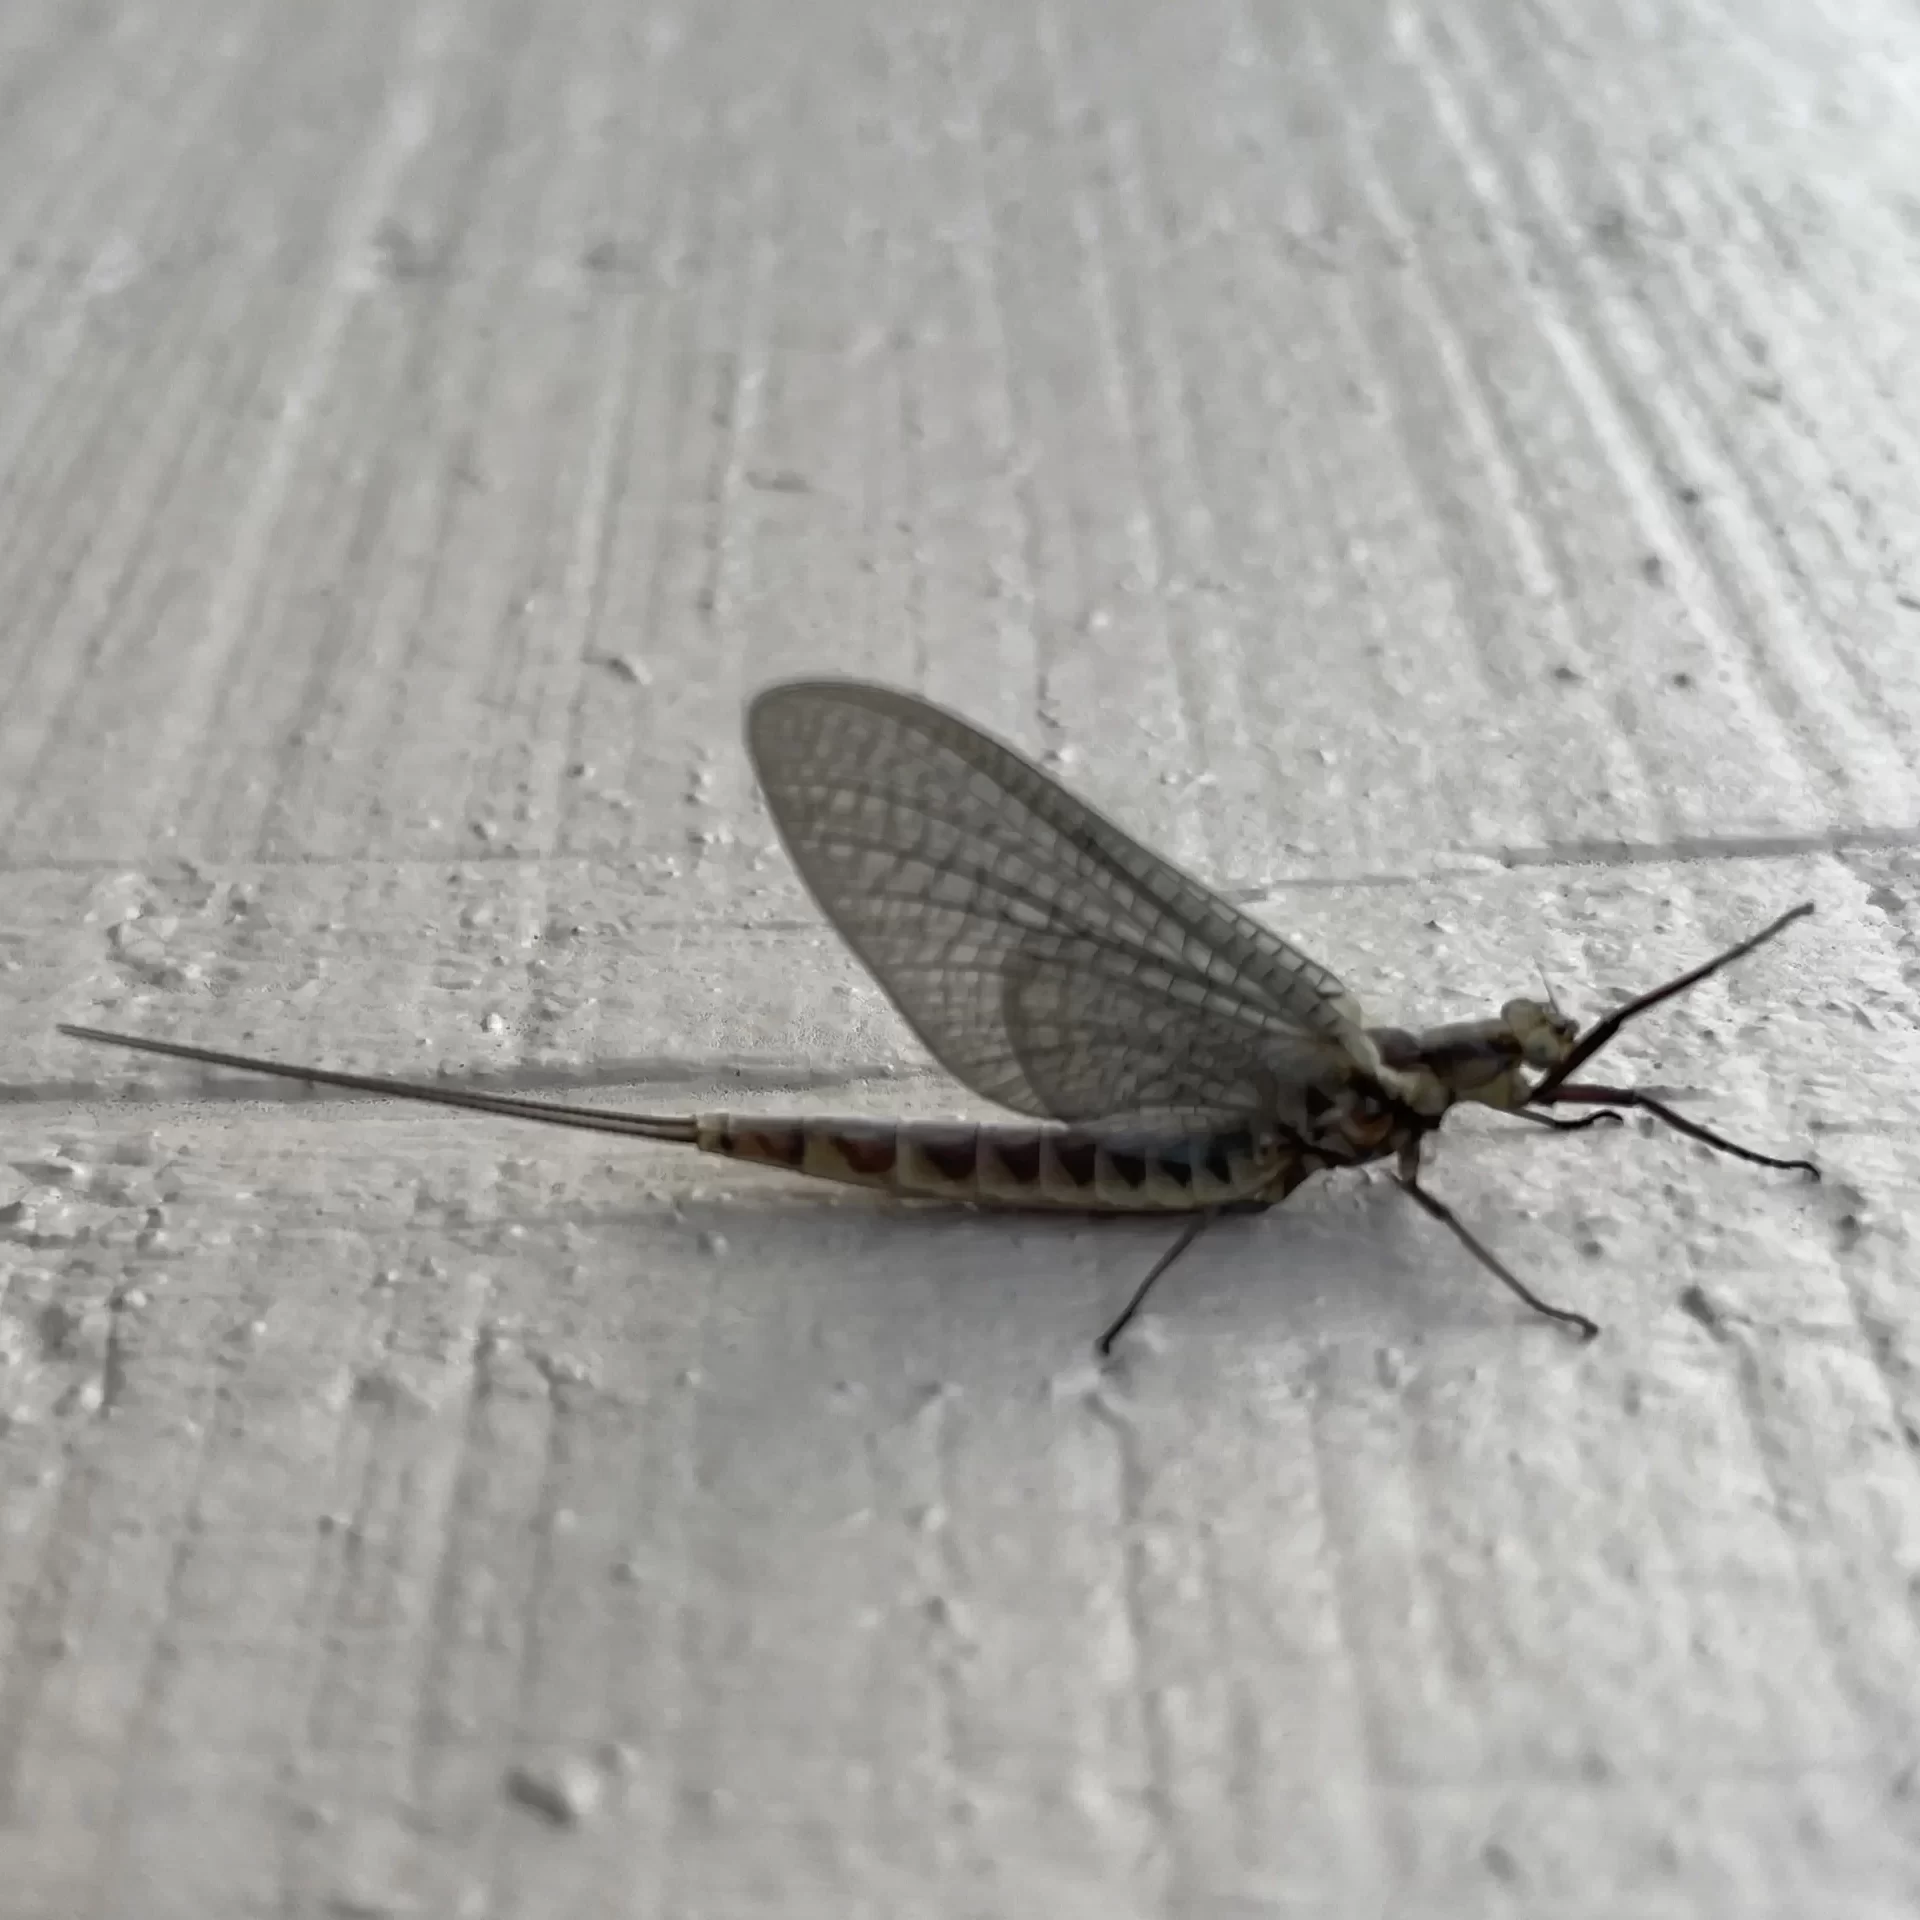
If you live within a mile so of water, which is nearly everywhere in the Great Lakes region, you may notice the arrival of what many call “fish flies” during the late May, June and early July timeframe. While that nickname certainly applies to these insects, which can serve as a feast for many freshwater fish species, their proper name is the mayfly.
There are over 3,000 known species of mayflies worldwide, belonging to the order Ephemeroptera. These species vary in size, color, habitat preference, and lifecycle characteristics. Mayflies are found on every continent except Antarctica, and they inhabit a wide range of freshwater environments, including lakes, rivers, streams, and ponds.
But here in the Great Lakes, there is one species that “rises” above the rest. Hexagenia Limbata, also known as the Giant Burrowing Mayfly, is a species of mayfly that lives throughout most of North America. And it is this species that we typically see near Great Lakes shorelines in late May, June and early July.
IMPORTANCE TO LAKE ERIE AND THE LARGER GREAT LAKES FISHERY
Mayflies are an essential food source for many fish species in the Great Lakes. Fish such as perch, bass, walleye, and trout feed on mayflies at various stages of their lifecycle, including nymphs and adults (duns and spinners). Mayflies provide a high-energy food source rich in protein and fats, especially during their emergences when large numbers of them are available.
This mass emergence often triggers feeding frenzies among fish, leading to increased activity and successful angling. They play a significant role in the Great Lakes ecosystem by transferring energy from lower trophic levels to higher ones, ultimately supporting the fishery and contributing to the overall health of the ecosystem.
However, it’s essential to note that the health and dynamics of the Lake Erie fishery are influenced by a combination of factors, including water quality, nutrient levels, habitat availability, fishing pressure, and management practices. So while mayflies are certainly significant, they are just one piece of the complex puzzle that shapes the fishery in Lake Erie.
LIFECYCLE
The lifecycle of a mayfly typically consists of four stages: egg, nymph (or larvae), dun (subimago), and spinner (imago). Here’s a breakdown of each stage:
Egg
Mayflies lay their eggs in bodies of freshwater, such as lakes, rivers, or streams. The eggs are usually deposited on the surface of the water or on nearby vegetation. The time it takes for eggs to hatch varies depending on species and environmental conditions, but it generally ranges from a few days to several weeks.
Nymph
Once hatched, the mayfly larvae, also known as nymphs, live underwater. They undergo several molts as they grow, typically feeding on algae, detritus, and other organic matter found in the water. Mayfly nymphs can be found burrowing in sediment, clinging to rocks, or hiding among aquatic plants. This stage can last from a few months to several years, again depending on species and environmental factors. Mayfly nymphs are often sold as bait in many Midwest baitshops. Known as commonly as “wigglers”, they can be a very productive bait when used for the right species at the right time of year.
Subimago (Dun)
When the nymph is ready to emerge from the water and transform into an adult, it swims to the water’s surface or crawls onto emergent vegetation. Once at the surface, the nymph undergoes its final molt, shedding its aquatic skin and emerging as a subimago, commonly known as a dun. The dun has wings but is not yet fully mature. It rests on the surface of the water or nearby vegetation while its wings dry and harden.
Imago (Spinner)
After its wings have dried and hardened, the subimago flies to a nearby area, usually vegetation or land, where it completes its transformation into the fully mature adult, known as the imago or spinner. The adult mayfly typically has clear wings and a slender body. Its primary goal as an adult is to reproduce. Adult mayflies typically live only for a short period, ranging from a few hours to a few days, depending on the species. During this time, they mate, lay eggs, and then die, completing the lifecycle.
PROBLEMS
PROBLEMS
Mayflies typically do not present significant problems themselves. They don’t bite or sting. But their mass emergences can sometimes lead to nuisance issues or minor inconveniences. Here are a few potential problems associated with mayflies.
Swarming
During mass emergences, mayflies can form dense swarms near bodies of water, which may be considered a nuisance, especially in urban areas. These swarms can interfere with outdoor activities, such as picnics, recreational boating, or outdoor dining.
Messiness
After mating and laying eggs, adult mayflies often die en masse, leading to large numbers of dead insects accumulating on surfaces near water bodies. This can result in a messy cleanup, particularly if they accumulate in large numbers on roads, sidewalks, buildings, and vehicles.
Clogged Filters
In some cases, mayflies can clog intake screens and filters in industrial and municipal water treatment facilities, potentially causing operational issues and necessitating maintenance.
Power Outages
Massive swarms of mayflies have also caused power outages by bridging gaps to ground at power plant switchyards. This can cause damage to equipment as well as cost utilities their customers, hundreds of thousands to millions of dollars depending on the nature of the short.
CURRENT STATUS
Mayfly populations were nearly non-existed around 1960, but due to environmental cleanup efforts over the next several decades, they begin to rebound by the 1990’s. However, they have since begun a gradual decline in numbers which is still being analyzed to determine the cause. Some of the possible reasons for this follow.
Habitat Loss and Degradation
Changes in land use, urbanization, agricultural practices, and habitat destruction have resulted in the loss and degradation of freshwater habitats where mayflies live and breed. Pollution from agricultural runoff, urban stormwater runoff, industrial discharge, and habitat alteration can degrade water quality and reduce suitable habitat for mayflies.
Pollution
Mayflies are sensitive to water pollution, particularly to pollutants such as pesticides, fertilizers, heavy metals, and other contaminants. Pollution from various sources can directly harm mayfly populations by affecting their growth, development, and survival, as well as indirectly by reducing their food sources and disrupting aquatic ecosystems.
Climate Change
Climate change is altering environmental conditions, including temperature, precipitation patterns, and hydrological cycles, which can impact mayfly populations. Changes in temperature and water flow regimes can affect mayfly life cycles, emergence timing, and habitat availability. Additionally, climate change can exacerbate other stressors, such as habitat loss and pollution, further threatening mayflies.
Invasive Species
The introduction of non-native species, such as invasive aquatic plants, fish, and invertebrates, can disrupt native ecosystems and negatively impact mayfly populations. Invasive species can compete with mayflies for resources, prey on mayfly nymphs or adults, and alter habitat conditions, leading to declines in mayfly abundance and diversity.
Disease & Parasites
Mayflies are susceptible to diseases and parasitic infections, which can weaken individuals, reduce reproductive success, and contribute to population declines, especially in stressed or degraded habitats.
Addressing the decline of mayfly populations requires comprehensive efforts to mitigate habitat loss, reduce water pollution, mitigate the impacts of climate change, control invasive species, and implement sustainable management practices. Conservation measures aimed at protecting freshwater ecosystems and restoring degraded habitats can help support mayfly populations and promote their long-term viability.
Finding & Catching Summer Crappie
* This page contains affiliate links. The Great Lakes Fisherman may earn a commission on items purchased through these links. For more on this, please click here.
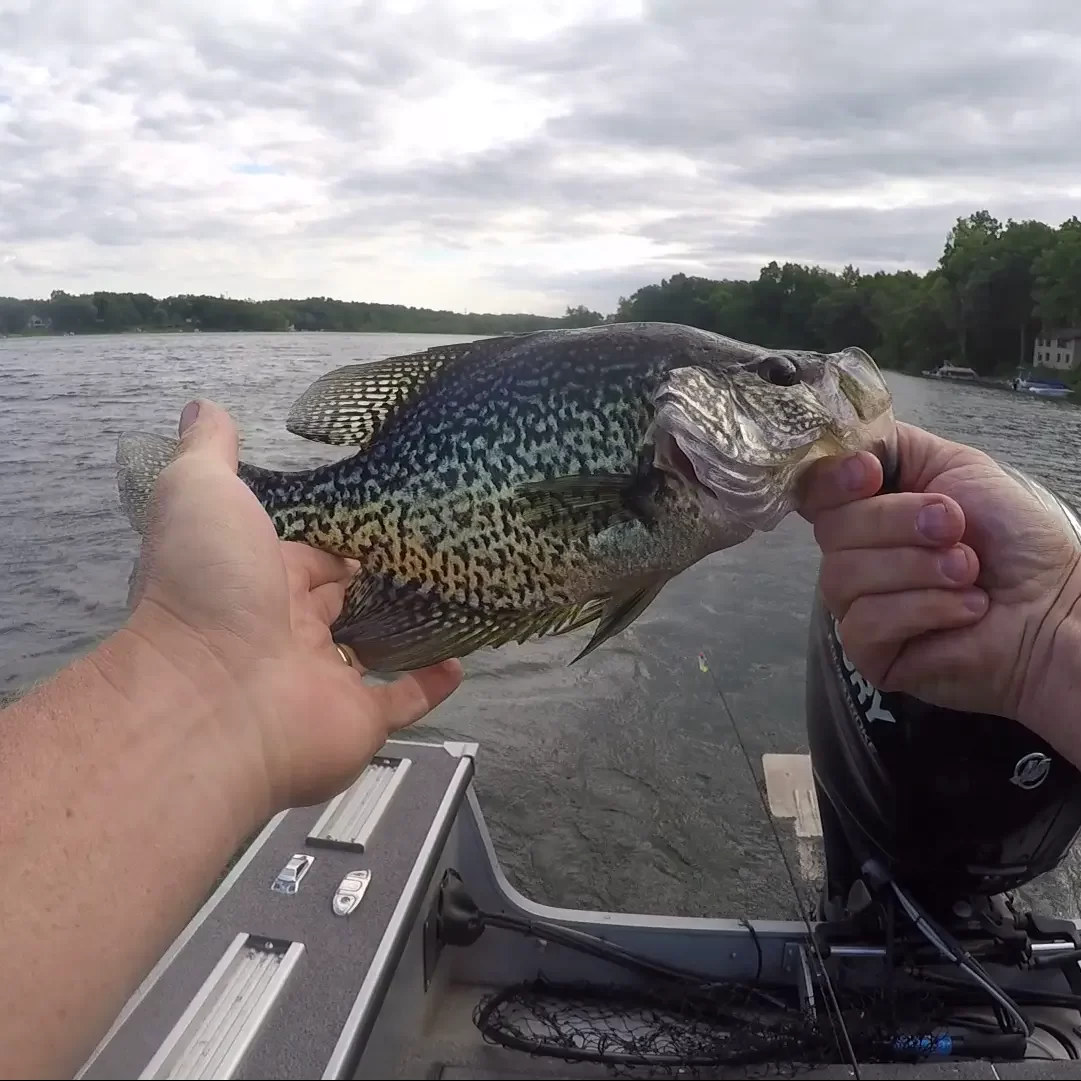
Many fisherman struggle to find consistent populations of summer crappie. As weeds begin to spring up on many lakes, many species bury themselves in this weed cover and can be tough to get out. And this is couldn’t be more true than for the crappie.
Unlike crappie in the south, which are often found near submerged stumps and standing timber, crappie in the natural lakes of the north usually have to find alternative cover. And for many of these lakes, tall summer weeds in deeper water is the only real option.
Effective Methods for Catching Crappie in Tall Weed Beds
There are three tried and true methods that I have used to consistently catch fish that are buried in these tall summer weed beds.
Method #1: Slip Bobber & Jig
This method is perfect for getting a jig or live bait presentation down between weeds as long as the weeds are not too thick. Cast the bait directly over the weed bed and the the bobber will allow the bait to fall straight down between the weeds. This is much preferred over standard bobbers where the bobber acts as a pivot causing your bait to swing down below the bobber, often catching on weeds in it’s path.
Method #2: Casting Light Jigs
Another technique that is very effective in the dog days of summer is to cast a jig or other light weight artificial over the top of the weeds and retrieve it just fast enough to keep it above them. This works great when the weeds are not full emerged. The light weight jig will allow you to make the retrieve fairly slow without the jig getting down into the weeds. This method is particularly effective if you’ve found a concentrated school of fish as it allows you to pinpoint your presentation on that school. However, because the jigs are lightweight, this method can be a problem if the wind is too high.
Method #3: Long Line Trolling Light Jigs
This method works great when searching for crappie, especially when fishing new waters. While spider rigging works great if you are working deep flats, long lining is preferred when trolling the baits high in the column to stay above the tips of tall weeds. When trolling, speed control is important and we typically use a trolling motor to hold speeds in the 0.7-1.3 mph range for active summer fish.
Baits to Try
When it comes to baits, I typically like to use jigs with plastics fished either by themselves or on a spinner. Some popular jig colors are white, pink and chartreuse.
Spinners can be purchased separately and added to the jig, if desired, when used methods #2 and #3 above. I prefer spinners with a #2 Colorado blade, but you can use whichever size your prefer.
When it comes to plastics, there are many on the market to choose from. Personally, I like a Bobby Garland style when using method #1 and Charlie Brewer Crappie Grub when using methods #2 and #3.
Finally, if you decide to try method #1, this slip bobber by Thill is a great one to try. Good luck out there!
How to Catch White Bass (Silver Bass) During the Spawn
* This page contains affiliate links. The Great Lakes Fisherman may earn a commission on items purchased through these links. For more on this, please click here.
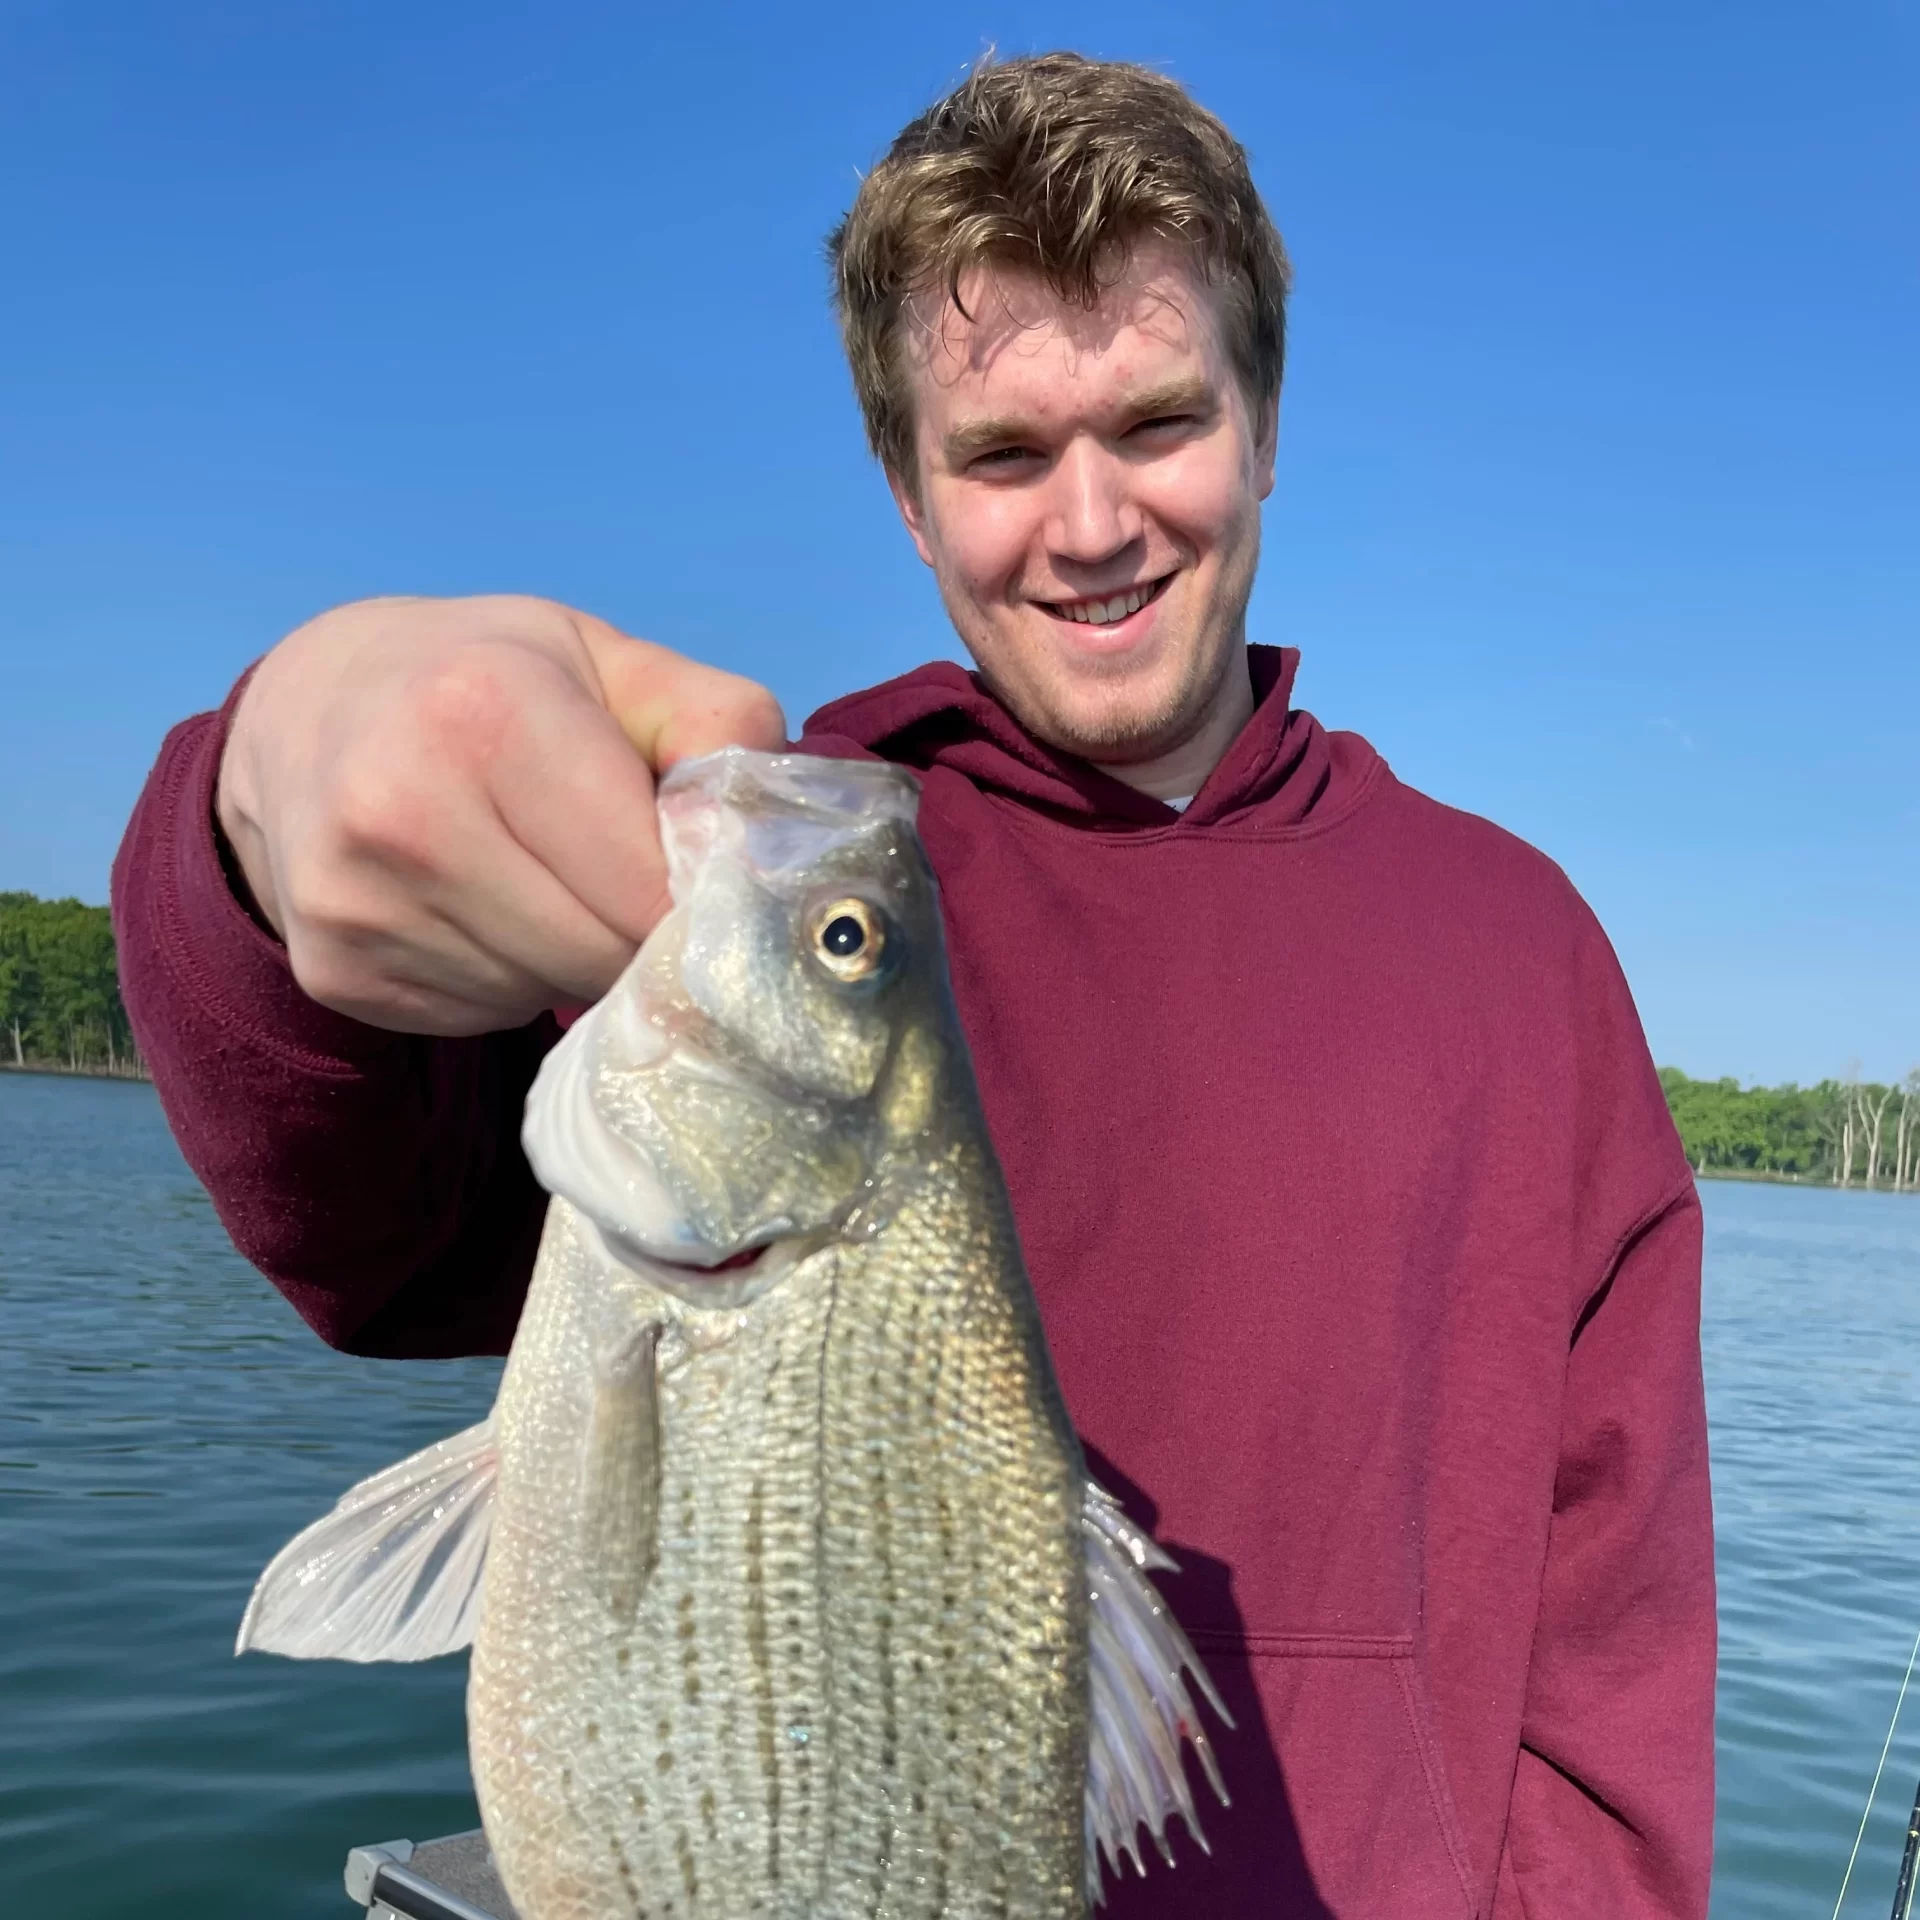
Fishing can be relaxing and fun in many ways. I’ve had some of the most enjoyable days on the water when I’ve been skunked. But it’s hard to argue that some of the very best days fishing are those rare days when the fish are seemingly jumping in the boat. If you’ve never had a day like that, then it’s time to try fishing for white bass during the spawn.
White bass (also known as silver bass) can be a great species to target when introducing kids to fishing. They are aggressive feeders, hard fighters, and can be caught easily in great numbers during their spawning period in the spring. In this article, I’ll convey one easy way to catch these often overlooked fish.
Where & When to Go
When white bass spawn, they look for water that has a gravel/rocky bottom in water up to about 10′ deep. In my home waters of the Detroit River, when the walleye spawn is wrapping up, the white bass are just ramping up. Simply position yourself to where you can access this shallower water with a current and you are likely to find the bass.
The Bait
White bass are very aggressive this time of year and will hit nearly anything you throw at them. To maximize your catch, use something that you can get down in front of them and can be easily seen. Using the right color, as always, can increase your catch, so pay attention to the clarity of the water and select a color accordingly. White is always a productive choice. If the water is very clear, something flashy will also do the trick. A very productive combination is a white jig head with a white plastic body like this one. Live bait on a jig is also a great choice, albeit a bit messier.
A Productive Technique
A technique that we use is to cast your jig downstream into an area where you suspect fish to be. Let the jig sink to the bottom. If the current is swift enough, you may need to let out more line or even go to a heavier jig to get it down. Now just work the jig back an forth, swimming it near the bottom. If you get no hits after about 10 seconds, slowly retrieve it, and repeat. If after a few casts, you get no hits, it’s time to move.
Once you find these fish, you’ll often be able to load up on them. And although they are not as popular as other fish for table fare, removing the red strip of flesh from the fillet will remove a lot of the fishier taste, giving you a much more mild flavor.
Wacky Rigging for Bass
* This page contains affiliate links. The Great Lakes Fisherman may earn a commission on items purchased through these links. For more on this, please click here.
Bass fishing is one of the most popular forms of fishing in North America. It certainly has the largest following on the competitive tournament trail and for most of us who first learned to panfish on small ponds and lakes, it was the prized bonus fish would occasionally sink your bobber. And one of my newly discovered ways to catch these fish is by using a simple wacky rig.
The Wacky Rig
For those who are new to wacky rigging, the rig itself is about as simple as it gets. A plastic worm is basically attached to the center on a large bass-sized hook and then cast and left to sink naturally, waiting for a lunker to take it. As a newbie using this rig, I was shocked as to how effective it is. And although you don’t feel as many of the explosive strikes as you might with other techniques, there is still a huge adrenaline rush that comes from watching your line take off through the water as you anticipate the hook-set.
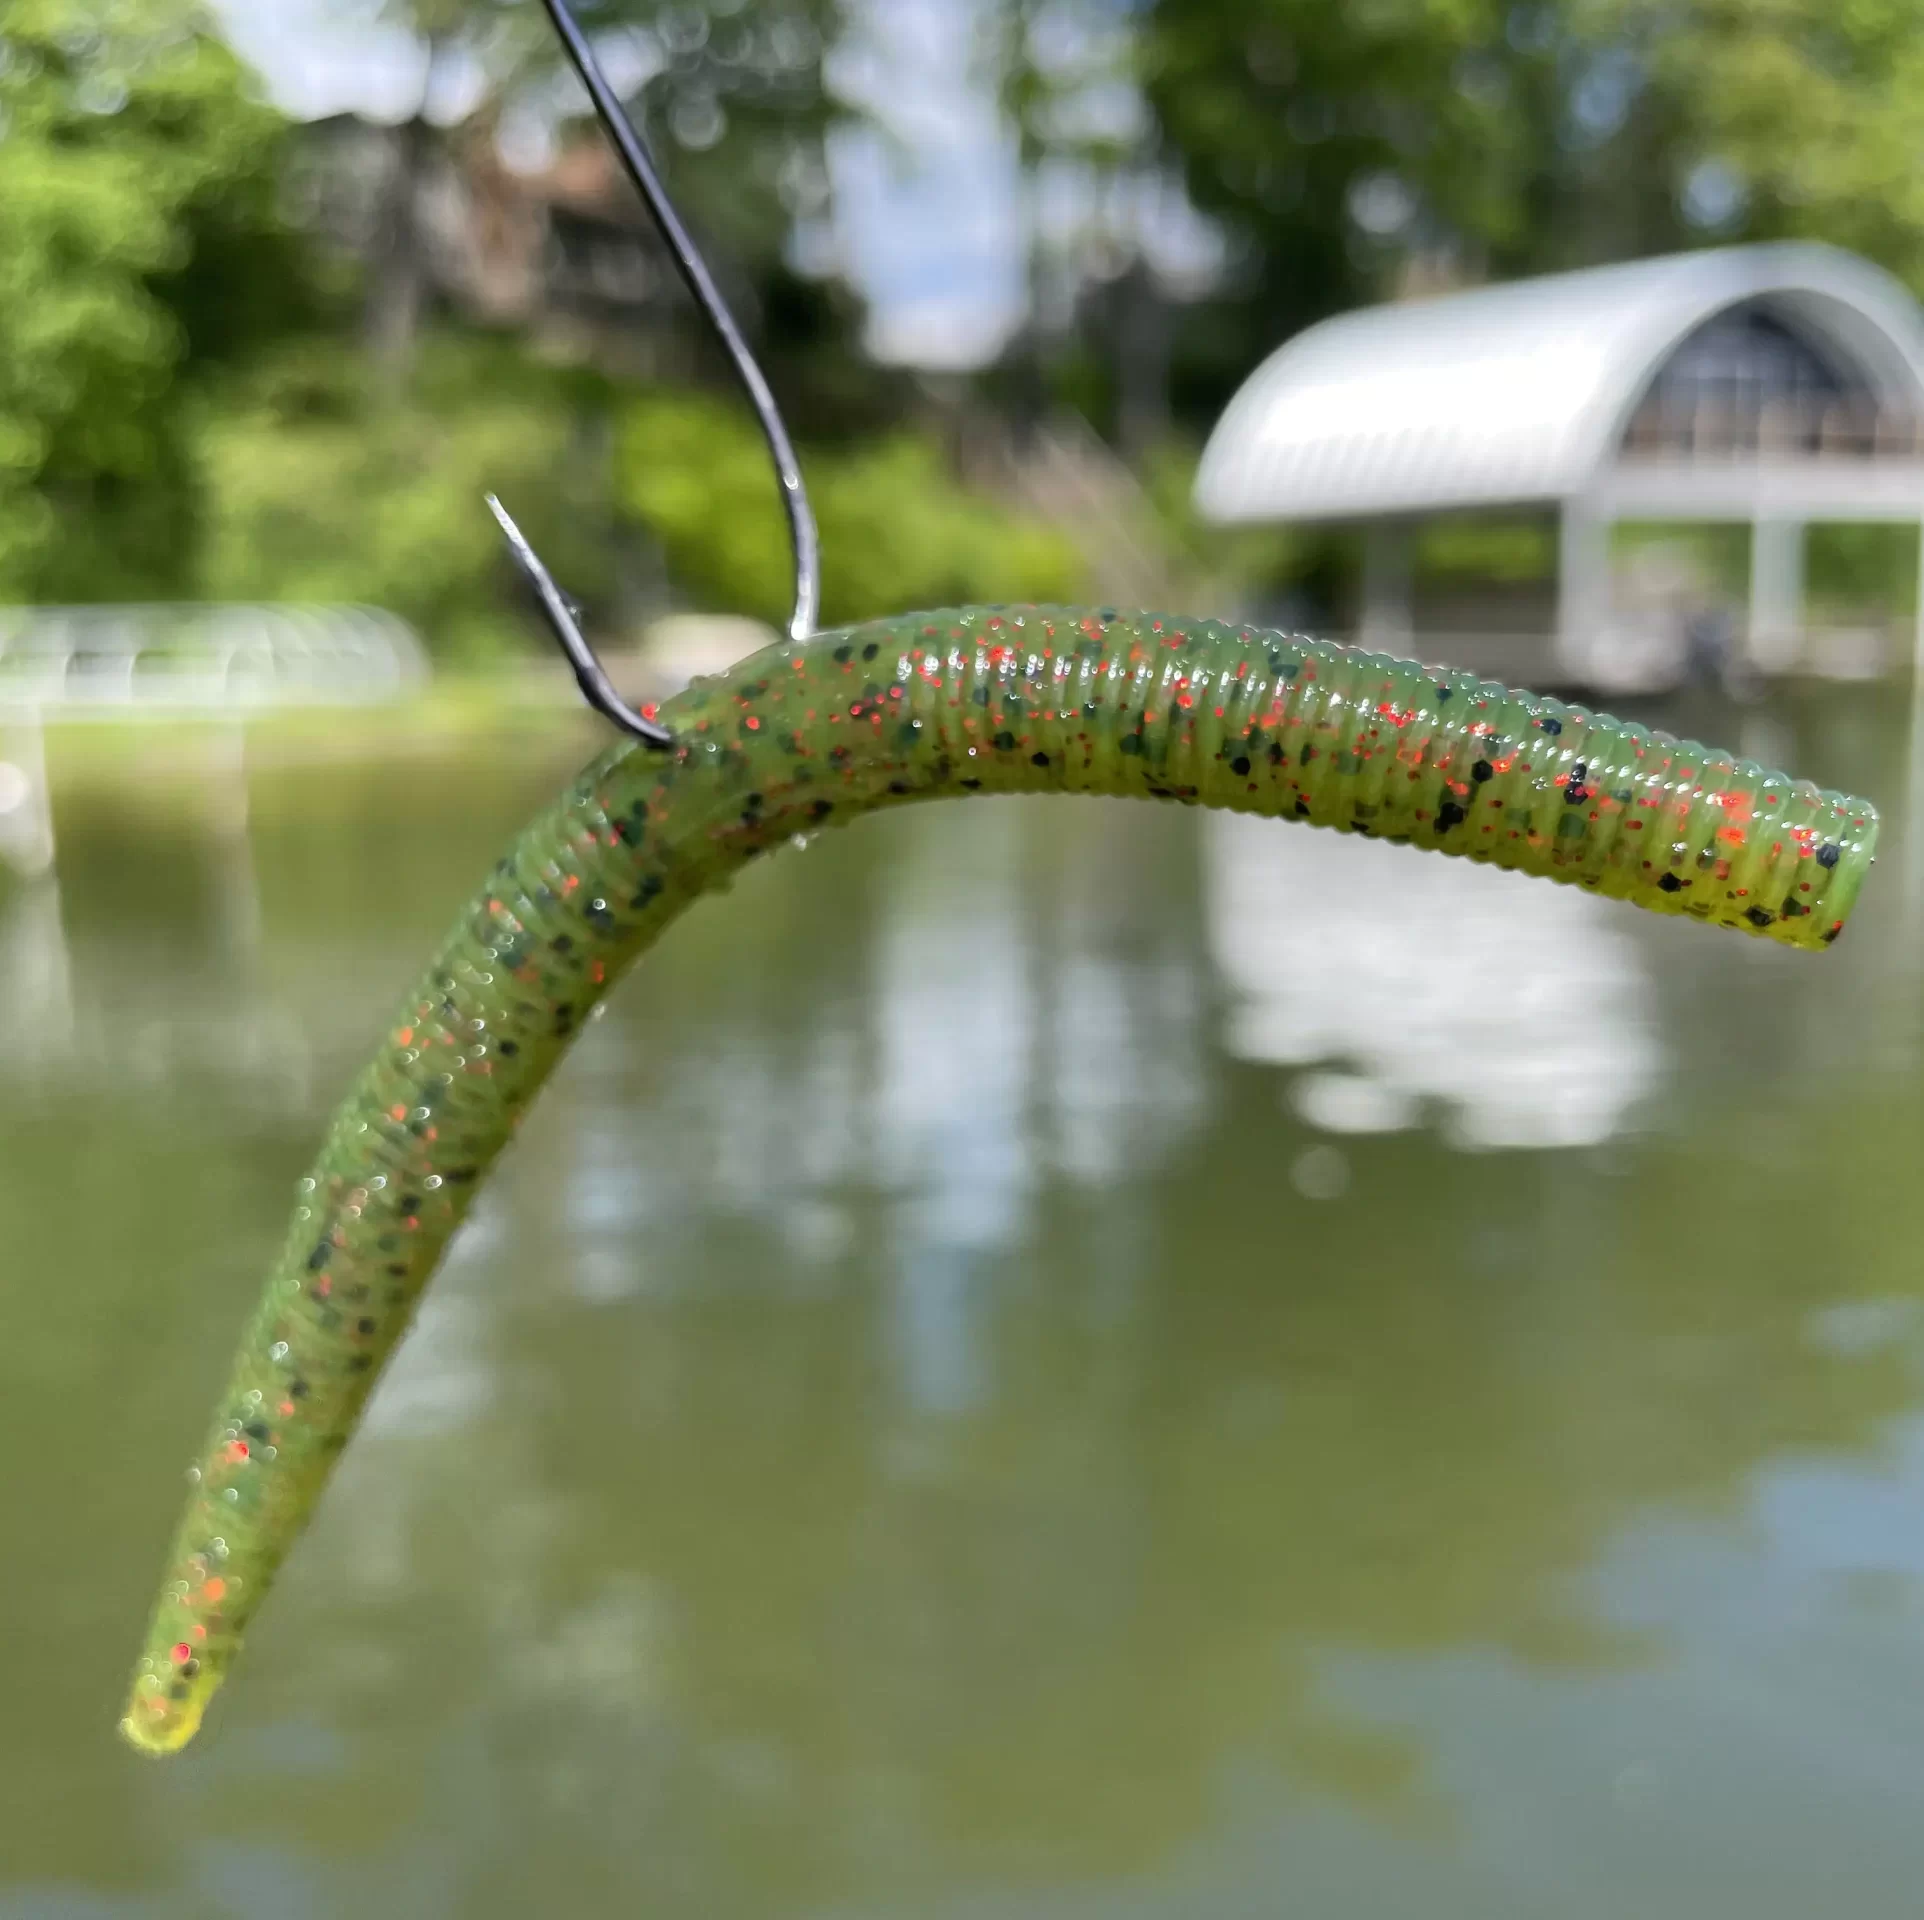
The Worm
While there are any number of plastics worms that can work, there are some that are specifically designed for this technique. The plastic is more or less balance from from front to back and the worm itself has plenty of weight to make casting at a distance easy.

A great color combo to try is Green Pumpkin. Although there are countless color combos out there, this is one of the most popular and put several fish into the boat the very first time I used it. The flecking that is incorporated into the design of these worms really helps the fish see them.
The Setup
The setup I use for this starts with a backing of high-vis yellow braid. Seeing the line is important with this technique as often the line is the only tell tale sign that a bass has taken the bait. As always, the backing should be the strongest line in your setup and with a large enough diameter to easily see it. For this, I would use 20 lb test high-vis braid, as braid has a very small diameter to strength ratio.
Next, I tie on a ~4′ length of 8lb. fluorocarbon line to the backing as a leader material. I am a big fan of fluoro, especially when fishing the clear lakes of the north. Although bass are an aggressive fish, to me, there is no harm in making the line as invisible as possible to give me every advantage I can get.
Finally, I terminate the leader to a large bass hook with a wide gap. Having an appropriately sized bass hook, ensures a better hookset when the time comes.
As a final note, I just stick the worm with the hook near the center of the worm. However, there are rings that can be purchased to allow the worm to be snugged up to the hook without the hook going through the plastic. This extends the life of your worm while also allowing for easy adjustment of the worm position to better balance it with respect to the hook.
How to Fish the Wacky Rig
This method is particularly popular in shallow water as this is where worms are naturally introduced. If fishing from a boat, first position your boat as far away from the target zone as you can so as not to disturb the fish’s environment. Fish can often see you easier than you think, especially in shallow water.
Next, simply cast the rig into the target water, leaving some slack in the line for the fish to take it and run without feeling any line tension.
Now, simply watch the line for any movement. The knot where the fluoro attaches to the braid is a great spot to focus your attention on as you can see this move in any direction. Sometimes the line itself will take off straight away from you. In this case, the braid will often create slight ripples in the water. If the strike is hard enough, you might even see water splashing away from the line when this occurs.
Once you see that something has it, simply lower your rod tip while reeling in any remaining slack line and then give it a good hard yank in the direction that is opposite from the direction the fish appears to be running. For example, if the fish is running to your left, your rod should be yanked to the right and vice versa. This ensures that hook is pulled back into the side of the fish’s mouth and not towards the front where there is a chance it will pop out.
Good luck with this technique and I hope you enjoy it as much as I do. Tight lines!